How to Build a Sauna in Basement
Saunas are becoming an increasingly popular way to relax and improve your health. And if you have the space, building your sauna is not a difficult task. This article will teach you how to build a sauna in the basement. Read on for instructions on how to get started.
If you’re looking for a way to add some extra value to your home and create a comfortable place to relax in the process, building a sauna in the basement might be just what you need. In this article, we’ll go over everything you need to know about how to build a sauna, from planning and construction to choosing suitable materials. Keep reading for more information!
Tools and Materials
- 2 x 4s
- 2 x 6s
- 6″ Drywall Screws (3 1/2″, 2″, 3″, etc)
- Drywall Anchors (Depending on Subfloor)
- Lighting Fixture Boxes & Face Plates (If Needed)
- Wood Glue
- Framing Square or Straight Edge
- Circular Saw or Miter Saw (for trimming)
- Reciprocating Saw or Hand Saw
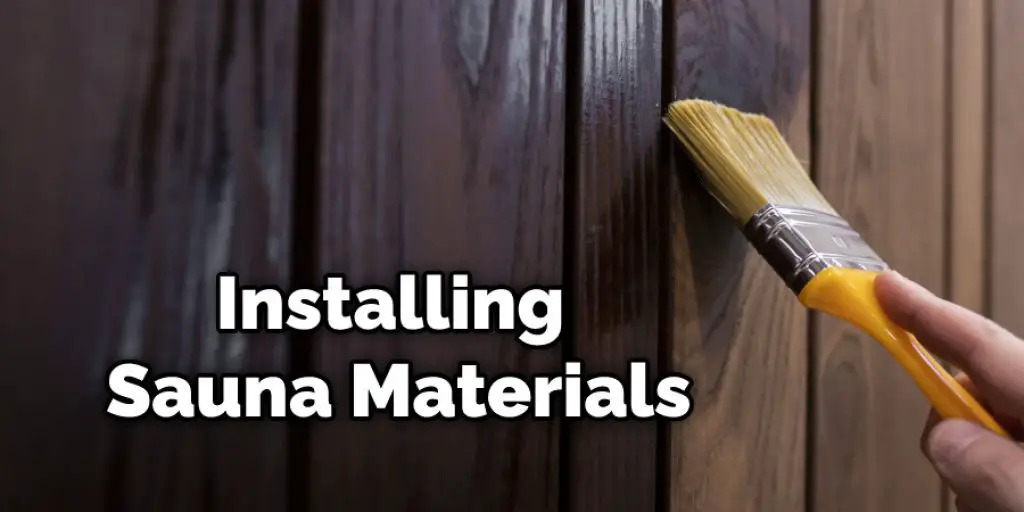
A Detailed Guide on How to Build a Sauna in Basement
Step 1 : Framing the Joists
Mark joist locations on the floor. Measure diagonally from corner to corner, then use a wide stance for marking the center of joists. We used 12″ OC (on center). TIP: When you finish laying out all your lines, use a framing square or straight edge to draw one final line running between two corners. Fasten 2 x 4s along marks using 6″ drywall screws every 16″. Make sure the ends are flush with the walls and each other.
Cut out notches in joists to fit around pipes or any obstacles in the floor. Mark notch areas by resting board against obstacle/pipes, then mark the desired depth on the lower side of the board. Cut out notch using a reciprocal saw and hand saw. NOTE: It’s easier to cut the notches BEFORE you fasten down joists
Finish framing by installing drywall anchors on any joists attached to wall studs (i.e., in corners). Then add 2 x 6 kickers between studs with no joists, making sure they’re flush with the wall top plate. Kickers should be nailed every 16″ with 6″ screws.
Step 2 : Adding Flooring Material
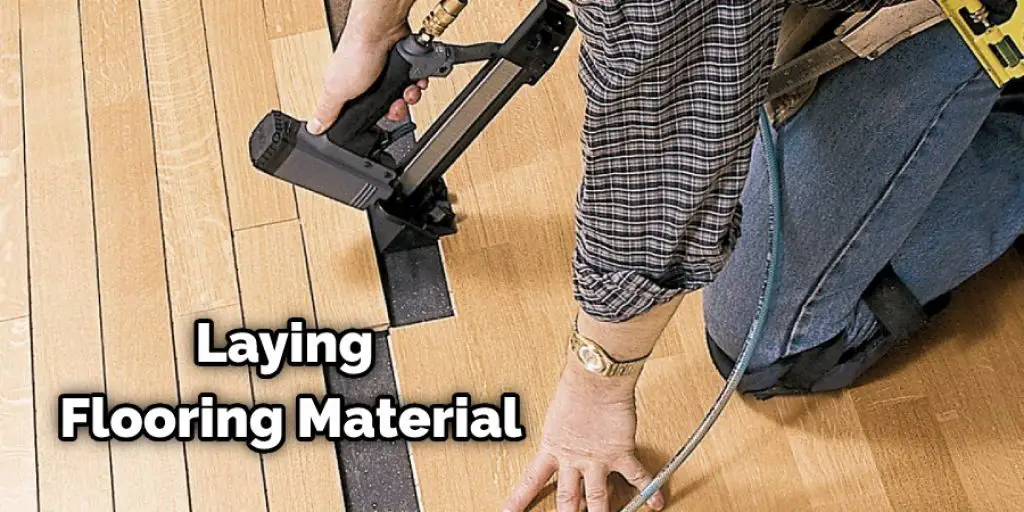
Start laying out your flooring material along with spacers. The boards should be perpendicular to the joists to drain heat and water from the sauna room properly. NOTE: Use 1/4″ spacers to allow airflow. Layout flooring material, then cut to fit a circular saw or miter saw.
Use 2″ drywall screws and wood glue to fasten boards together. Drop-in sub-floor panels beneath boards. If installing on cement subfloor, install 3/8″ x 1 1/2″ wood cleats every 5′ along the perimeter of the room (don’t forget to use drainage hole plugs). Finish with a concrete backer board laid flat over the top.
NOTE : It’s preferable to use tongue & groove type of engineered flooring material. However, standard planks will do just fine. You can even nail them down instead of gluing them for a more straightforward installation process.
Step 3 : Installing Vapor Barrier
In this article, we used a plastic vapor barrier as an extra layer of protection from moisture. We had some leftovers from our basement waterproofing project, and it worked well as a vapor barrier

Begin by laying out the 4′ wide x 50′ long plastic sheet over the floor. You want to have enough overlap on each side so that you can fold the excess under the sauna bench area. Note where joists are located and avoid covering these areas since they’re needed to install the bench supports later on. Next, fasten down tightly using 6″ drywall screws every 8″ or so along edges and 12″ OC along joists.
Note : We ran into some difficulty stapling the vapor barrier to the subfloor with an electric staple gun. Our solution was to use drywall anchors every 4′ or so and then screw them down with #8 x 3″ wood screws (two per anchor).
Step 4 : Installing Sauna Heater
The sauna heater can be installed now, but make sure you leave room for electrical outlets near the heater (not shown in pictures below). You’ll want to install this before installing insulation since it will make it easier to wire up later.
Drill holes in joists if possible. We ran into some difficulty when fastening the heater to this floor, so I’d recommend using either 2 x 4 blocking or plywood for extra support if needed. Then attach the top of the heater and joists with plumber’s tape and 1/2″ bolts over flashing.

Pipe flashing should be attached to the bottom of the sauna heater and screwed down into the rim joist (not shown). Seal around the perimeter of pipe flashing with high temp caulk.
Use a combination of Teflon tape and thread sealant on connectors before installing onto the boiler line. Remember, you’ll need to attach another connector from the manifold valve up to the steam head unit later on. This step is crucial in how to build a sauna in basement.
Step 5 : Installing Vapor Steam Head
Once you’ve connected the steam head to the sauna heater, could you place it in location? You’ll want access to it for future service and maintenance—Mark two screw holes for vapor trap wall studs (don’t drill yet). Drill pilot holes for 3″ screws at an angle through drywall anchors. Drive screws into anchor bolts until flush with wall studs.
NOTE : Use clear sila stic caulking around the vapor head unit where it meets the wall to prevent water seepage. Attach steam hose bonnet where desired using #8 plumbers tape and 1/2″ x 1-1/4″ stainless steel bolts – use 2 per side. This bonnet attaches to copper tubing that runs up through the vapor head unit. Make sure it’s sealed tightly so that no water seeps in when in use.
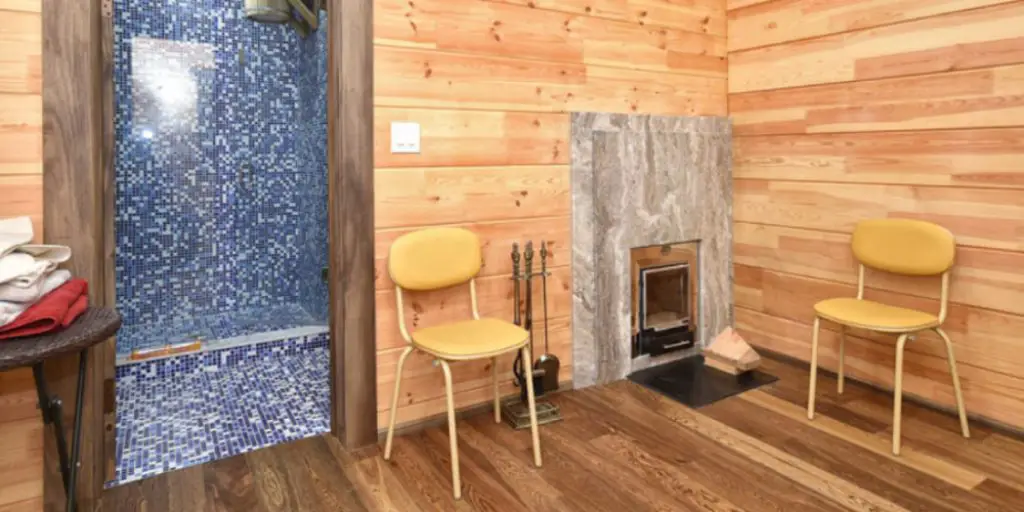
Step 6 : Installing Sauna Bench
There are many ways to install the bench, but we glue and screw down 1/2″ x 3-1/2″ pine boards. The front edge has a nice curve, giving the sauna a more finished look. We used 2 x 4’s as backers between joists and scabbed them together with 2″ screws—pre-drill holes for screws where needed. Cut out small rectangles of insulation board and stick inside corner gaps before attaching directly to joists (not shown in pictures below).
Note : you’ll want to leave room on the sides of the sauna bench so that doors can open up flat against the wall.
Step 7 : Installing Sauna Door
Sauna doors can be purchased online, or you could make your own. Note: we wanted a window in the door, and it’s not easy to see through after painting (see images below). It would be better to cut small windows into the door first and then paint over it with tinted clear caulk/sealer afterward.
Step 8 : Installing Vapor Tight Closet Doors
This requires quite a bit of construction as you’ll need to install 2 x 4 framing, vapor barrier, door frame, and top cap all at the same time. Measure twice!
Note : You might consider installing another sauna heater here in the steam room in a future project. The steam generator provides plenty of heat to run one heater in each space.
Step 9 : Installing Vapor Barrier and Tiles
Tip: R-max tiles are suitable for industrial applications because they have a high insulation value per inch (0.11). They can be cut easily with a routing tool. Cut them slowly, wear safety goggles and use a dust mask when cutting polystyrene for anything other than small pieces.
Seal the perimeter of all tile joints with clear caulk to prevent water from seeping through. Next, run a bead between tiles and vapor barrier to ensure a tight fit around the entire room. You can also caulk edges of the vapor barrier where it meets wall tiles for a tighter seal against steam leakage. These steps will help in how to build a sauna in basement.
You can check it to Prevent Calcium Buildup on Fish Tank
Precautions
- Choose a place for the sauna that doesn’t have moisture problems.
- Ensure that there is no mold or mildew growth on the room’s walls and floor before construction starts.
- Locate electrical outlets near where you will build the sauna, as it requires two dedicated 20 amp circuits and one dedicated 15 amp circuit to power it up. These circuits should be hooked directly into your main panel. This ensures an adequate amount of electricity for all of the appliances used within the sauna, such as lights and ventilation fans, which require approximately 1,500 watts.
- Build the sauna near existing plumbing lines so that you can quickly hook up the ventilation system and drain needed for operation.
- Install a smoke detector on each side of the room to prevent any potential problems caused by too much heat or lack of oxygen.
- Use radiant barrier insulation, which reflects heat away from heated objects, rather than conventional fiberglass insulation. This blocks out 50 percent more heat from transferring into your home from the sauna itself, thus saving energy costs and providing a healthier environment for your family members to enjoy.
Conclusion
If you are struggling to get the TV antenna signal down into your basement, try these instructions on how to build a sauna in basement.
With a bit of coaxing and some patience, it is possible to extend an antenna cable from upstairs through the window or door opening of your house all the way downstairs where you can hook up with another wiring to bring that signal back out again.
You may read it also – How to Build a Fence on Uneven Ground


