How to Build an Oven Cabinet
Ovens are necessary for most kitchens, but their bulky size often takes up precious counter space. So if you’re looking for an alternative to a traditional oven, why not build an oven cabinet? This article will show you how to build an oven cabinet using basic materials and tools. With this project, you’ll be able to free up valuable counter space and have an oven that perfectly fits your needs. So get started and follow these simple steps!
The oven cabinet is an essential part of the modern kitchen. It offers a lot of advantages for the users. The oven cabinet can be used as an oven or storage space for different kitchen items. It is made of high-quality materials that make it sturdy and durable. In addition, this oven cabinet is easy to assemble and does not require any professional skills.
Things You’ll Need
- Tape measure
- Plywood
- Carpenter’s level
- Cordless drill
- 1/8 inch drill bit
- Circular saw
- High-grit sandpaper
- Stiles
- Rails
- Construction adhesive
- Cordless drill
- Phillips head screwdriver attachment
- 1 inch hole saw or jigsaw
A Stepwise Guide on How To Build An Oven Cabinet
Step 1: Determine The Dimensions
Before you can start building the oven cabinet, you need to take some precise measurements. This will help ensure that your oven cabinet fits perfectly in the space allotted for it. Using a tape measure, determine the height, width, and depth of the opening where you plan to place the oven cabinet.
Step 2: Arrange the Plywood
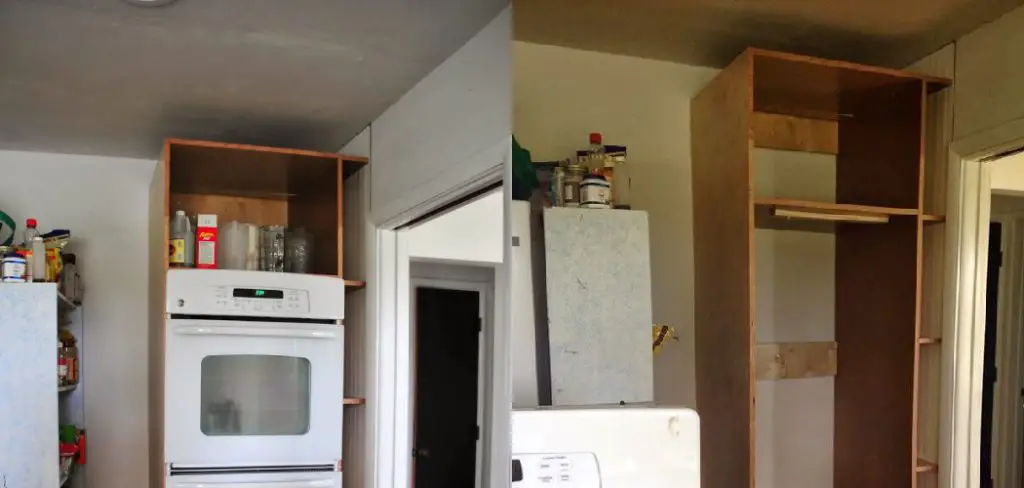
Once you know the dimensions of the oven cabinet, it’s time to start working with the plywood. First, cut out two pieces of plywood at the determined height and width using a circular saw. These will serve as the top and bottom panels of your cabinet. Then, cut out four more pieces of plywood at the determined depth. These will be used for the sides of the cabinet.
Step 3: Secure the Plywood to the Frame
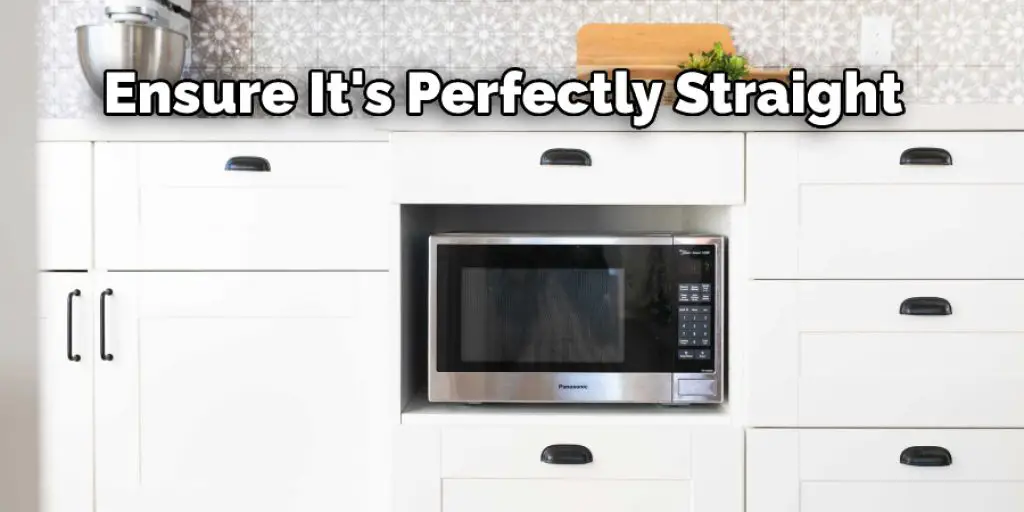
To ensure that your cabinet is stable and durable, you’ll need to secure the plywood panels to a frame. First, create two long horizontal rails using 1×4 lumber to do this. Cut the lumber to the determined width, then use a carpenter’s level to ensure it’s perfectly straight. Next, create two shorter vertical stiles using 1×4 lumber. Again, cut these to the determined height.
Step 4: Assemble the Frame
Once all of your pieces are cut, it’s time to assemble the frame. Place the stiles upright on a flat surface, then spread construction adhesive evenly across their tops and bottoms. Position the rails on top of the stiles, making sure that they’re level and aligned with the edges of the stiles. Use 1-inch screws to attach the rails to the stiles.
Step 5: Place the Oven on the Base
Now it’s time to start putting your oven cabinet together. Place the bottom plywood panel on a flat surface, then spread construction adhesive evenly across its top surface. Carefully lower the oven onto the adhesive, ensuring it’s level and centered. Use 1-inch screws to secure the oven to the plywood panel.
Step 6: Attach the Sides
Once the oven is in place, you can start attaching the side panels. First, spread construction adhesive evenly across the top and bottom edges of one of the side panels, then position it against the side of the oven cabinet. Ensure that it’s flush with the front and back of the cabinet, then use 1-inch screws to secure it in place. Repeat this process with the other side panel.
Step 7: Finish the Cabinet
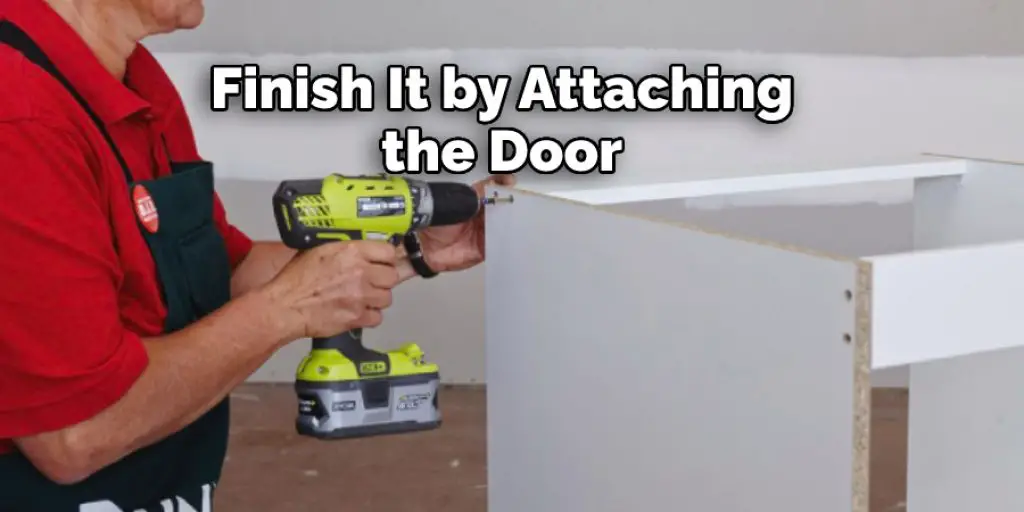
Now that the cabinet is assembled, you’ll need to finish it by attaching the door. To do this, cut a piece of 1/4 inch plywood to the same size as the opening in the cabinet. Spread construction adhesive evenly across its surface, then position it in the opening. Use 1-inch screws to secure it in place. Finally, use high-grit sandpaper to smooth out any rough edges.
Step 8: Install the Hardware
Now that your oven cabinet is finished, you’ll need to install the hardware that will allow you to open and close the door. Start by drilling two 1/8 inch holes in the top of the cabinet just inside each side. These will be used to attach the cabinet door hinges. Next, drill a 1-inch hole in the center of the cabinet door for the handle. Finally, use a Phillips head screwdriver attachment to install the screws to hold the door in place. These steps will help in how to build an oven cabinet.
There you have it! Your very own oven cabinet, made with your own two hands. Congratulations!
Tips and Warnings:
Tips:
- When building an oven cabinet, make sure that you have all of the necessary tools and materials before starting. This will help to avoid any delays in the build process.
- The size of your oven cabinet will depend on the size of your oven. Therefore, make sure to measure the dimensions of your range accurately before beginning construction.
- Follow the instructions provided carefully when assembling your oven cabinet. Taking shortcuts during this process could lead to a finished product that is less than satisfactory.
- Once your oven cabinet is complete, test it out by installing your oven inside. Then, make any necessary adjustments accordingly.
Warnings:
- Do not attempt to build an oven cabinet if you are not confident in your carpentry skills. This project should only be attempted by those who have experience in this area.
- Be aware of the risks associated with working with wood. In particular, take care when using power tools as they can cause serious injuries.
- Ensure that the oven cabinet is stable and secure before using it. A poorly constructed oven cabinet could pose a safety hazard.
- Always read the manufacturer’s instructions carefully before using your oven. Ignoring these instructions could lead to damage to the appliance or even injury.
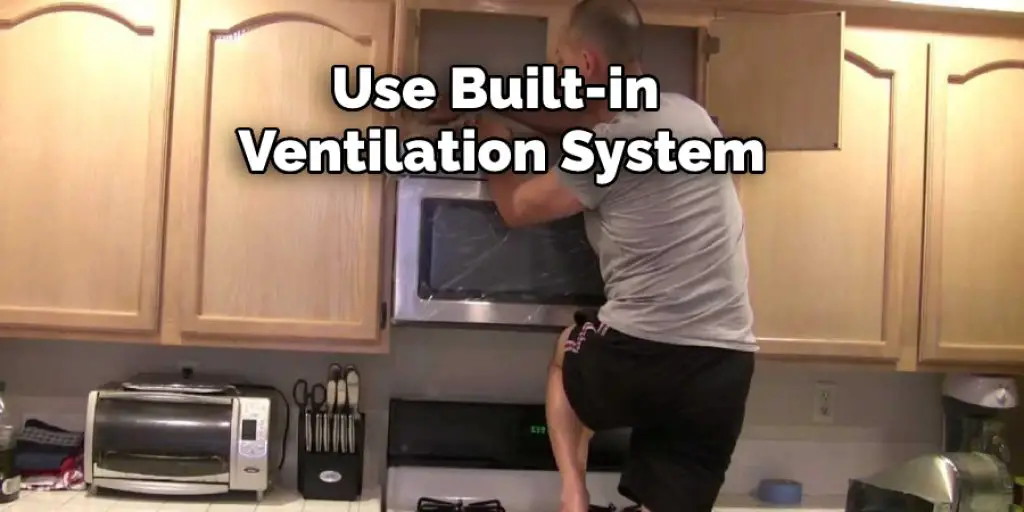
Does a Wall Oven Need Ventilation?
Most wall ovens come with a built-in ventilation system, so you won’t need to worry about installing one yourself. However, if you’re planning on using an older oven or one that doesn’t have a vent, you’ll need to install a ventilation hood. This is especially important if you’re using your oven for cooking large meals or for extended periods.
Ventilation hoods help to remove smoke and odors from the kitchen, and they also help keep the air around your oven cool. If you don’t have a ventilated hood, you may find that your kitchen gets very hot when you’re using the oven.
When choosing a location for your oven, make sure that there’s plenty of ventilation. If possible, choose a spot near a window or an exterior door. This will help keep the air around your oven cooler and help to ventilate the kitchen.
You Can Check it Out to Hang Wreaths on Cabinet Doors
Conclusion
Now that we have finished building our oven cabinet, it is time for the finishing touches. We will need to apply a few coats of paint or sealant to protect our hard work. Make sure to follow the manufacturer’s instructions so that your finish lasts as long as possible. Finally, install your new oven cabinet and enjoy! We hope you found this article on how to build an oven cabinet helpful. If you did, please share with your friends and family.


