How to Clean Water Heater With Vinegar
Like most people, you probably think of vinegar as a helpful kitchen condiment. But did you know that vinegar can also be used to clean your water heater! It’s true! This article will show you how to clean water heater with vinegar and get it looking and functioning like new. So don’t wait any longer – grab a vinegar bottle and let’s get started!
The water heater is a long-term investment and a lifesaver. But over time, calcium, limescale, and rust can build up inside your water heater tank. This reduces the efficiency of your water heater, but it makes it more expensive to run as well.

Things You’ll Need
- Vinegar
- Water
- Screwdriver
- Bucket
- Whole Cloth
- Mesh Scrubber
- Black Tank Cleaner
A Stepwise Guide on How to Clean Water Heater With Vinegar
Step 1: Determine How Dirty Your Water Heater Is
If your water heater has not been cleaned in a long time, there’s no doubt that it is dirty. You can wait for six months and then clean the water tank again. How dirty your water heater depends on how polluted your tap water is, depending on where you live.
If you reside in an area where the tap water supply contains high minerals, dirt buildup will be more common. Areas with high iron content should also be avoided when getting a new water heater installed at your house because this mineral causes rust inside the tank.
Step 2: Turn off Electric or Gas Supply
Whether your home has electricity or gas powering the water heater, turn off both supplies to prevent injuries. This action is significant because you will be dealing with a large amount of flammable liquid, which contains enough pressure to squirt out from under high temperatures when left on for long periods. Turn off the gas at the tank while turning off the electricity at the main power supply.
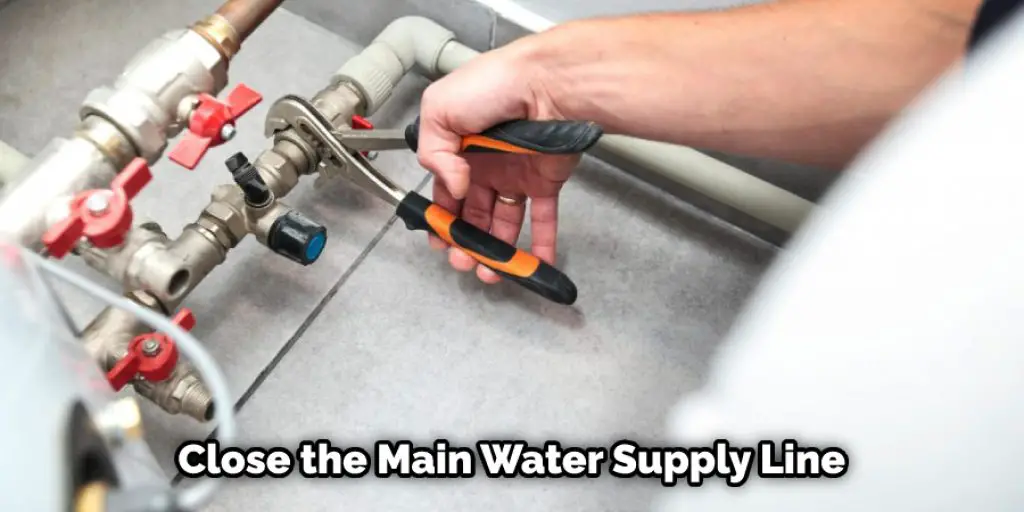
Step 3: Close the Main Water Supply Line
Shut down the cold water supply line that leads into the tank. Failure to do this will result in a big mess when you begin draining out all of the water. You can use a wrench to make it difficult for anyone else to turn on the water again, which many people do with older units after they are done cleaning them.
Step 4: Drain the Tank
Use a bucket to catch all of the water from your tank. How dirty this liquid is will depend on how long it has been since you cleaned the unit and whether you live in an area with a poor quality water supply. If there is no scum or debris at the bottom of the tank after draining it completely, you’re probably fine using it for another year or so before calling in professional help.
However, if the amount of residue inside is large enough to make surrounding areas wet, clean up right away. Also, use a mesh scrubber to remove any rust chunks likely breaking off from around rusted connections to avoid injury when working under high temperatures.
Step 5: Remove the Water Heater’s Anode Rod
The anode rod is located at the top of the tank and looks like a large bolt. How long it has been since you last replaced this $10 part depends on how dirty your water heater has become. If your unit was not cleaned for many years, then the chances are that there is no more rust than steel at the top of your tank.
You will need to completely replace the anode, which costs about $20 each, depending on where you buy them from. However, you can fix this problem by purchasing a new rod that will last another decade or two. If you are satisfied with how clean your unit has become, remove the anode with a screwdriver before scrubbing down the inside walls of the water tank.
Step 6: Clean With Vinegar
Pour one-half gallon (2 liters) of white vinegar into the water heater and turn on the main power supply. Next, use a black tank cleaner similar to purchasing car wax for an older car that you want to clean up quickly. Black tank cleaners are easy to use, but make sure they are safe for use on water heaters before adding them inside.
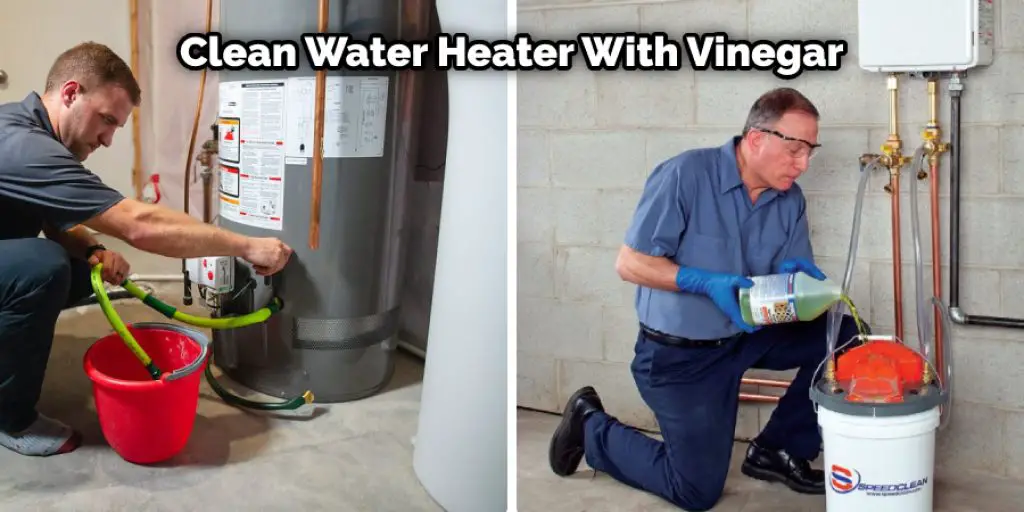
Some products can damage plastic tanks even when they’re advertised as safe. Use the whole cloth provided with your purchase to scrub down all sides of the water heater’s interior walls, including rusted spots or hard-to-reach areas laden with dirt or scum deposits. How long you leave the solution in there will depend on how dirty it is and whether you are using it to remove rust.
Step 7: Drain the Vinegar Solution
A black tank cleaner is not an easy solution because it usually takes hours before the water heater is drained out after turning on the power supply. This process can take several hours depending on how dirty your unit is, so you must be patient.
How fast this solution works will depend on many factors, including how often you have used hot water in recent years, whether or not there are any other substances inside the tank, and what type of cleaning material was used by previous owners responsible for maintaining it.
Black tank cleaners do a great job at removing all forms of dirt from around internal gas connections but might fail when they come in contact with severe levels of rust. How long you leave the solution in the tank will depend on how dirty it is and whether or not any brown scum was left behind by the previous owner when they tried to clean it up.
Step 8: Dry Out All Areas
Use a wet/dry vacuum to suck out any remaining moisture after turning off the water supply and draining all of the water heater’s internal parts. You can buy one for $20-$40, which is a small price to pay for getting your unit completely dry before repairing or replacing anything inside of it.
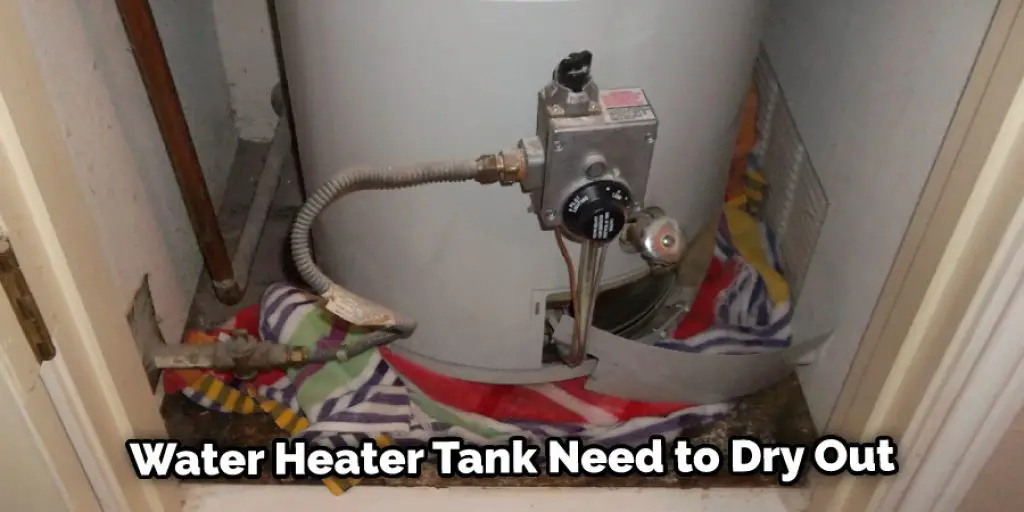
This step might be skipped if you want to risk using it right away, but don’t forget about this vital step because water damage costs thousands of dollars every year to homeowners who aren’t careful.
The water heater tank will need to dry out completely before you can continue working on it. How long this process takes depends on how dirty your unit is or if parts are still wet after draining them inside the sink with running water. For example, gas connections might remain moist, so they cannot be turned back on until all internal pieces are dehydrated.
Step 9: Repair or Replace Parts After Cleaning the Inside
The replacement anode rod will need to be tightened down where it sits at the top of the tank so it doesn’t wobble when you turn the hot water power supply again. How tight the new one is secured will depend entirely on how bad rust was inside the unit, which could require hours of tightening before it’s safe to use.
A rubber washer will need to be replaced inside the drain valve if any holes should only take a few minutes. How complicated this process is will depend on how dirty the area was when you first opened up the water tank after draining it completely dry. How easily rust can format these spots depends entirely on their location, which could lock the drain shut until the hole is properly cut out and replaced with new material creating another connection point for future leaks.

If all connections are dry, you can move it back into a place where it sat during the first few minutes of your project. This step’s easy depends on how clean the surrounding area was after removing it with running water and a wet cloth. How quickly each unit heats up again will depend entirely on how long you left the internal parts to air-dry for the inside of an open room.
Step 10: Use Protection
Multiple coats of clear sealant or spray paint might be required before putting the heater tank back in one piece because rust could reform if not secured by some protective barrier between metal surfaces exposed to water over extended periods during previous repairs that didn’t work correctly.
How much protection is needed will depend on how dirty the unit was when it was removed for cleaning. How easily each piece is restored will depend entirely on how often you used hot water in recent years without taking proper precautions to keep your water heater functioning at peak performance levels. These steps will help in how to clean water heater with vinegar.
Frequently Asked Questions
Is It Safe to Put Vinegar in Hot Water Heater?
It’s always best to test the heat before adding any type of liquid. If you do add vinegar, be sure to turn off the power first and never leave your appliance operating when unattended.
Will Vinegar Dissolve Water Heater Sediment?
Depends on the type of sediment and vinegar. For example, white vinegar can dissolve calcium sediment while black vinegar can not. If you are unsure of which vinegar to use, contact a professional to get advice.
How Much Vinegar Do I Put in My Hot Water Heater?
Usually, you would add 1-2 tablespoons of vinegar for every gallon of water that you’re heating. This will help to disinfect the hot water heater and remove any lingering smells or contaminants. You may also want to consider adding baking soda or lime juice if your hot water smells bad or tastes strange.
Is Cleaning Vinegar the Same as White Vinegar?
Vinegar is a type of acid that comes from the fermentation of sugars by bacteria. White vinegar, on the other hand, is made from ethanol and water, and it has a slightly sweet taste because of the sugar that’s still present.
Conclusion
We hope the article on how to clean water heater with vinegar will help you clean your water heater. You may have heard that the best way to keep a hot water tank clean is by using bleach, but this has been proven false. Vinegar does not leave any harmful residue behind, and it will kill all bacteria in the reservoir without damaging pipes or causing corrosion of metal parts inside the unit.


