The simplest way to cut the angles for deck railing is with a simple miter saw. You can also use a circular saw or hand-saw, but these methods will be slower and less precise than a miter saw.
When cutting the pieces that are going on the outside of your deck railing, you’ll need to set up your cuts so that they’re flush against an inside corner at the bottom of each piece. This means that there should be no overhang when you lay it down flat against its neighbor’s edge.
The easiest way to do this is to use a miter saw. However, it would help if you began by measuring the length of each side of your deck railing and marking the short section of each side with your tape measure. So, this article is for you. You will learn how to cut angles for deck railing with just one simple trick!
Step to Follow on How to Cut Angles for Deck Railing
Step One: Layout and Cut
First, you need to layout where the cuts will be for your railing. Take a string and put it onto the deck somewhere, measure out what you want and drill a couple of pilot holes in the deck. Now take a pencil and draw lines from deck to post for each section that must be cut perfectly at 90 degrees.
Cutting the angles for your railing is pretty simple. Set up a stop block on your miter saw so you can only cut one angle at a time. Measure out from the stop block how long you want to cut and make sure everything looks perfect. Flip the piece over and trace the outside of the square tube onto it using your square as a guide.
Step Two: Drill the Deck
Now take out a drill and make a hole in each pilot hole you drilled in step one. When you put in the galvanized hex head screws, these holes will be used, so they don’t spin while you try to tighten them up. Also, drill an extra hole on the top rail to use as a stud for your handrail.
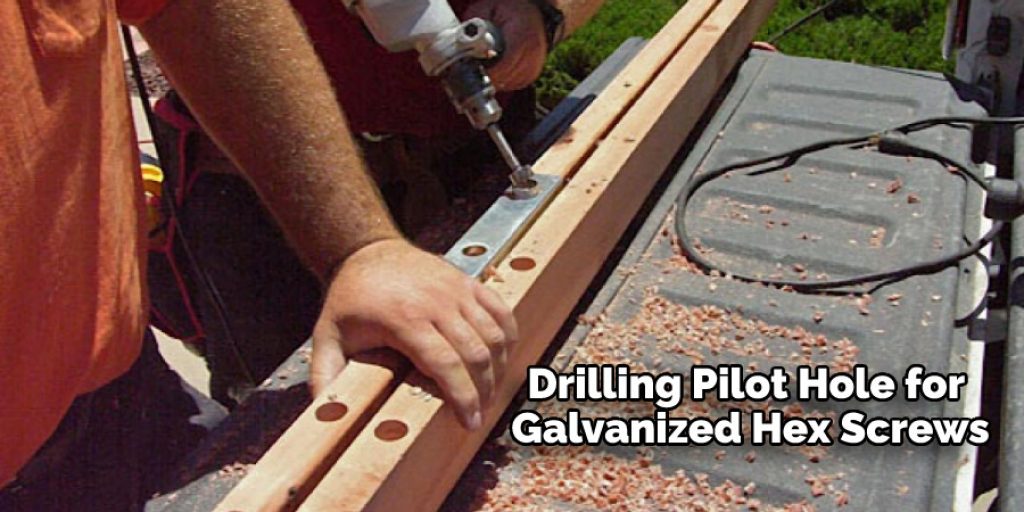
This will be used so you can attach the railing on both ends and not just one middle post. Now drill the end post and be sure to put a washer on both sides of it. Now step three is to paint the railing. First, take all of your rails and give them two coats of primer, letting each coat dry before applying another one.
Step Three: Attach the Railing
After letting the primer dry, it is time to attach your rails. First, take your railing and flip them up, so the bottom of the tubing faces upwards. Next, put in eight screws, two on each side except for one, where you drill a hole through the tubing near the top. This is so you can put your hand railing on later.
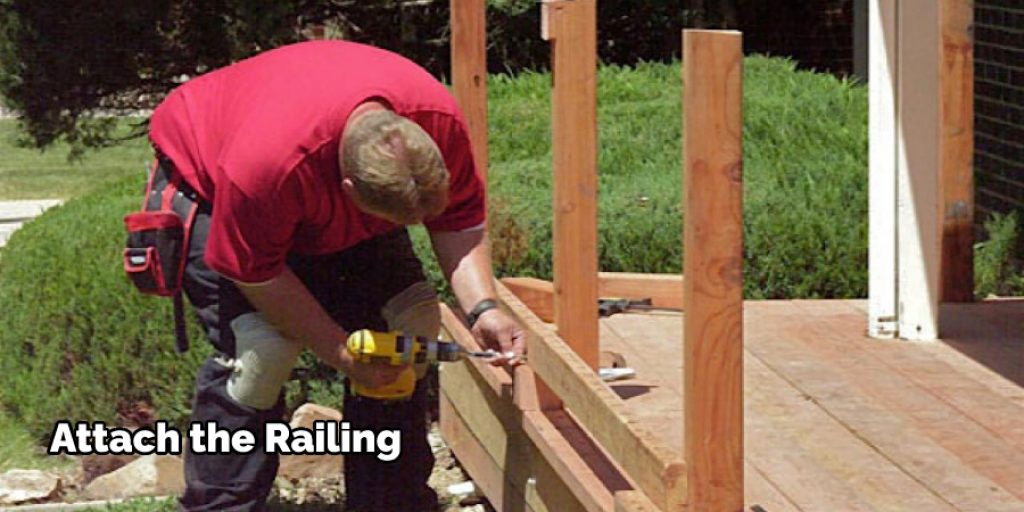
Now take all of your posts and put them on. You will need to ensure the hex head screws are flush with the holes before putting them in. If not, you can use a drill or tap to re-countersink it, so it is perfect. Do this for all four posts, and your railing should look pretty good. If you use the steps outlined above for how to cut angles for deck railing, you can do it yourself.
Step Four: Attach Bottom Rail
Now take your bottom rail and lay it on top of one post, making sure it is level. The holes you drilled in step three should line up with the holes in the post and be easy to put in. If not, use a tape measure to make sure they are perfectly lined up.
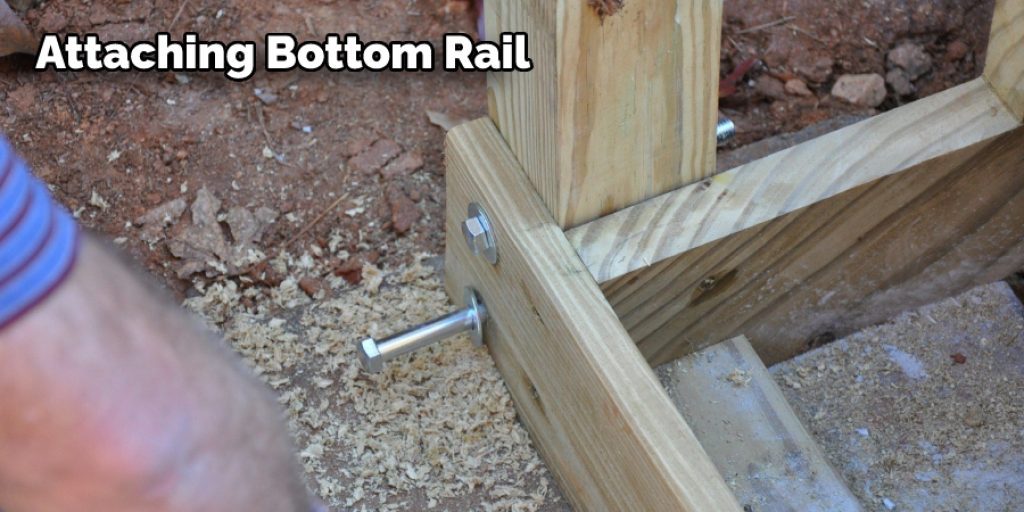
Put all of your screws in this time, and it will make it much easier when you attach the top rail later. Now do this for all of the bottom rails, and you will have a completed deck with an excellent railing system. If you want to use this system for your stairs, continue the length of run you want for your railing, then put another post on end.
You Can Check It Out to Install Muzata Cable Railing
Step Five: Maintenance
Now that you have your railing up, it will require a little bit of maintenance. The most important thing to do is make sure the screws are kept tight and in good condition. You will also want to inspect your railing every year or so for any problems. For example, one issue will be if one of the rails springs out of place.
You can put it back or use a drill to re-countersink the hole deeper. The system for this railing is pretty simple and should be easy to remember after a few times doing it. The only thing I would suggest is to make sure you have all of your angles laid out before cutting because once you cut them, it is pretty much set in stone.
Step Six: Enjoy!
Now that you have installed your railing sit back and enjoy your deck! Now that it is winter, I suggest adding a heater onto the deck to make it nice and cozy for any upcoming warm nights. If you are building your deck or stairs, I hope this has helped in some way.
This is an excellent railing system that allows for many different size rails and posts. It is simple and makes for a great railing. Just remember, always use safety glasses when using power tools. Also, check out my previous article on how to cut angles for stairs.
Frequently Asked Questions
Do You Need a Rosette for Handrail?
While rosettes are not required by law, they can be a nice addition to your handrail. This decorative element is often used in upscale layouts and adds an extra level of visual appeal. They come in various designs and sizes, so be sure to select one that fits the look of your staircase or hallway. Additionally, installing a rosette can help to reduce Chenille stair tread wear and tear over time.
What Angle Do You Cut the End of a Handrail?
It depends on the specific situation. However, in general, you should angle the end of a handrail so that it’s at a 45-degree angle from the wall. Doing so will prevent anyone from accidentally falling off the side of a staircase or railing.
Where Should a Handrail Start and Stop?
Depends on the individual situation. However, some general guidelines that can help when it comes to determining where a handrail should start and stop are:
1. Handrails should be located at or near the edge of a staircase or ramp.
2. Handrails should extend at least two feet beyond the edge of a stair or ramp.
3. Handrails should be design to prevent anyone from getting stuck if they fall.
4. Handrails should be spaced at least 16 inches apart on both sides of a stair or ramp.
Do You Need a Return on a Handrail?
Do you need the return to cover your maintenance costs or are there other benefits? Additionally, what type of handrail should you choose? There are many styles and types of handrails available on the market today, so it is important to consider your needs before making a purchase.
Generally speaking, most people need somewhere between 2-6% returns in order to make an investment worthwhile. So if you’re looking for long-term stability with little risk, then investing in bonds or blue chip stocks may be a good option. If you want greater potential for short-term growth but don’t mind taking on some risk, then ETFs orgrowth stocks might be better suits your needs. And finally, real estate could provide excellent returns over time as prices tend to rebound after periods of decline.
Conclusion
For safety, it is essential to make sure that deck railing angles are appropriately cut. This blog has given you a couple of different ways to do this, what tools will be needed for each method, and other things to consider when cutting these angles, such as using a protractor or measuring from an edge.
If you have any questions about anything we discussed in this article, don’t hesitate to ask us! The conclusion paragraph is informative and provides information on how to cut angles for deck railing.
Check it out- How to Stiffen a Deck Railing


