You might be thinking that you’ll need to buy a new vinyl fence if your current one is too short, but this isn’t true. You can add height to the fence by extending it with posts and adding panels. If you want more privacy, consider using trellis or lattice in addition to the extra vertical fencing for an even higher barrier.

The following guide will walk you through how to extend vinyl fence height to become taller than before. Writing an opening paragraph has many uses. This is part of the writing process that helps you to get an idea down on paper. It also allows you to think about what you want to say in your paper.
Step to Follow on How to Extend Vinyl Fence Height
Step One: Determine
First, you need to determine if your fence is wood or vinyl. The easiest way to determine which type of fence it is is by looking at the ends of the posts. If they are round, your fence will be wood; if they are square, the fence will be vinyl. If you have tall children or pets, you may want to consider extending your vinyl fence height.
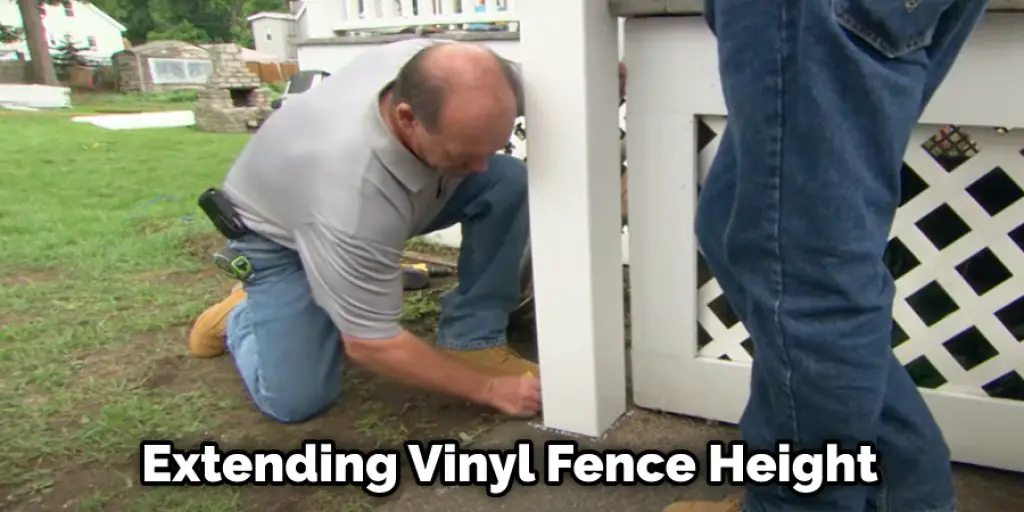
You can use several different methods to do this, including adding a second post or adding a panel to cover the ground space between posts. When choosing to extend wood fencing, there are two extra pieces that you will need: caps and spacers.
Caps go on top of existing posts to cover the top ends. These are made out of wood, vinyl, or composite materials. If you choose to use cheaper caps for your wood fence, they will eventually rot and should be replaced after several years. Spacers can be used instead of adding second posts.
Step Two: Prepare for Installation
To complete the installation of your fence, you need to know the exact measurements that will be necessary. This includes post spacing and posts height. You can obtain these by using a tape measure or measuring from inside the gate if included with your present fence.
You should also obtain information about what type of posts are currently in place. If they are capped, you can use the same kind of post. If the posts are bare, you need to know their height and diameter before beginning your installation. You will also need a hammer to drive the extra pieces into place.
A power drill with a bit can also be used in place of a manual drill. The drill bit should be pre-drilled to ensure that the screws are not dulled when screwing them into the pre-existing posts. If your fence is vinyl, you will also need a saw to cut the panels to length.
Step Three: Install Posts
You can use a manual or electric drill with a pre-drilling bit for this process. For wood fences, it is best to use an electric one as they require accurate drilling and speed to ensure all screws are put in evenly. If you choose this method, you will need to drill a hole through the top of each wooden post and into the existing base below it.
This is to ensure that there are no gaps between posts for pets or children to fall through. If using metal spacers instead of second posts, then you will only need to drill the holes. The next step is to place the spacers on top of the existing posts. The size of these is determined by the height you want your fence to reach.
The higher, the more expensive they will be. The next step is to add the caps to cover the top of each post. These are usually rounded on top and come in different styles, colors, and materials, including wood or composite plastic. These instructions will teach you how to extend vinyl fence height.
Step Four: Cut Panels
If you extend your fence height with panels instead of adding a second post, you will need to cut the panels before installation. For vinyl fences, measure up from the bottom to determine how far it needs to be missed. This is usually measured in feet or inches, depending on the size of the panel.
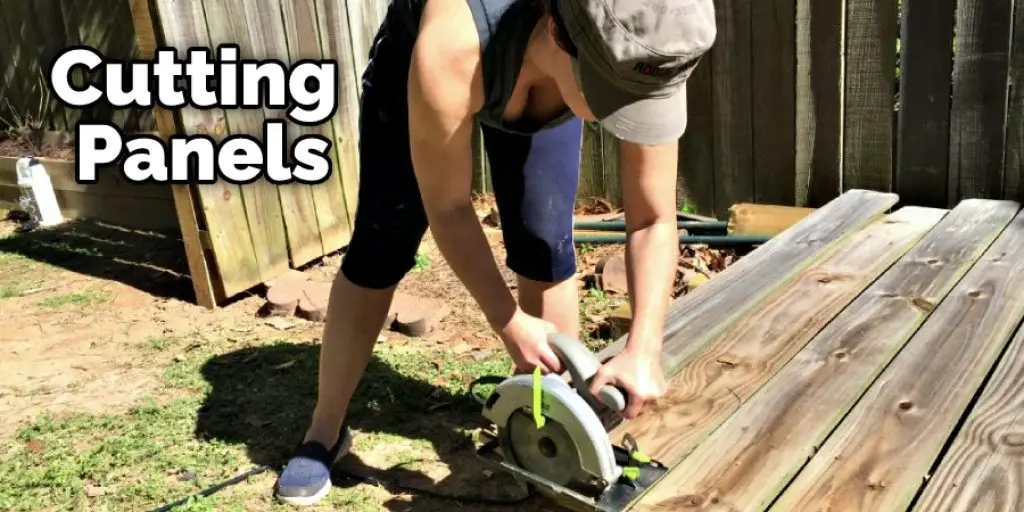
Make sure that when measuring, you measure to the inside of the fence. This is because the cap will cover the outside edge. When cutting wood fences, you must measure correctly to avoid problems with water damage due to rot.
Then you can use a saw to cut each panel down to size. This is best done with a manual saw, as electric ones could damage your fence if not used properly. You should also check to see if the panel has any curvature so that it will fit together evenly along the line of fencing instead of leaving gaps where pets or children could crawl through.
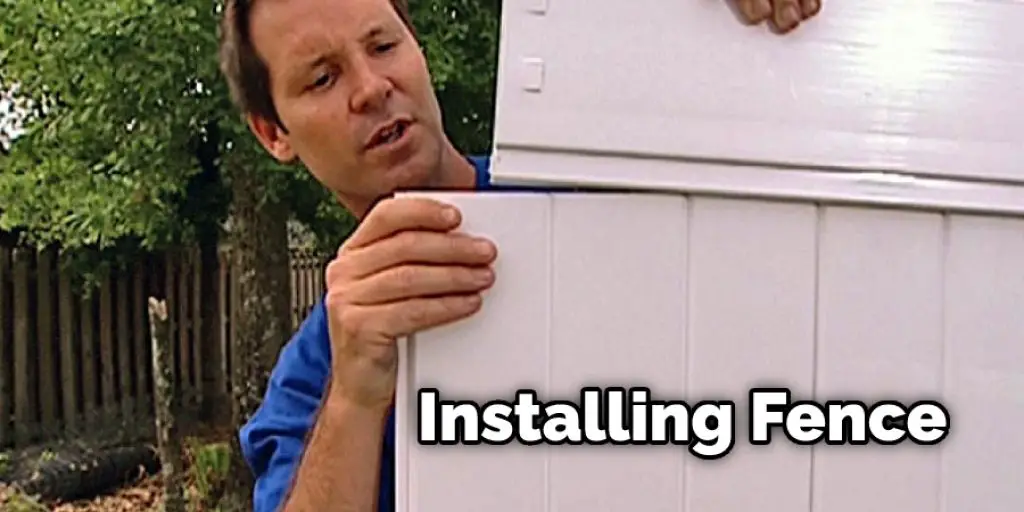
Step Five: Install Panels
You can now install your vinyl or wood panels. For the vinyl, you will need to perform the same steps as in Step Four. You mustn’t rush through this process so that your fence will last for years to come. Each panel should be installed with screws so that they are secure in place.
The wooden panels can be installed using finishing nails or screws. If you choose to drive nails into the wood, you will need to use a rod that goes through the nail and prevents it from splitting the fence. After all, panels are in place; they should be inspected for any gaps between posts.
You can check it to Remove Fence Staples.
Conclusion
We have a few tips for you if it is time to give your vinyl fence the much-needed height boost. The first step in this process would be removing any vegetation and covering the soil with mulch or other material that will not obstruct drainage.
Next, attach an extension post on one side of the existing posts using brackets and screws to secure them tightly together. The conclusion paragraph is informative and provides information on how to extend vinyl fence height.
Check it out also – How to Stop Soil Going Under Fence.


