If you’re looking for a boundary for your property that doesn’t require too much maintenance, shadow box fence panels might be a perfect choice. Not only are they affordable, but they are also easy to install. This article will show you how to install shadow box fence panels quickly and easily.
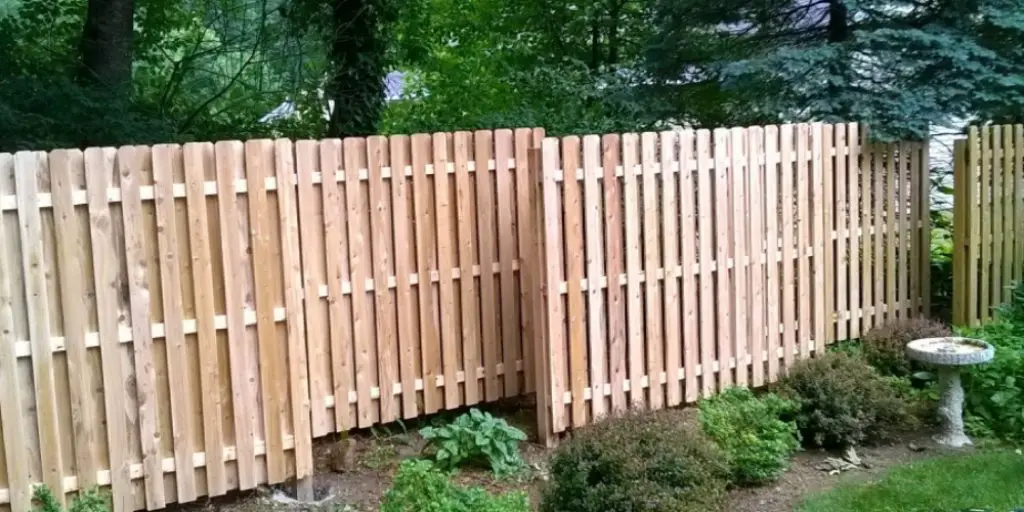
So, you’ve decided that you want to install a shadow box fence around your property. Great decision! Shadowbox fences are not only beautiful, but they are also low-maintenance. Plus, they require little to no painting, and there is never a need to deal with splinters. But, if you’re thinking of installing these lovely fence panels yourself, we’ll show you how in just a few easy steps.
Tools and Materials
- Hammer for driving in spikes
- String line
- Hand tamper/plate compactor
- Metal post vibrator, or you can use a sledgehammer to install the posts by pounding them into the ground
- Nails, screws, power drill with screwdriver bit and 10-12″ extension cord
- Power driver with Phillips attachment if needed for extra long deck screws instead of nails
- A helper is always good!
- Gloves and Eye protection
A Step by Step Guide on How to Install Shadow Box Fence Panels
Step 1 : Preparation
Make sure you have a clear area where you can work without any trees, branches, or anything else hanging in the way. You must have enough room to allow the panels to tilt outwards when they are closed and that there is a solid surface under all your posts so that they don’t sink into soft ground.
Next, stretch a string line between two stakes (or use thin 2×4 stakes) to mark off an 8′ X 8′ section for each panel. This will be the exact size of your finished installation. Use this as a reference point since it should not vary but should also not be over-tightened, making the panel bow in the middle (if it does, call the office for doubt assistance right away).
Step 2 : Determine How Many Panels You Will Be Insatiable
The panels come in 10-foot increments from 4′, 6′, 8′, 10′ and 12’s. It is best to round up or down when determining how many boards you need for a fence. We recommend a minimum of 2 feet per panel, but with Shadow Box fencing, your options are open with the amount of space in between each post!
For example, you can have close access turns with just 20″ apart, or you could have a comprehensive panoramic look having 80″ spaces in between posts.
Step 3 : Installing Posts
We recommend installing a post every 10 feet in a straight line. How far apart they are in the curves depends on how tight of a turn you want to make with the fence panels. The closer they are, the stricter curve will exist, with less room between them when closed.
Use your string lines to know where each post should be placed and drive them at least 2′ into the ground, which means 4″ deeper than your frost line or roughly 1-1/2 foot below grade level for most installations. This will allow enough space for spikes and metal post caps after going through all your soil conditions.
After digging a hole about 3-4 inches wider than your post, you will need to insert the metal spike into each hole. Marking a half-inch above the ground with your string lines at both 10′ and 4′ marks for easy reference is recommended before setting in the posts.
The installer needs to push down on the metal post driver attached to the spike with their foot while simultaneously pulling upon it with their hands trying to create an arch in it. This will not be visible once installed, so make sure it goes as far as possible before hitting a hard surface!
Step 4 : Measure and Mark Backer Rail
Move the string line to the opposite side of the post (the one closest to you) and pull it taut. Mark each side using a pencil or chalk line. This will indicate where the top edge of your backer rail should fall along with 2″-3″ on either side for wiggle room when closing your panels.
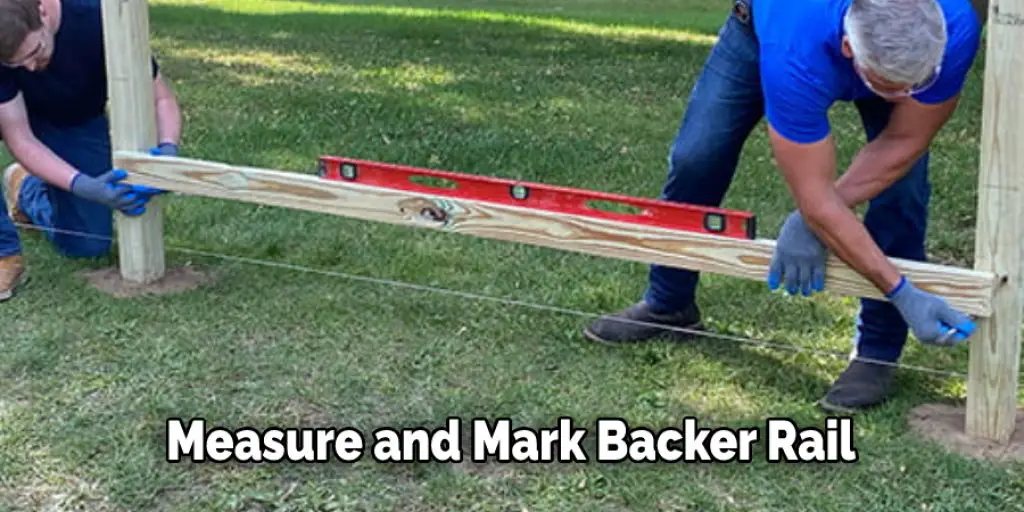
Using this mark as a reference, measure down 3/4′ and make another mark creating another consideration for your notch that will hold onto the backer rail. This is done because if it is precisely 3/4′, then after the soil settles, there could be less space making contact with your metal post caps which would cause them not to remain tightly secure against your panel!
Step 5 : Attach the Backer Rails
This is done by sliding it onto the top of the post and using a few nails or screws to hold it in place. How many you use depends on how long your backer rail is, but we recommend at least 3 for each end and one about every 2′-3′ across. Center them between each post along the length of the fence line.
Step 6 : Set Your First Panel!
Once all your posts are secured, you can move your string lines back to the front side again, marking off 4′ intervals from bottom up. This will be where each panel should rest while installed. Next, mount either one or two hinges onto the top edge of your first panel next to where both backer rails meet together (at least 2″ from the top), ensuring that your hinge is facing inwards towards each other, or they will not close properly.
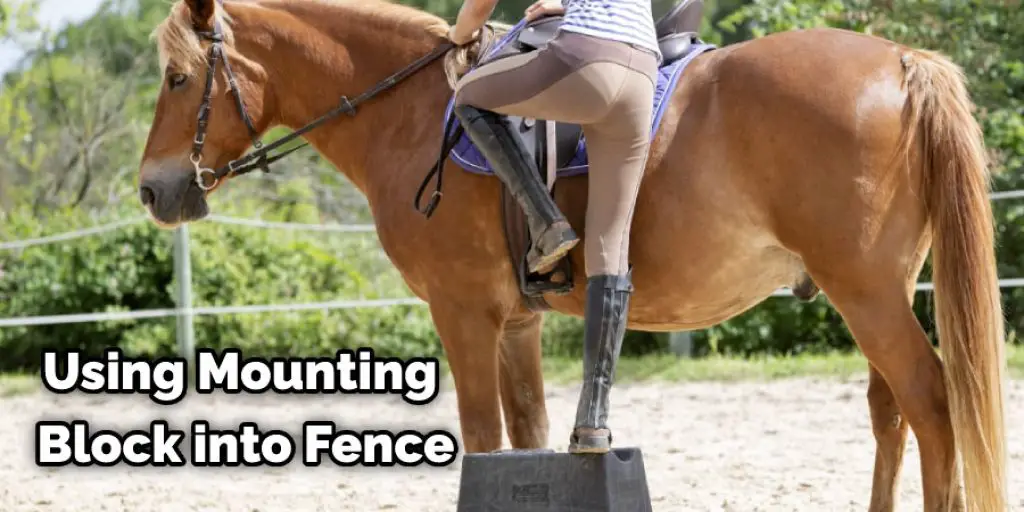
Another installation method would be to use a mounting block with notches on either side for your backer rail to set into before sliding up against its post. How you decide to install your panel is entirely up to you! This is a crucial step in how to install shadow box fence panels.
Step 7 : Install Your Panels
After getting one panel-mounted, ensure it is flush with both backers and even between posts with no gaps by closing it. If there are any issues, this is when they need to be found out and corrected before moving onto the next panel because once another is installed, then cut/fixed issues will become much more complicated to have two panels resting against each other which also prevents the scissor hinges from closing all the way!
Use a cordless drill with an appropriate sized Phillips Head Bit for mounting screws to secure it in place. Ensure your panel is flush against one backer, and then install the screw into that post well away from where any metal post caps will be because you need this hole open for when you cut out your notch in the second panel.
Step 8 : Install Your Second Panel
This time, use one of your panel pins to insert through both backers while using another hand at holding down the top rail on each side against the posts. This will ensure everything stays tight while installing or if there are any issues later after soil settles or shifting takes place. How far apart you place the panel pins is entirely up to your fence installer and their judgment!
If you are not using a mounting block, this step will be done after all the screws holding the first panel in place have been installed. For those who are using a mounting block like we were (and highly recommend doing so for easy installation!), then one screw needs to be installed into each side of your backer rail before sliding it up against your block and quickly installing the rest of your screws that hold it in place.
Drilling pilot holes do this for each screw and only insert them halfway down the threads, allowing enough room to turn them quickly without breaking through too far and causing any splitting. Once this is completed, your Shadow Box Fence Panel is installed and ready for the fence line to be completed as a whole!
You Can Check It Out To Hang a Pinata Without A Tree or Fence
Step 9 : Finishing and Care
Now that your fence is installed don’t forget to finish things off with a touch of character by adding some decorative caps or even attaching an archway if you are looking for something more elaborate.
How you decorate the top rail will give your new Shadow Box Fence its unique style, which can completely change up its appearance of it, making it much more enjoyable! How long your panels will last depends on how well they are made and how often they are exposed to weather elements like rain, snow, ice, and sun.
If not properly cared for during installation, longer-lasting beautiful results can be achieved by applying an appropriate conditioner after cleaning any dirt or stain away. How often this needs to be done depends on the location where the fence is being installed and how much sun and rain it may receive.
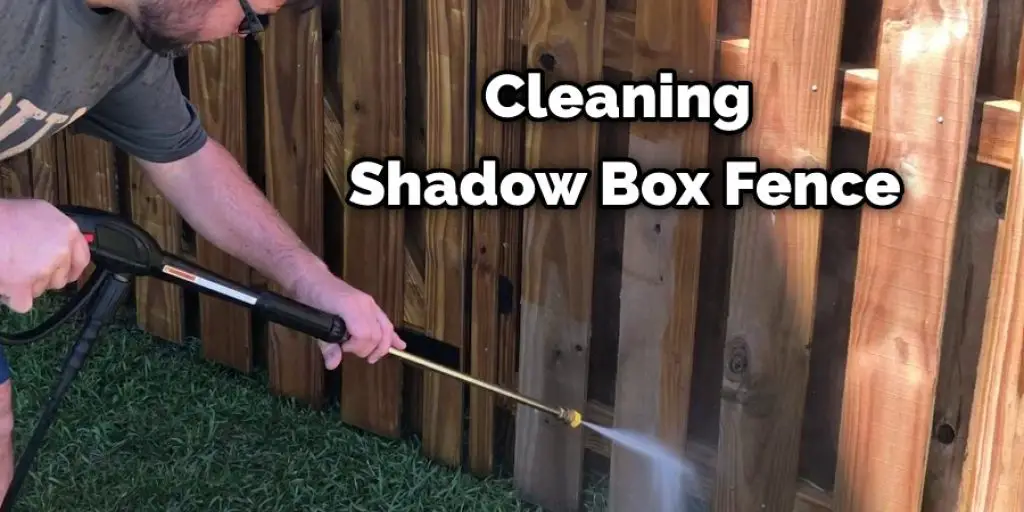
How well the fence has been lodged will also be a factor because improper installation can result in warping, bowing, or even breakage down the road, which is why it is essential to have a professional handle your fencing from the start. To finish! These steps will help in how to install shadow box fence panels.
You can check it to Make a Shadow Box Fence More Private
Conclusion
We hope you have learned how to install shadow box fence panels. Installing shadow box fence panels is a project that may take some time, but it should be worth the effort. Follow these steps to get started on your installation today!
You may read it also – How to Attach Hardware Cloth to Fence


