How to Install Shiplap Over Plaster Walls
Shiplap is a widespread technique in the home remodeling industry, and for a good reason. It’s not easy to install, so it can be challenging and rewarding to complete your project. One of the most important things to do before beginning this process is to ensure that there are no electrical wires or pipes in the wall where you’ll install the shiplap.
This will save you from having to tear down sections of your wall if something isn’t compatible with what you’re trying to accomplish. Instead, shiplap installation starts by going up into the attic space above, where you plan on installing new paneling.
Then, you’ll have to go into the wall with a drill. Drill through it until your hole is big enough for the saw to fit snuggly inside. So, this article is for you. You will learn how to install shiplap over plaster walls with just one simple trick!
Step to Follow on How to Install Shiplap Over Plaster Walls
Step One: Determine
First, you must determine how thick your plaster walls are. The thickness of the plaster varies by the wall, so you must discover this before installing shiplap siding over it You may do this by removing one or more outlet covers. If the studs behind them appear metal, they will most likely be wood studs covered in lath and plaster.

If this is the case, you can measure the thickness of the plaster with a ruler or tape measure before moving on to the next step. If they appear cement, then you will need to use a different approach. To determine what the walls are made of, tap and listen to the wall until you can tell if it is metal or not.
Assess the condition of the ceiling. The walls will be fine as long as they are not too run down, but if there is something wrong with the ceiling, then you should have it checked out by a professional. If you think that the ceiling needs to be replaced, then this is not the time to do it yourself. This may cause more damage to your home than good.
If it sounds solid, then you have plastered over lath and wood studs. If it sounds hollow, you are most likely dealing with cinder blocks or concrete, and you will need to consult a professional before installing shiplap siding. If you feel confident, you can bring in a stud finder and attempt to detect the different materials.
Step Two: Mark Stud Locations
It would help if you now determined where the wood studs are located on your wall. You should use a pencil and place points on the wall where you think that the studs are located. You can then connect those points with a pencil line to see where the wood studs lie on your walls.
If you are sure of the stud locations, you can mark them directly onto the wall with a pencil. If you are unsure of their places, then you will need to use a stud finder. With this device, sweep it across the wall until it beeps or lights up at the point where the studs are located.
The tool will then show you where to mark your studs. You can then connect these dots with a pencil to see where your wood studs lie on your wall. If you have determined that your wall is cement, then you can skip this step as the studs will not be present on the wall.
Step Three: Cut Plaster at Stud Locations
Once you have discovered where your wood studs lie, you must remove a section of plaster around them that spans from floor to ceiling. Each side should reach from the floor to the roof but should not extend beyond them. To do this, you may use a hammer and chisel.
If you want to put new holes in your walls, you can start by removing the plaster around one stud. Then use that hole as a guide to cut the rest of the holes. Be sure to blow away all the dust and debris created when you removed the plaster. If you’re not sure what kind of walls you have, ask a plumber before trying to remove the plaster.
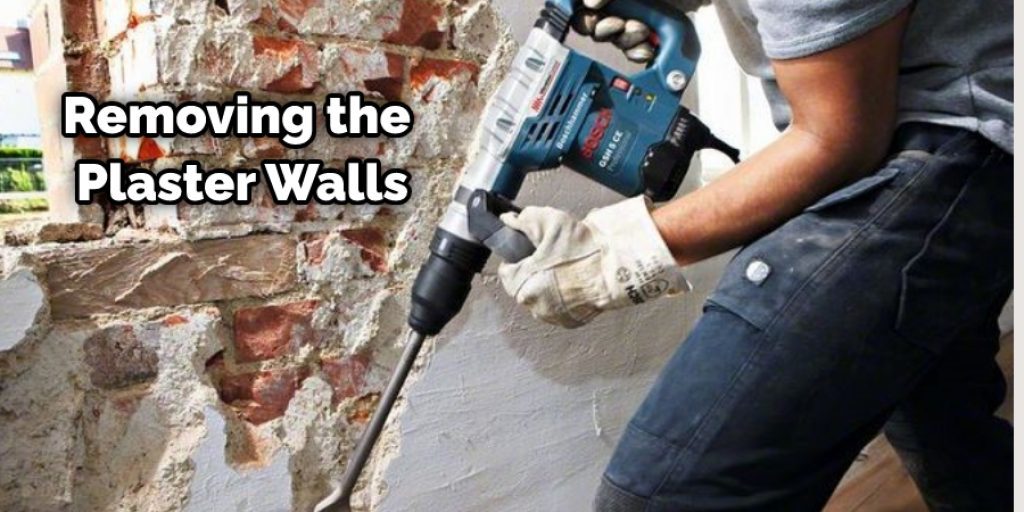
Then, use a carpenter’s pencil to mark the size of the studs at their location. This will allow you to keep track of where your wood studs lie on your walls. Afterward, remove the plaster around these marks with a hammer and chisel. These steps should help you in learning how to install shiplap over plaster walls.
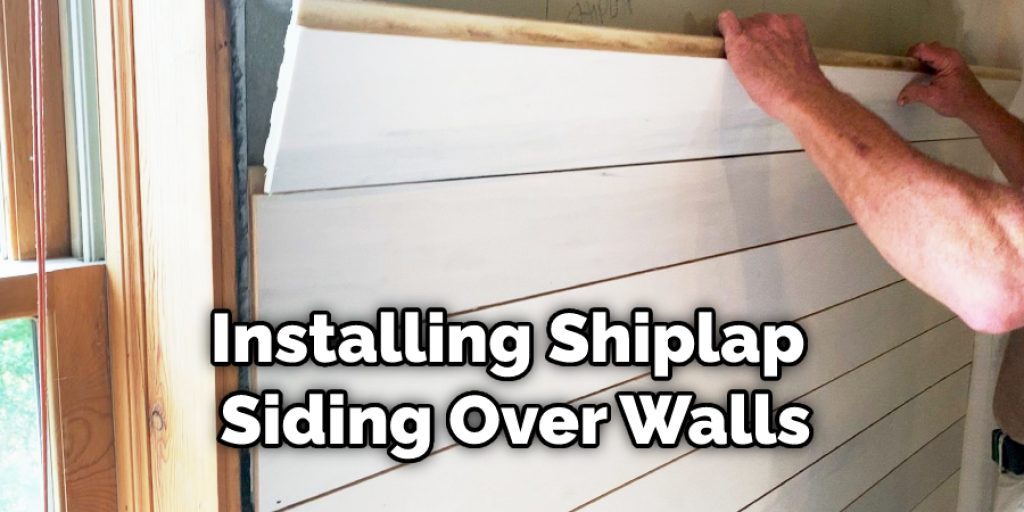
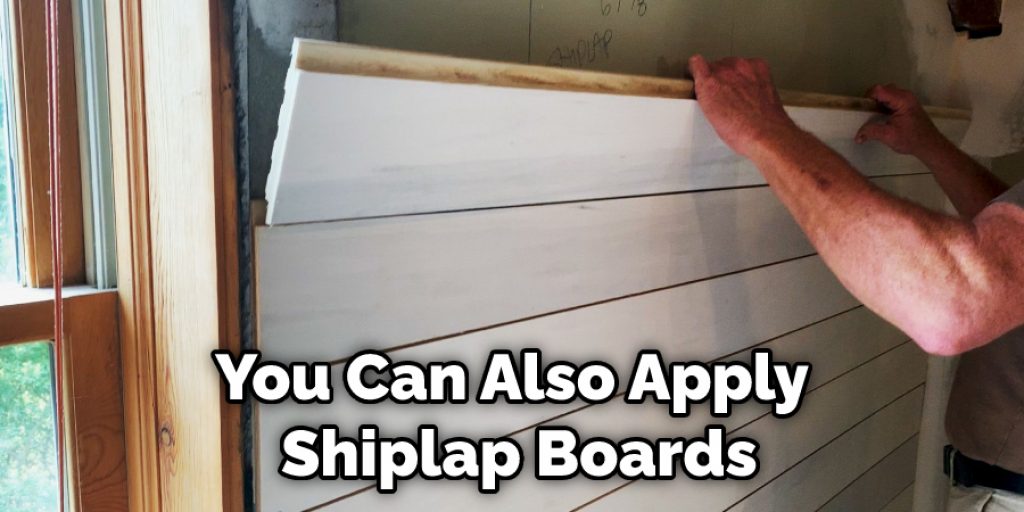
Step Four: Measure and Cut Shiplap Boards
You should measure and cut a piece of shiplap siding to fit each wall, so that each board covers a wood stud. You can mark the measurement on the board before you buy it, so that you know it will fit. If you need to make any adjustments later, you can always cut away from or add to a particular board.
You must then measure from the ceiling down to the bottom of the wood stud on the other side and mark that as a point. Once you have cut shiplap boards to fit each wall of your house, you can install them by simply screwing them onto each wood stud with screws.
Be sure to use exterior grade screws for this step, as they will be used to secure shiplap siding onto your walls. An exterior grade screw should have a washer that has been preinstalled to prevent moisture from seeping into the hole and can typically handle being exposed to rainwater for extended periods.
Step Five: Apply Sealant to Siding
Once you have finished installing shiplap siding over your walls, you should apply a sealant to the exposed side of each board. You can also do this before installing shiplap boards on your wall by simply painting the exposed surfaces of each board with texture spray paint.
However, if you have shiplap siding already installed on your walls, you may apply the sealant using a paintbrush. Be sure to read any instructions that come with spray paint or sealants before applying them to ensure proper use and safety.
The last step is to allow all of the sealant or texture spray paint to dry as directed by the instructions on the package. Then, your shiplap siding should be complete, and you will have a beautiful exterior wall to enjoy. This will help in how to install shiplap over plaster walls.
Step Six: Keep Walls Moisture Free
Now that you have installed shiplap siding in your home, there are several steps that you must take to help keep the outside walls of your house moisture-free. One step is maintaining proper drainage around your house. You should remove all obstructions from surrounding soil, then ensure that the ground slopes down away from your house at a very gradual angle, if not completely flat. This will allow water to drain away from your house and not pool up around its foundation.
This will allow water to flow away from the foundation of your home. It is also important that you seal all cracks in cement or brick on your exterior walls. Use waterproof caulk for them instead of any other type of adhesive. You should apply a bead of caulk to these cracks, then allow it to dry before filling them with grout.
Finally, you should install gutters on your house if they are not already there. Install the gutters at least 10 feet away from any exterior walls of your home. If you do not have shiplap siding installed on your house yet, you should consider it to help keep moisture and water away from your walls.
Step Seven: Cleaning Shiplap Boards
After installing shiplap siding over your walls, you must regularly clean the shiplap boards to keep them looking nice. First, remove any dirt on the surface of the boards using a broom. Then, apply some liquid soap to a sponge or rag and dampen it with water.
Wipe the liquid soap onto the shiplap boards, and scrub with a circular motion to clean them. Next, rinse the soapy sponge or rag with water and wipe away any excess soap bubbles left on the surface of each shiplap board. You can then use a hose to rinse your boards off, but be careful not to direct the hose too close to any seams where shiplap boards are joined together.
This is important in how to install shiplap over plaster walls. Then, allow your boards to dry before utilizing them again fully. Some homeowners choose to apply a product called Enduro-Var after cleaning their shiplap boards using soap and water.
Step Eight: Maintain Exterior Siding
To properly maintain your exterior shiplap siding, you should always check for any signs of weather damage. Look closely at the surface of each board for cracks or gaps that may have formed over time. These can be fixed by applying a small bead of caulk into the crack or gap using a caulk gun, then smoothing it with a putty knife.
You can also apply shiplap boards over this area if there is enough room for the seams to be adequately covered. If you notice any parts of your shiplap siding that have started to rot or become weathered, then you should cut those pieces off using a circular saw.
You can check it to Stop Couch From Hitting Wall.
Conclusion
The process is fairly simple. First, you’ll need to remove the old plaster from your walls using a wire brush or other abrasive device. Next, use an adhesive to secure the tongue-and-groove boards in place on your wall and then attach them with nails that are spaced 12 inches apart at each corner of the board.
Once this has been done, apply another coat of paint to give it a fresh look! With just these few steps completed, you can be the proud owners of shiplap-style living room walls without all the work involved in creating them yourself! The article has been a good guide on how to install shiplap over plaster walls.
You may also read this – How to Get Plaster Dust Out of Carpet .


