If you’ve ever drywalled a garage, you know that it’s not the easiest of projects. But with a few simple tips, you can have your garage looking like new in no time! This blog post will show you how to insulate and drywall a garage. So read on for all the details!
Why Insulate and Drywall a Garage?
Any homeowner knows that the garage is one of the most versatile rooms. It can be used for car parking, store tools and lawn equipment, or even serve as a workshop.
However, many people don’t realize that the garage can also be a valuable source of extra living space. By insulating and drywalling the garage, you can create a comfortable and stylish room that can be used for entertaining, working out, or as an extra bedroom for guests.
This will add value to your home, but it will also make your life more convenient and enjoyable. So if you’re thinking about making some changes to your garage, don’t forget to consider insulating and drywalling. It’s a great way to add value to your home and make your life more comfortable.
How to Insulate and Drywall a Garage Step by Step Guide
Step 1: Remove Anything Mounted to The Walls
Takedown any hooks, nails, or screws mounted into the garage walls. You will be adding new drywall over top of the old, so anything mounted into the current wall needs to be removed.
Step 2: Clear the Walls for the Insulation
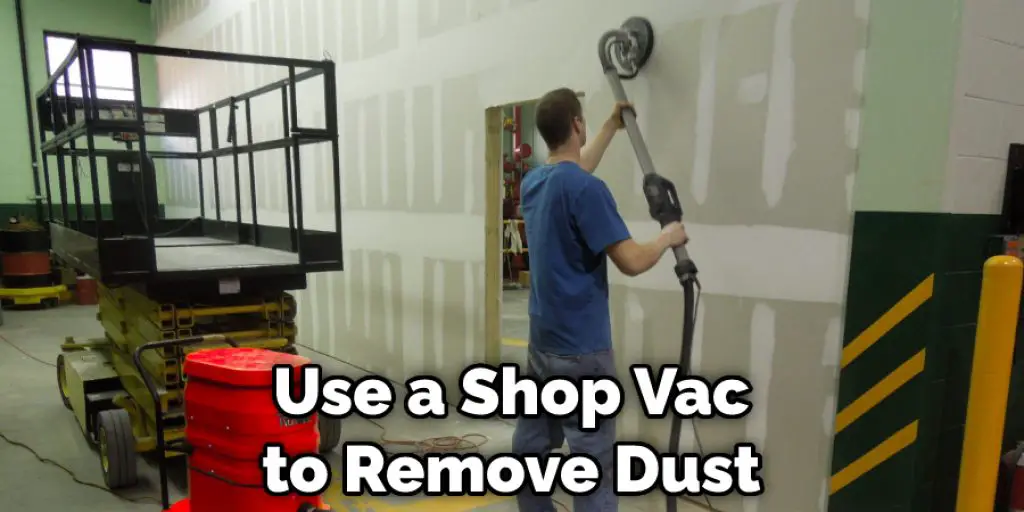
Before you can insulate, remove everything from the walls that will be in the way, including any shelving, hooks, nails, or other objects. If there are any electrical outlets or switches, you’ll need to remove them. Once the walls are clear, use a shop vac to remove dust or debris.
Step 3: Seal Any Cracks or Gaps Along the Exterior Wall
To keep your garage well insulated, it’s important to seal any cracks or gaps along the exterior wall. You can do this by caulking around windows and door frames and any gaps between the wall and the foundation. This will help prevent drafts from coming into the garage and add an extra layer of protection against moisture and pests.
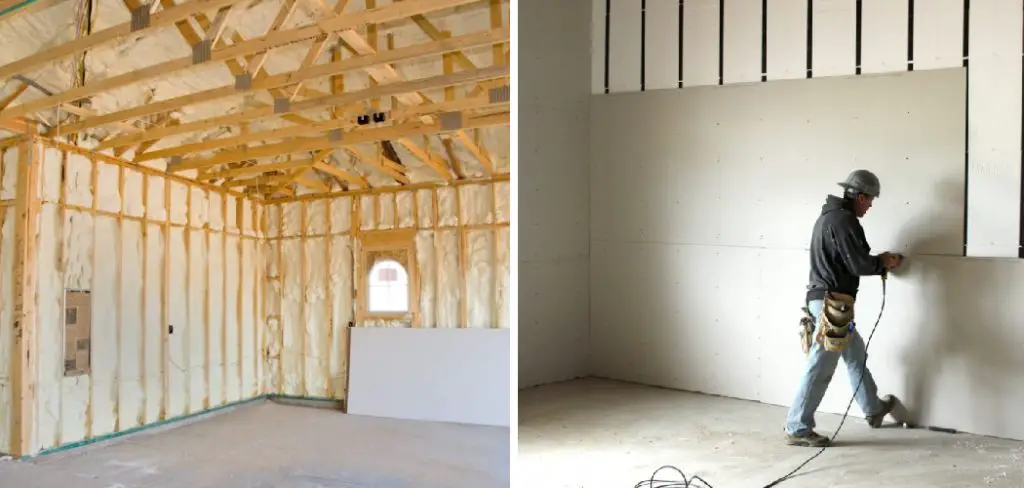
Step 4: Install Fiberglass Insulation
If you choose to use fiberglass insulation, you will need to install it before you can drywall the garage. Start by measuring the width and height of the garage walls. Then, cut the insulation to size using a utility knife.
Next, fit the insulation into the stud cavity and secure it with metal staples. Once the insulation is in place, you can move on to drywalling the garage.
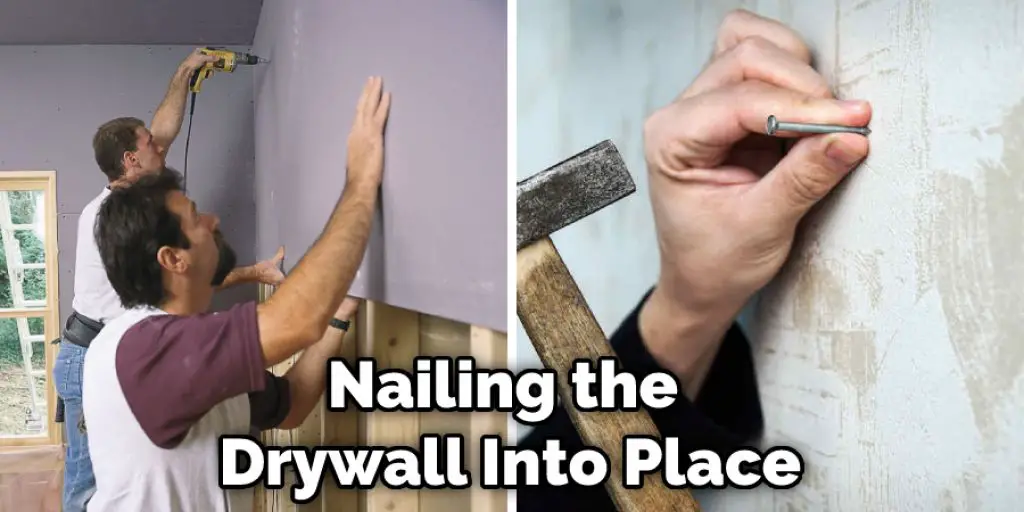
Step 5: Hang Drywall
Once the insulation is installed, you can move on to hanging the drywall. Start by measuring and cutting the sheets to size, then use a drywall lift to hoist them into place. Screw the drywall into the studs using 1-1/4″ screws spaced every 8″ along the edges and 12″ in the field. Apply a layer of drywall compound over the joints and screw heads, then tape and texture the walls as desired.
Step 6: Cover the Insulation With Drywall
Cover the insulation with drywall using drywall screws. Every 4 feet or so, place a screw through the drywall and into a stud. Be sure to use washers on the screws to create a stronger connection. If you are using 1/2 inch drywall, use 1-1/4 inch screws. If you are using 5/8 inch drywall, use 1-3/8 inch screws.
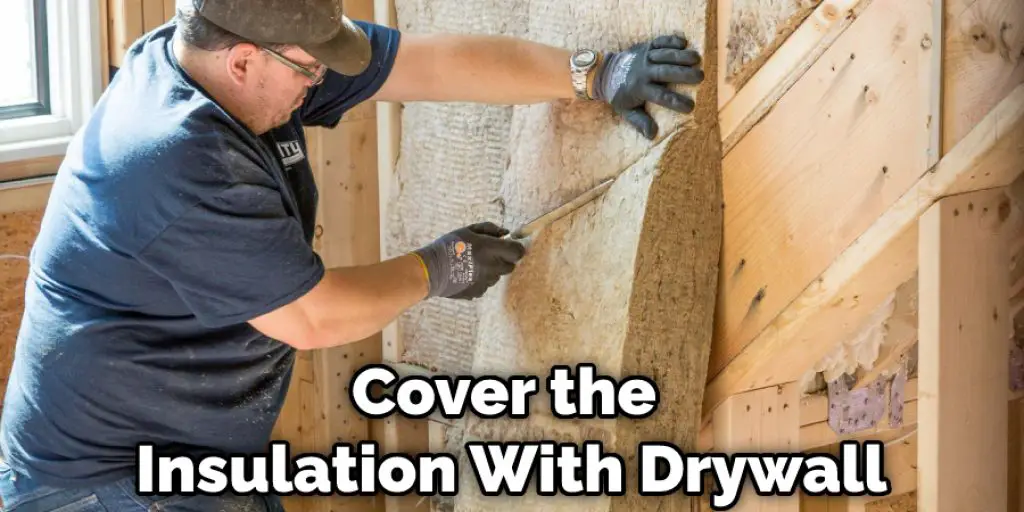
Start at the bottom of the garage and work your way up. Ensure the drywall sheets are tight against each other to avoid gaps. Also, make sure the screws are not too close to the edge of the drywall, as this can cause the drywall to crack.
Once all the drywall is in place, tape, and mud the seams. Start by applying a layer of joint compound (or mud) to the seams with a 6-inch joint knife. Then, lay a strip of joint tape over the mud and apply another layer of mud over the tape. Allow the mud to dry for 24 hours before sanding it smooth.
Step 7: Add Trim and Finishing Touches
To finish your garage, add any trim or finishing touches you desire. You may want to install baseboards, crown molding, or wainscoting. You may also want to paint or stain the trim to match the rest of your home. Once the trim is in place, you can add any shelving, hooks, or other objects you removed earlier.
Now that you know how to insulate and drywall a garage, you can do the same for your home. Just follow the same steps outlined above, and you’ll be able to finish the job in no time.
How to Insulate a Garage Ceiling?
If you have a garage attached to your home, chances are the ceiling is not insulated. This can be a problem during the winter months, as the heat from your home will escape into the garage, making it cold and uncomfortable. Luckily, insulating a garage ceiling is a fairly easy process that anyone can do. Here are the steps you need to take:
- First, you need to determine how much insulation you will need. This can be done by measuring the square footage of your garage ceiling. Once you have this number, multiply it by the R-value of the insulation you want to use. The R-value is a measure of how well the insulation will work. The higher the R-value, the better the insulation will be.
- Next, you need to purchase the insulation. You can find this at most home improvement stores. Make sure to get the correct type of insulation for your garage ceiling. If you are not sure, ask a salesperson for help.
- Once you have the insulation, you need to cut it to size. This can be done with a sharp knife or a pair of scissors. Make sure the pieces fit snugly together, so there are no gaps.
- Now, you need to attach the insulation to the ceiling. You can do this by using construction adhesive or nails. Again, start at one end of the garage and work your way to the other.
- Finally, you need to cover the insulation with drywall. This can be done by screwing or nailing the drywall into place. Once it is up, you can tape and mud the seams just like you would with any other drywall project. Keep reading for more information about how to insulate and drywall a garage.
How to Insulate a Garage Door?
If you have a garage door that opens and closes frequently, it is important to ensure that it is properly insulated. A well-insulated garage door will help keep the temperature in your garage consistent, which can protect your belongings from temperature damage.
There are two main ways to insulate a garage door: batting or spray foam. Here is a brief overview of how to insulate a garage door with each method:
Batting Insulation:
- Measure the height and width of your garage door.
- Cut pieces of batting to size using these measurements. Make sure that the batting is slightly smaller than the door to fit snugly.
- Install the layer of batting by stapling it to the top of the door.
- Trim any excess batting from around the edges of the door.
- Close the door and test it to ensure that it is properly insulated.
Spray Foam Insulation:
- Begin by cleaning the surface of the garage door. Use a clean rag to remove any dirt, dust, or debris on the door.
- Next, measure the door to determine how much insulation you will need.
- Once you have the proper insulation, cut it to size and fit it into the door frame.
- Use a caulk gun to apply a bead of sealant around the perimeter of the door frame.
- Press the spray foam insulation into the door frame, filling all gaps and spaces.
- Allow the sealant to dry for 24 hours before painting or staining the door.
Can You Use Drywall in An Unheated Garage?
If you are insulating and drywalling an attached garage that is unheated, you need to take special precautions to ensure the drywall does not get damaged by the cold temperatures. Here are a few tips:
- Use 1/2″ or 5/8″ thick fire-rated drywall instead of standard 1/2″ drywall. Fire-rated drywall is more resistant to moisture and temperature fluctuations.
- Use a vapor barrier behind the drywall. This will help prevent moisture from seeping through and damaging the drywall.
- Apply a layer of polyethylene film over the studs before installing the drywall. This will further help to prevent moisture damage.
- Use screws instead of nails to attach the drywall to the studs. Screws are more resistant to temperature fluctuations and will not pop out as easily as nails.
- Make sure all seams in the drywall are properly sealed with tape and joint compound. Sealing the seams will help prevent moisture from seeping through.
Frequently Asked Question
Should I Put Drywall in My Garage?
Whether or not to put drywall in your garage is a question you will have to answer for yourself. Some factors to consider include how much you want to spend, how much insulation you currently have, and how much work you’re willing to do. If you decide to put up drywall, it’s important to ensure that the job is done correctly so that your garage is well-insulated and protected from the elements.
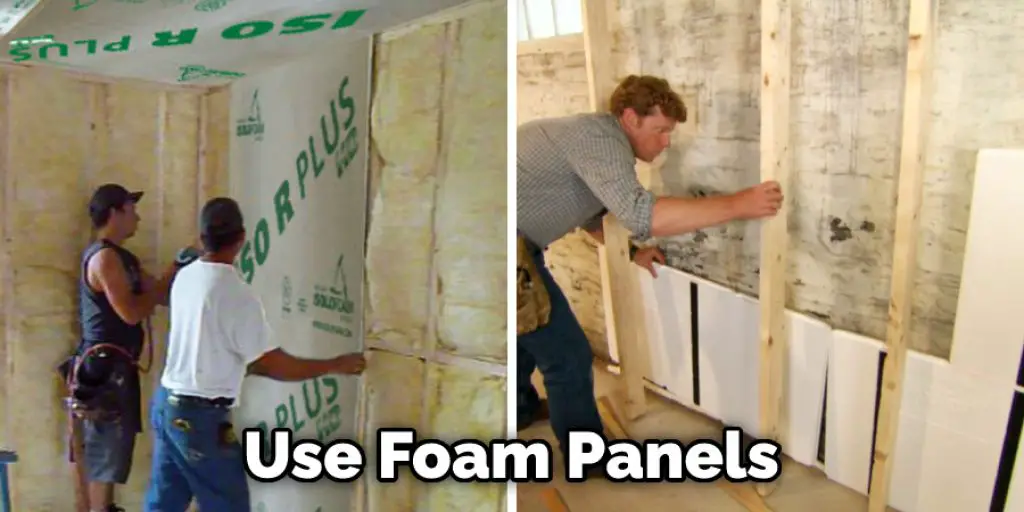
What Is the Easiest Way to Insulate a Garage?
There are a few different ways that you can insulate a garage. The easiest way is to use foam panels. You can either buy them or rent them. The panels are installed by screwing them into the framing of the garage. The panels will fill the gaps and create an airtight seal.
You Can Check It Out To Attach Sheet Metal to Drywall
Conclusion
So, there you have it! The basics of how to insulate and drywall a garage. If you follow these simple steps, you’ll be able to get your garage in shipshape in no time at all. Have any questions or tips of your own? Let us know in the comments below!


