How to Make a Bowl out Of Polymer Clay
Polymer clay is an oven-bake modeling clay made from polyvinyl chloride (PVC) particles. It usually contains other ingredients that make it softer and easier to work with. You can find it in craft stores in a wide variety of colors. In this tutorial, we’ll show you how to make a bowl out of polymer clay.
What Is Polymer Clay?
Polymer clay is a modeling clay made from polyvinyl chloride (PVC) and a plasticizer. It is soft and pliable when first mixed but hardens when heated. Polymer clay can be found in a wide variety of colors and can be easily molded into any shape.
It is non-toxic and does not require the use of any special tools or equipment. Polymer clay is perfect for crafting small figurines, jewelry, ornaments, and other decorative items.
Unlike traditional ceramic clay, polymer clay does not need to be fired in a kiln – simply bake it in a conventional oven to set the shape. This makes it an ideal medium for beginners, as it is easy to use and relatively forgiving. With a little practice, anyone can create beautiful and unique art pieces from polymer clay.
Why Should You Make a Bowl out Of Polymer Clay?
Polymer clay is a material that has many benefits for those who enjoy crafting. It is easy to work with, requires no special tools or equipment, and is very versatile. Polymer clay can be used to create a wide variety of objects, from jewelry to sculptures.
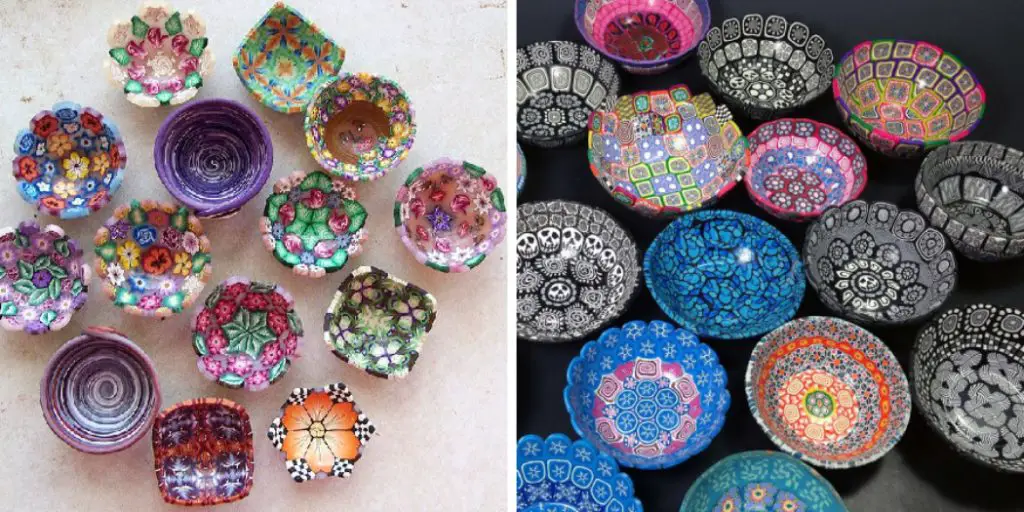
Perhaps one of the most practical uses for polymer clay is creating bowls. Bowls made from polymer clay are strong, durable, yet lightweight and easy to handle.
They can be used for various purposes, from holding keys and coins to serving snacks and salads. Best of all, polymer clay bowls can be customized to match any decor. So whether you prefer a colorful and whimsical design or a more elegant look, you can create a perfect bowl for your home. So why not give it a try? You may be surprised at just how easy and fun it is to make your own polymer clay bowls.
What You’ll Need
- 1 block of white polymer clay
- 1 block of brown polymer clay
- Sculpey III oven bake clay kit
- Rolling pin
- Knife
- Oven
- Bowl mold or a bowl turned upside down
7 Steps to Follow on How to Make a Bowl out Of Polymer Clay
Step 1: Choose Your Polymer Clay
The first step is to choose the right polymer clay for your project. There are many different brands and types of polymer clay available on the market, so it’s important to do your research and select the best clay for your needs. If you’re unsure where to start, ask a salesperson at your local craft store for help. Once you’ve chosen your clay, it’s time to start your project!
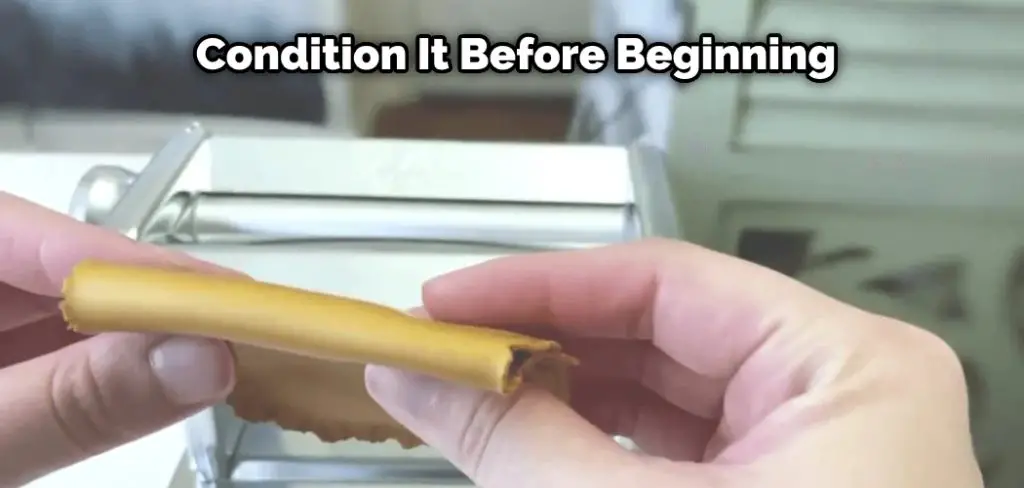
Step 2: Condition Your Clay
Once you have your clay, it’s important to condition it before beginning to work with it. This will make it more pliable and easier to work with. There are many ways to condition polymer clay, but the most common method is to simply knead it with your hands until it’s soft and pliable. If the clay feels too hard or stiff, you can add a small amount of water or petroleum jelly to help soften it up.
Step 3: Roll Out Your Clay
Once your clay is conditioned, it’s time to start shaping it into a bowl. First, roll out the clay into a long, thin strip using a rolling pin. The thickness of your strip will determine the thickness of your bowl, so make sure to roll it out evenly. Once you have a long, thin strip of clay, begin wrapping it around itself in a spiral motion until you have formed a bowl shape. Ensure the edges are sealed well, so your bowl is watertight.
Step 4: Bake Your Bowl
Now that your bowl is formed, it’s time to bake it so that it hardens and becomes durable. First, preheat your oven according to the directions on your clay package, then place your bowl inside and let it bake for the recommended amount of time. Once finished baking, remove your bowl from the oven and let it cool completely before handling.
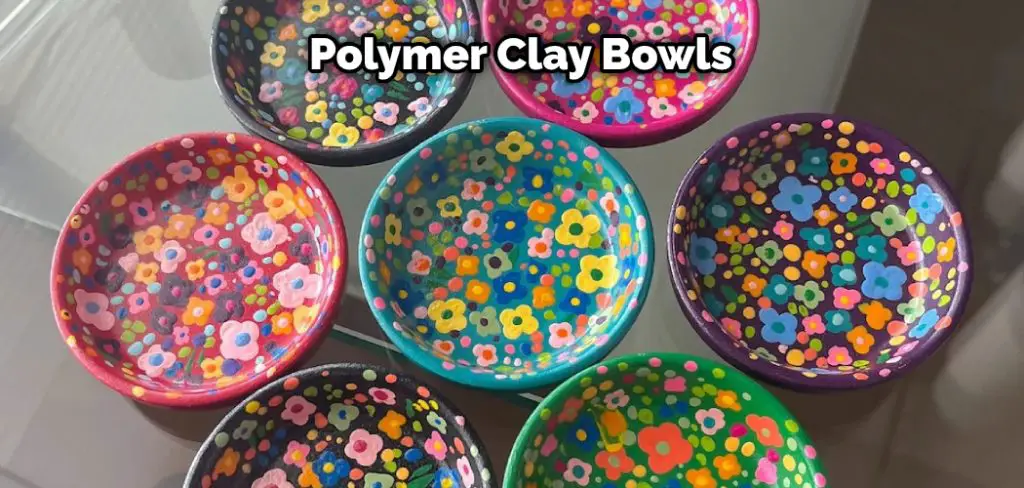
Step 5: Decorate Your Bowl
Now that your bowl is complete, it’s time to decorate it! You can use various techniques to add color and pattern to your bowl. One popular method is to use stamps or stencils to create patterns in the clay. Another option is to paint your bowl with acrylic paints. So get creative and have fun with it!
Step 6: Seal Your Bowl
Once you’re finished decorating your bowl, it’s important to seal it so that the colors don’t fade over time. You can use a clear acrylic sealer or a polymer clay varnish for this. Simply brush on a thin layer of sealer or varnish and let it dry completely.
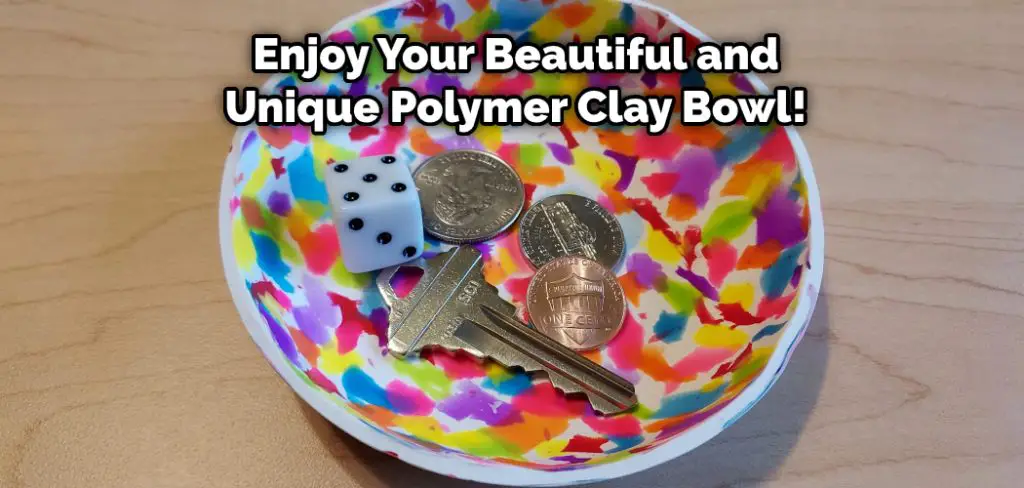
Step 7: Enjoy Your Bowl!
Your bowl is now complete and ready to use! Fill it with keys, coins, candies, or anything else you can think of. Or, use it as a serving dish for snacks and salads. Whatever you do with it, enjoy your beautiful and unique polymer clay bowl!
That’s it! You’ve now learned how to make a bowl out of polymer clay. So give it a try and see how easy and fun it is! You may be surprised at just how creative you can be with this versatile material. With a little practice, you’ll be able to make all sorts of different shapes and designs. So get started today and see what you can create!
Different Ways to Use Polymer Clay Bowls in Your Crafting Projects
Polymer clay is a versatile medium that can be used to create a wide variety of objects, from jewelry to home decor. One of the most popular things to make with polymer clay is bowls. Bowls can be used as storage containers, planters, or even serving dishes.
They can be decorated in endless ways, making them a perfect project for crafters of all skill levels. When it comes to bowl crafting, the sky is the limit. Below are just a few ideas to get you started.
One simple way to decorate a bowl is to add a pattern using stamps or stencils. You can also use acrylic paint or ink to create more complex designs. Try adding some mica powder or glitter before the clay dries for an extra shimmer. Another popular technique is known as “cane work,” which involves forming long rods of clay and then slicing them into thin discs.
These discs can then be applied to the bowl’s surface in any design you like. The possibilities are endless! Whether you’re a beginner or a seasoned pro, there’s no wrong way to craft with polymer clay bowls.
How to Add Texture and Detail to Your Polymer Clay Bowls
Applying texture to your bowls can give them an added dimension of interest and charm. There are many ways to add texture, but one of the easiest is to use a simple kitchen utensil such as a rubber spatula.
Start by lightly pressing the flat side of the spatula into the clay. Then, use the back of the spatula to create swirls and patterns. To add texture, you can also use other items such as forks, toothpicks, or even your fingers.
Just be sure to experiment on a scrap piece of clay first so that you don’t ruin your bowl. Once you’re happy with the texture, you can then bake the clay according to the manufacturer’s instructions. After it’s cooled, you’ll have a uniquely textured bowl that is perfect for serving snacks or displaying treats.
Conclusion
Making a bowl out of polymer clay is a fun and easy project that anyone can do at home with just a few simple supplies. By following these four easy steps, you’ll be able to create a beautiful and unique bowl that will be the envy of all your friends. Thanks for reading our post about how to make a bowl out of polymer clay.
You Can Check it Out to Clean Ceramic Bowl


