How to Make a Homemade Bed Fan
Summertime is the perfect time to catch up on your sleep. However, it can be hard to get a good night’s sleep with the hot weather outside. A bed fan can help circulate air around your body and keep you cool while you sleep. In this blog post, we will teach you how to make a homemade bed fan using materials that are easy to find. So stay cool and comfortable all summer long with this easy hack.
Why You Need a Bed Fan
There are many benefits to using a bed fan, especially during the summer months. A bed fan can:
Help Circulate Air Around Your Body
The hot air outside can make breathing difficult, especially at night. A bed fan can help circulate the air around your body and make it easier to breathe. Also, circulate air around your room by opening the windows and doors to create a cross breeze.
Keep You Cool
A bed fan can also help keep you cool while you sleep. The circulating air will evaporate the sweat on your skin and help keep your body temperature down. Keep a bed fan on your nightstand to use whenever you need it.
Reduce Allergies
If you suffer from allergies, a bed fan can help reduce the number of allergens in your room. The circulating air will filter out the allergens and help you breathe easier. It’s important to clean your bed fan regularly to prevent the buildup of allergens.

Help You Sleep Better
If you are struggling to sleep due to the heat, a bed fan can help. The circulating air will help you stay cool and comfortable, so you can fall asleep and stay asleep all night long. Sleep is essential for your health and wellbeing, so make sure you get enough of it during the summer months.
Save Money on Your Energy Bills
During the summer, your air conditioner has to work overtime to keep your home cool. This can lead to high energy bills. A bed fan can help reduce your energy usage and save you money on your bills.
Things You’ll Need
- 1 box fan
- 1 piece of plywood
- 4 furniture legs
- 1 drill
- 4 screws
- 4 washers
- 4 nuts
Step by Step How to Make a Homemade Bed Fan
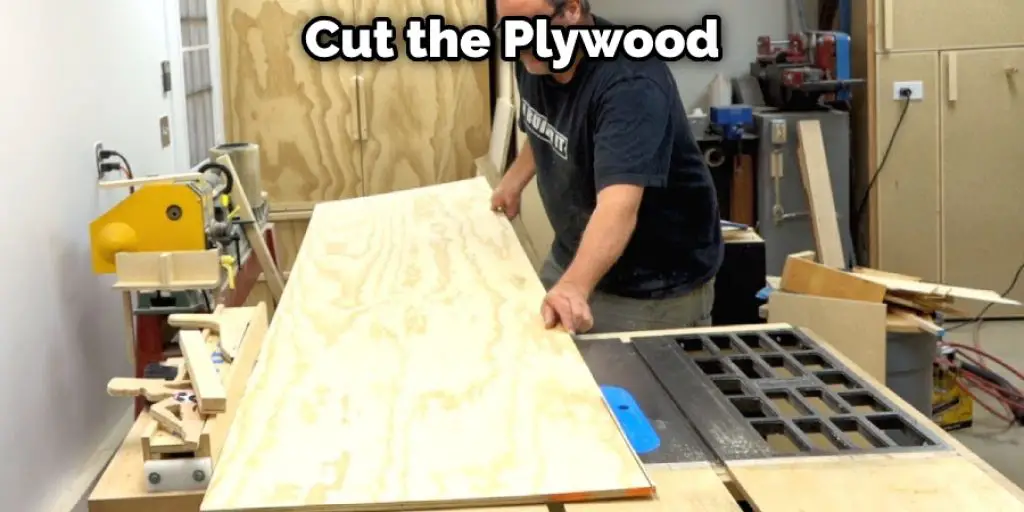
1. Cut the Plywood
The first step is to cut the plywood. You will need to measure and mark the plywood according to the size of your box fan. To do this, measure the length and width of your box fan. Then, use a pencil to mark the plywood where you will need to cut it. If you don’t have a saw, you can ask your local hardware store to cut the plywood for you.
2. Cut the Legs
Next, you will need to cut the furniture legs. You will need four legs that are the same height. Use a saw to cut the legs at the desired height. Make sure that the cuts are straight and even. If they are not, the fan will not be stable.
3. Attach the Legs
Now, it’s time to attach the legs to the plywood. First, predrill holes for the screws. Then, use screws and washers to attach the legs to the plywood. If the holes are not perfectly aligned, you can use a drill bit to enlarge them. Be sure to screw the legs in tightly so that they are secure.
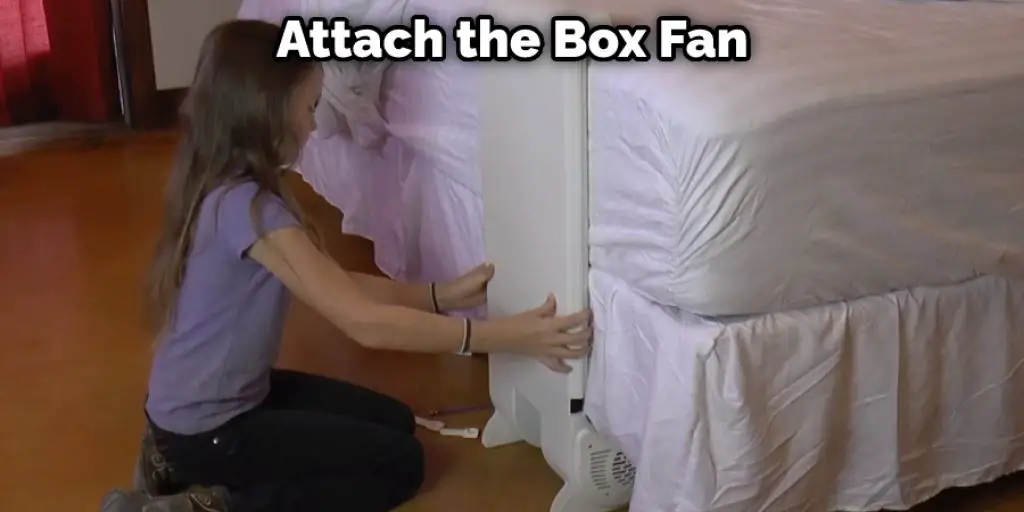
4. Attach the Fan
The next step is to attach the box fan to the plywood. First, find the center of the plywood and mark it. Then, find the center of the fan and mark it. Line up the two marks and trace the outline of the fan onto the plywood. If your fan has screws on the back, you can use these to attach it to the plywood.
Otherwise, you can use a drill and screws to attach it. Just make sure the screws are long enough to go through the plywood and into the fan.
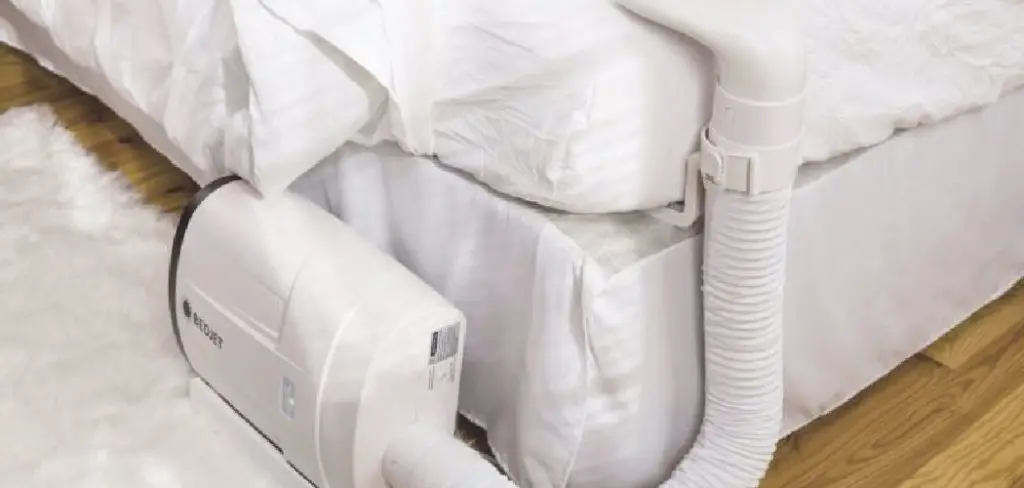
5. Attach the Pipe
Now, it’s time to attach the pipe to the plywood. First, find a drill bit that is slightly smaller in diameter than the PVC pipe. You will also need a saw to cut the pipe to size. Cut the pipe so that it is about 2 inches shorter than the length of the plywood. Next, drill a hole in the center of the plywood. The hole should be big enough for the PVC pipe to fit through snugly. Once the hole is drilled, insert the PVC pipe into it.
6. Cut the Holes
The next step is to cut the holes for the bed fan. You will need two holes: one for the PVC pipe and one for the power cord. For the PVC pipe, use a hole saw to cut a 2-inch hole in the center of the bottom of the bed frame. For the power cord, use a drill to make a hole large enough to fit the power cord through. Drill the hole in the side of the bed frame, near the bottom.
7. Drill the Holes
Now, it’s time to drill the holes for the screws. Drill four holes in the corners of the plywood. Make sure that the holes are large enough for the screws to go through easily. To do this, use a drill bit that is slightly smaller than the screws. If the holes are too big, the screws will not be able to grip, and they will just spin in place.

8. Screw in the Fans
Now, it’s time to screw in the fans. Begin by screwing in two screws into each of the corners. Ensure that the screws are going into the wood, not just the drywall. Then, take your fans and screw them in to the screws. Be careful not to over-tighten the screws, or you may strip them. If they are too loose, the fans will not be secure and they may fall off.
9. Add the Washers
Now, it’s time to add the washers. If you have them, you can use flat washers. Otherwise, you can use fender washers, which are a little thicker. In either case, you’ll need four washers that fit snugly around the bolts. Once you have the washers, thread them onto the bolts, and then screw on the nuts. Be sure to tighten the nuts securely. If they’re too loose, the blades will wobble, and the fan won’t work properly.
10. Hang the Fan
Now, it’s time to hang the fan. Start by finding a stud in the wall. Then, use a drill to make a hole in the wall where the stud is. Next, use a screw to secure the bracket to the wall. Finally, hang the fan on the bracket. Use a second screw to secure the fan to the bracket if you need to.
11. Test and Use the Fan
Now, it’s time to test the fan. Plug it in and turn it on. If everything is working properly, the fan should start blowing air. If it doesn’t, check the connections and make sure that everything is secure. Once you’ve confirmed that the fan is working, you can use it to cool off your bed. Adjust the settings until you find a comfortable level of airflow. If you need to, you can also use a second fan to cool off the other side of the bed.
You Can Check It Out to Turn Off Ceiling Fan Without Chain
How Much Does It Cost to Make a Homemade Bed Fan?
The cost of making a homemade bed fan will vary depending on the materials you use. In most cases, you should be able to find everything you need for around $30. However, the cost may be slightly higher if you need to purchase new tools. The good news is that bed fans are relatively inexpensive, so even if you do have to buy new materials, the cost will still be lower than buying a commercial bed fan.
Tips and Warnings on How to Make a Homemade Bed Fan
Tips:
- Be sure to use a sturdy box fan.
- Make sure the box fan is not too small for your bed.
- Choose a location for your bed fan that will allow you to access the controls easily.
- Be sure to use an extension cord that is long enough to reach from the outlet to your bed.
- Be sure to turn off the fan when you are not using it.
Warnings:
- Be careful not to overload the circuit by plugging in too many devices.
- Do not use a bed fan if you are pregnant or have small children.
- Do not use a bed fan if you have respiratory problems.
- Do not use a bed fan if you are allergic to dust.
- Do not use a bed fan if you have any other medical conditions that could be aggravated by exposure to dust.
Conclusion
Bed fans are a great way to keep cool while you sleep and make it easy to make yourself. In this post, we’ve shown you how to make a homemade bed fan. So why not give it a try? Once your homemade bed fan is set up, you may never want to go back to sleeping without one again. If you have any tips or warnings of your own, please share them in the comments below. Thanks for reading!


