Barbecue is one of the best summer activities. There’s nothing quite like gathering with friends and family to enjoy good food and company. However, if it’s raining, your barbecue party might not be as fun. But don’t worry – with a little bit of creativity, you can make a BBQ rain shelter that will keep you and your guests dry! In this article, we’ll show you how to make bbq rain shelter. Check out these easy tips to get started.
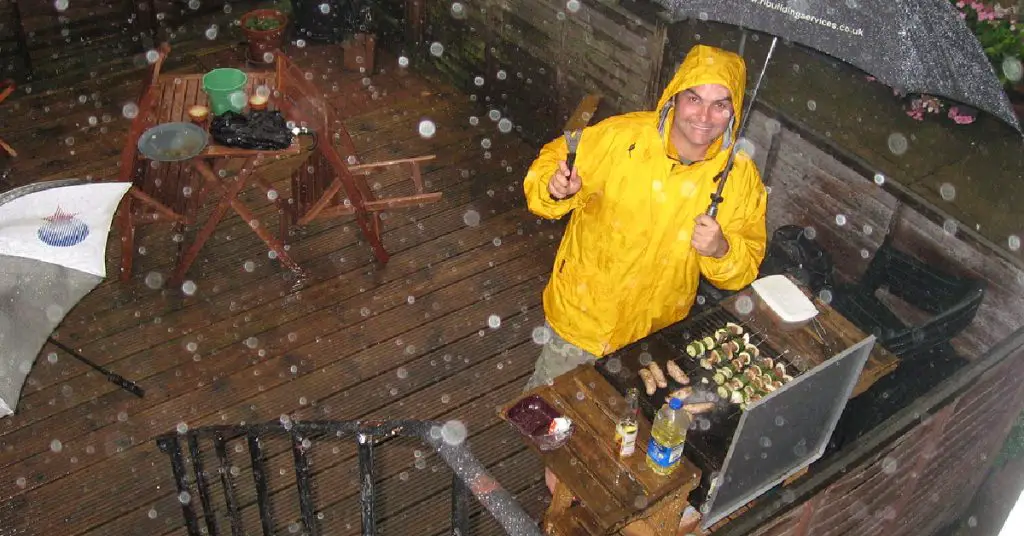
When the rain starts to pour just as we’re about to light the grill, we all know that feeling. But with a little bit of preparation, you can still enjoy your barbecue party – rain or shine! However, many people don’t realize that making a rain shelter for their barbecue is easy. With a few simple supplies, you can create a space that will keep you and your guests dry while enjoying the best summertime activity!
A Step by Step Guide on How to Make Bbq Rain Shelter
Step 1: Determine What Type of Shelter You Need
The first step in creating your BBQ rain shelter is determining what type of shelter you need. There are three main types of shelters: temporary, semi-permanent, and permanent.
Temporary shelters are typically made out of tarpaulins or other light materials that can be easily set up and taken down. These shelters are ideal for small gatherings or if you only plan to use the shelter occasionally.
Semi-permanent shelters are more sturdy than temporary ones but can still be taken down when not in use. These shelters are typically made out of metal or PVC pipes and tarps. They provide more protection from the elements than a temporary shelter but can still be taken down when not needed.

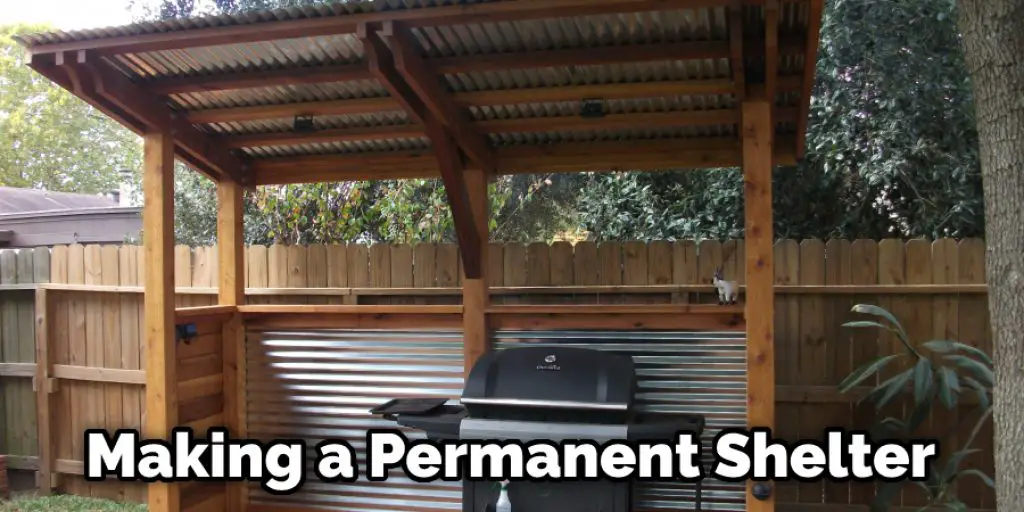
Permanent shelters are the most heavy-duty and are meant to be left up. These shelters are typically made of metal or stone and have a concrete foundation. Permanent shelters provide the most protection from the elements but are also the most expensive and challenging to set up.
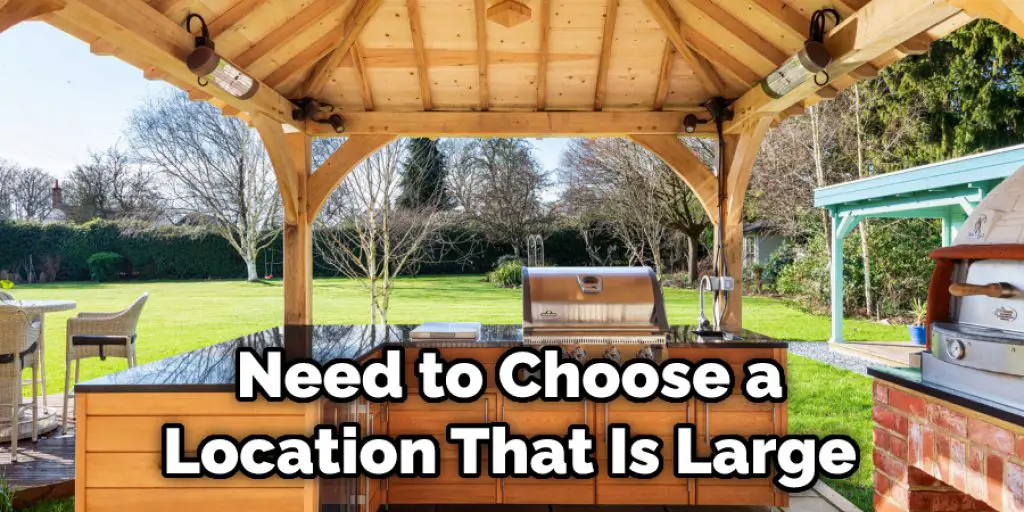
Step 2: Choose a Location for Your Shelter
Once you have determined what type of shelter you need, you need to choose a location for it. The location of your shelter will depend on a few factors, such as the size of your shelter, the type of shelter, and where you plan on using it.
If you are planning on using your shelter for cooking, you will need to choose a location with enough space for a grill and picnic table. You will also need to ensure that the location has access to electricity and water.
If you are planning on using your shelter for relaxing, then you will need to choose a location that is large enough for furniture and has good drainage. You will also need to make sure that the location is close to your house to get to it easily in case of bad weather.
Step 3: Choosing What Materials to Use
Now that you have chosen a location for your shelter, you need to choose what materials you will use. The type of materials you use will depend on the kind of shelter you are making.
You will need tarpaulins or other light materials that can be easily set up and taken down for a temporary shelter.
For a semi-permanent shelter, you need metal or PVC pipes and tarps. These materials will provide more protection from the elements than a temporary shelter but can still be taken down when not required.
You will need metal or stone and a concrete foundation for a permanent shelter. Permanent shelters provide the most protection from the elements but are also the most expensive and challenging to set up.
Step 4: Gather the Materials You Need for Semi-permanent Shelter
If you have decided to build a semi-permanent shelter, you will need to gather the materials you need. For this type of shelter, you will need:
- Metal or PVC pipes
- Tarps
- Cable ties
- Hammer
- Drill
- Screws
Step 5: Prepare the Location
Once you have gathered all of the materials you need, you will need to prepare the location. This step is only necessary if you are making a permanent shelter.
You will need to dig a hole for the foundation for a permanent shelter. The hole should be about 6 inches (15 cm) deep and 3 feet (1 m) wide. Once the hole is dug, you will need to fill it with concrete.
If you are making a semi-permanent shelter, you will not need to prepare the location.
Step 6: Measure and Cut the Pipes
Once the location is prepared, you will need to measure and cut the pipes. The length of the pipes will depend on the size of your shelter.
You will need four 10-foot (3 m) pipes for a small shelter. You will need six 10-foot (3 m) pipes for a medium shelter. Finally, you will need eight 10-foot (3 m) pipes for a large shelter.
After you have determined how many pipes you need, you will need to cut them to the correct length. To do this, you will need a saw.
Step 7: Start Assembling the Frame
After the pipes are cut, you will need to assemble the frame. You will need to connect the pipes using the screw and drill to do this.
Start by connecting two of the 10-foot (3 m) pipes. Then, take another 10-foot (3 m) pipe and connect it to one of the ends of the first two pipes. Repeat this process until all of the pipes are connected.

Step 8: Connect the Frame to the Foundation
Once the frame is assembled, you will need to connect it to the foundation. If you are making a semi-permanent shelter, you will use screws to attach the frame to woodblocks.
If you are making a permanent shelter, you will use bolts to attach the frame to the concrete foundation.
Step 9: Cover the Frame with Tarps
After the frame is attached to the foundation, you must cover it with tarps. To do this, you will need to measure the tarp to be slightly larger than the frame.
Once the tarp is measured, you will need to cut it to size. After the tarp is cut, you will need to attach it to the frame using cable ties.
Step 10: Add a Door and Windows
Once the shelter is covered with tarps, you will need to add a door and windows. You can use zip ties or rope to create an entry for a temporary shelter.
For a semi-permanent or permanent shelter, you must purchase a door and install it.
Windows can be made by cutting holes in the tarps. However, if you are making a semi-permanent or permanent shelter, you must purchase windows and install them.
Step 11: Add a Roof
This step is to add a roof. For a temporary shelter, you can use tarps or plastic sheeting. For a semi-permanent or permanent shelter, you must purchase a roof and install it.
Step 12: Lighting and Ventilation
After the roof is installed, you will need to add lighting and ventilation. For a temporary shelter, you can use battery-operated lanterns or candles.
For a semi-permanent or permanent shelter, you must install light fixtures and vents.
Now that you know how to make a bbq rain shelter, you can protect your grill from the elements. This will allow you to enjoy grilling all year round.
Tips and Advice:
- Make sure that the shelter is big enough to fit all of your guests comfortably.
- If you’re using a tarp, make sure that it is properly secured so that it doesn’t blow away in the wind.
- Be sure to have plenty of food and drinks on hand so that your guests can stay hydrated and fed while they wait out the storm.
- Have some fun activities planned so that everyone can stay entertained while they wait for the rain to stop.
- Most importantly, relax and enjoy yourself! Making Bbq Rain Shelter is a great way to spend time with friends and family while enjoying delicious food.
Maintain Your Bbq Rain Shelter
- Invest in a quality bbq rain shelter. This will be one of the best investments you make for your grilling needs.
- Keep your grill covered when not in use. A good cover will help protect your grill from the elements and keep it clean.
- Clean your grill regularly. Once every week or two should do the trick. Simply remove the grates and brush them down with soapy water.
- Check for rust regularly. If you see any rust, immediately sand it down and repaint it to prevent further damage.
- Make sure the vents on your bbq rain shelter are clear and unobstructed. This will allow air to circulate correctly and prevent condensation build-up.
- Replace any worn or damaged parts on your grill. This will ensure that your grill is always in tip-top shape.
By following these simple tips, you can maintain your bbq rain shelter and keep it looking and functioning like new for years to come!
Conclusion:
Do-it-yourselfers have the opportunity to save money by building their BBQ rain shelters. The design and construction of a BBQ rain shelter are not tricky, but they require some planning and effort. However, by following the instructions in this article on how to make bbq rain shelter, you can build your shelter in no time.


