One of the ways to make shutters for your home is by using pallets. You will need to make sure that you have enough boards to create the level of shutter you would like. It’s best to use a saw and cut the boards into desired lengths, but if this isn’t an option, it’s time to get creative with what you have available.
Once they are cut, lay them out on your table or floor in order from longest at one end to shortest at the other end so that when they are nailed together, they form a straight line. The next step is nailing together!
Make sure not to leave any gaps between boards so that there is no light coming through whatsoever! So, this article is for you. You will learn how to make shutters out of pallets with just one simple trick!
Steps to Follow on How to Make Shutters Out of Pallets
Step One: Cut the boards
Break down pallets. You can use a crowbar or hammer to break down the boards on some of the wood. On each board, measure how long you want it, and cut using either a table saw if you have one, or by hand, with a handsaw it may not be that precise.
Break all wood down to smaller boards. Make sure each board is close to the same size, except for the ends already cut off. It doesn’t matter if they are a little longer or shorter, just as long as they are all within about an inch.
Step Two: Nail boards together
Layout the boards in the pattern you want them to be. Then start nailing them down, starting with the center of each board and moving outward. Make sure to add nails evenly on each board, and add enough nails, so they are all flush with the wood.
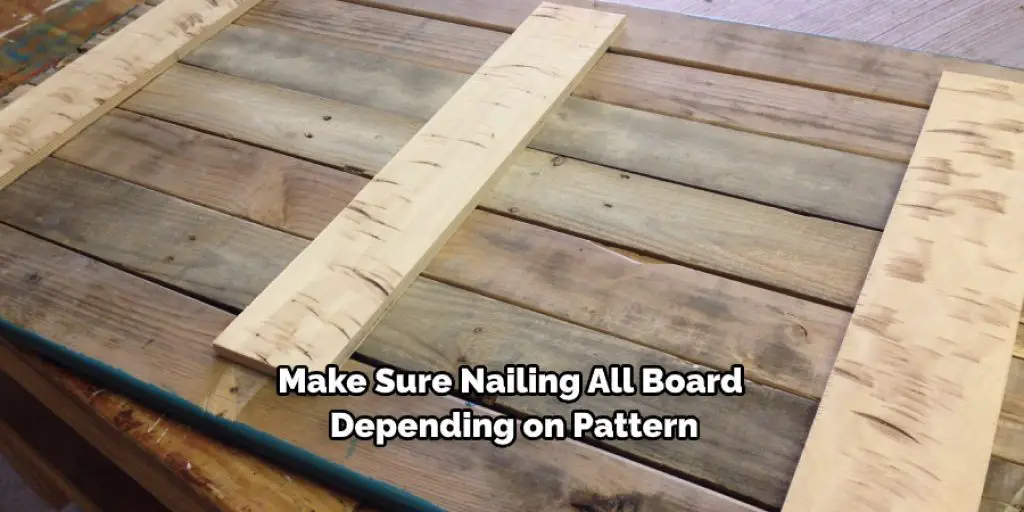
Make sure you are laying out all your boards in the pattern you want, and make sure all the nails are pointing in the same direction. This will make it easier to attach them in the next step. Double-check in every direction to ensure you didn’t miss any nails and ensure everything is flush with the pallet boards.
Step Three: Attach all.
Put wood glue on top of every nail, and also make a line of glue along with each board before attaching them. This will help to hold it together better and allow less of a chance for your shutter to break apart. Also, make sure wood glue is put onto the sides where the boards are attached and on top of each nail.
It might be a little trickier to attach them at first, but once you get going, it will become easier. First, attach boards by lining them up next to each other, placing a good amount of glue down, and then hammering nails into them from one side. Then, repeat this process with the remaining boards.
Step Four: Sand boards down
Once your shutter is fully assembled, use a palm sander for sanding all the edges of each board, so they are smooth and even with each other. Sand all the edges of each board after they are attached by using a palm sander and going in one direction on all boards.
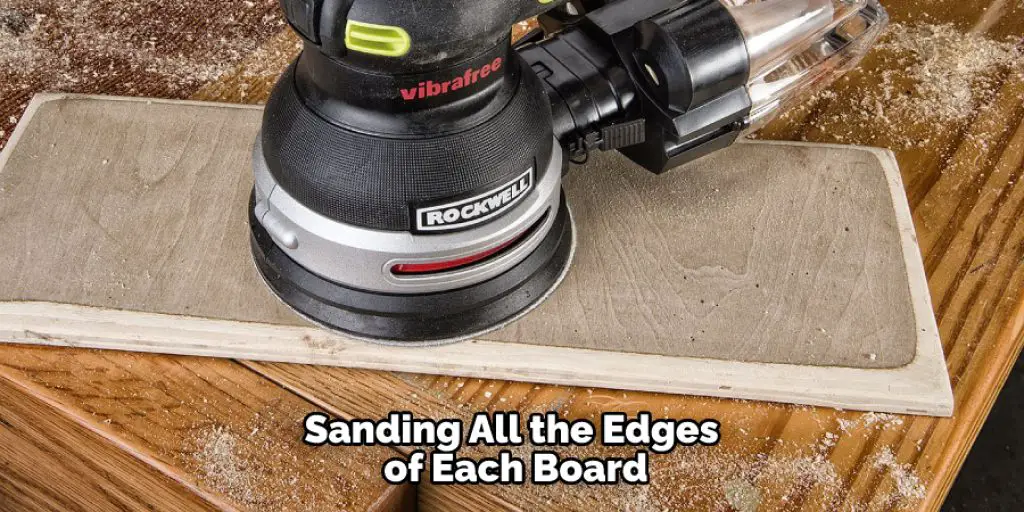
This is where you will see if any nails were missed or gaps between any of the boards. If this is not done correctly, the shutter will look poorly made and uneven when hung up, so it is essential to go over each board slowly and carefully.
Step Five: Stain boards
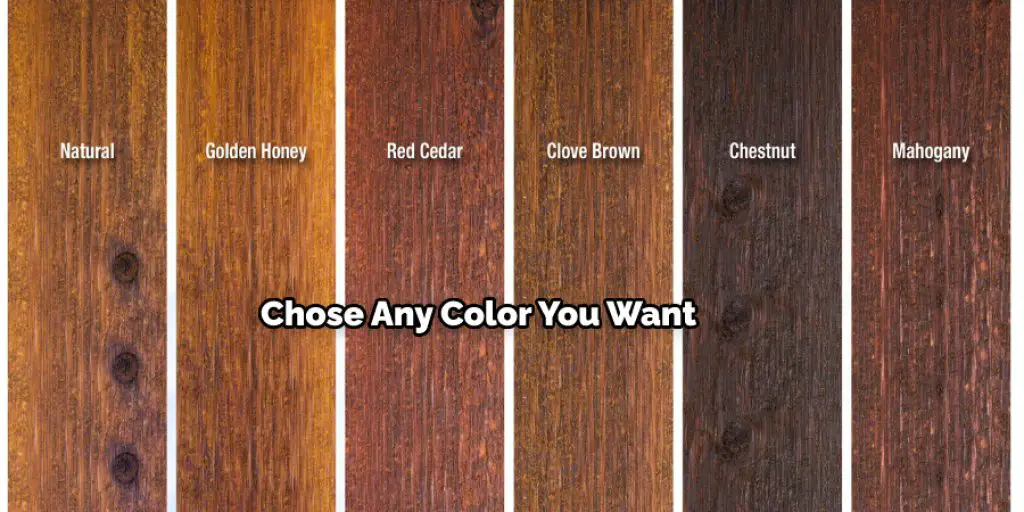
Stain your boards to the desired color. You can choose any color you would like. For this tutorial, they decided on a grayish color that has some dark brown mixed in. Follow the directions on the stain of what to do with water and mixing ratios. Once stained, wait for it to dry.
This can take anywhere from one hour to overnight, depending on the type of wood and how much you put. Before starting, make sure to read the directions so you know what to do for each board and how much water you should use depending on how much stain to mix with it.
Step Six: Hang wooden shutters
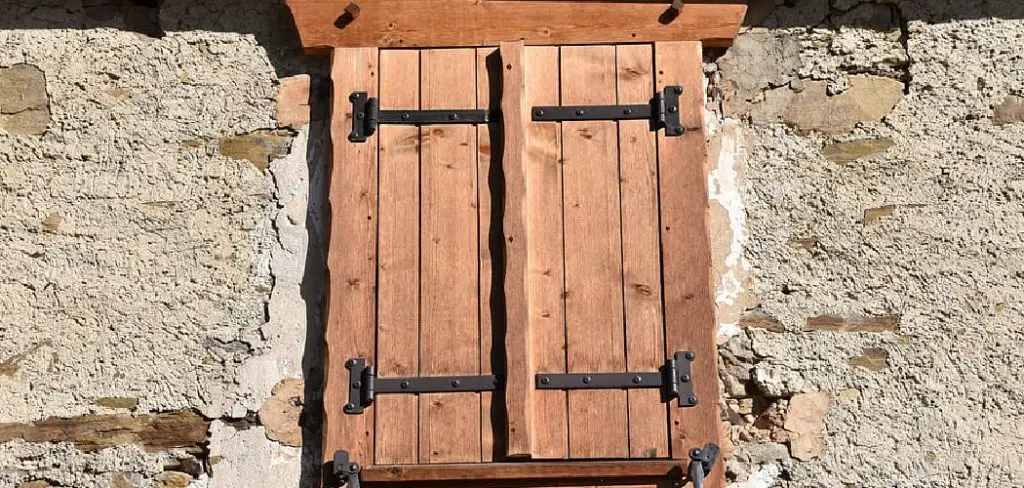
Hang your wood-paneled shutters up either using nails or by placing them on hinges. Your choice! You now have a shutter to hang up in any window you want. These are great for rustic, cabin-style homes, and would look especially good over any large windows that need some covering and decoration.
You can also hang up your shutters! They look great in large windows and add a rustic feel to any room needing extra charm and design. You can choose to either nail them into the wall or put hinges on them, so they open like doors. This will help in This will help in.
Step Seven: Fun optional additions
There are many ways to make your shutter unique and special. A few ideas would be to paint your shutters with scenic landscapes or add some trim around the edges for a decorative look. You can also install them on hinges to open like doors, but this may require more work depending on how your current window is set up.
If you’d like, you can choose to either paint scenic landscapes on your shutters or add trim around the edges for decorative flair. You could also choose to put hinges onto your shutters, so they open like doors – this may be slightly more work depending on how your window is already set up, though.
Frequently Asked Question
Can You Make Shutters Out of Pallets?
You can make shutters out of pallets. You will need to make some adjustments, however, before you start.
The first thing that you will need to do is remove the wheels from the pallet boards, so they are flat and stable. The next step is drilling holes in each of the sides of the pallet board where you want your shutter hinges to be. Next, screw in hinges on each side of the frame that you have created by drilling into each board on either side.
Finally, place a piece of plywood or hardboard across your frame and attach it with screws or nails.
What Are Cafe Style Shutters?
Cafe-style shutters are a type of shutter that is popular in the United States. They are used to block out natural light, typically by closing off one or more windows.
Benefits of Cafe Style Shutters:
- It provides privacy and allows for a relaxing atmosphere.
- It can make your home feel warmer during colder months as it blocks out outside light.
- It helps with energy efficiency as it prevents heat from escaping through the windows.
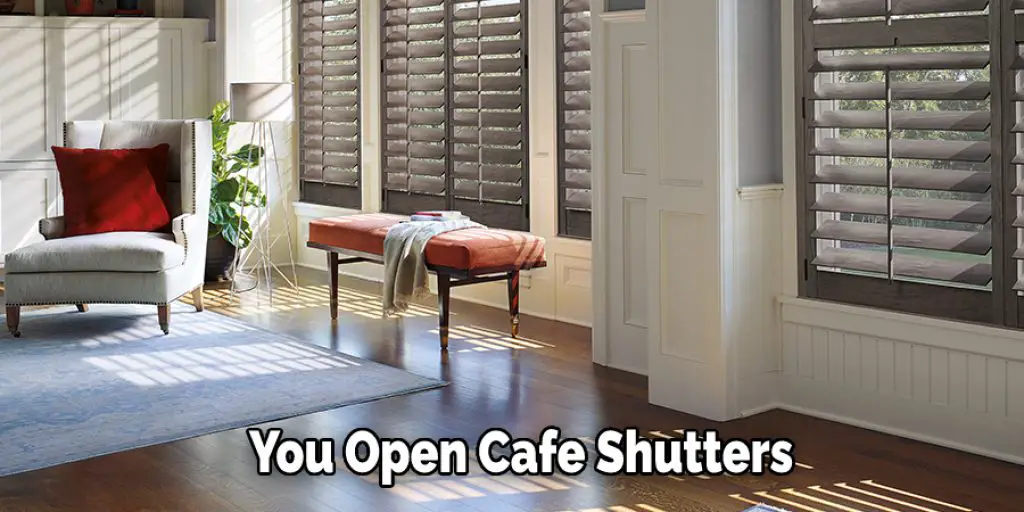
Can You Open Cafe Shutters?
Cafe shutters are not easy to open and close. You will need a screwdriver, pliers, and some other tools to do so.
In order to answer this question properly, we first need to understand what a cafe shutter is?
A cafe shutter is a type of vertical blind that usually opens upwards from the bottom of the window frame. It can be made from wood or metal, depending on the design. Cafe shutters typically have slats with a wooden base for mounting them on the window frame.
If you want your cafe shutter closed, it is possible with just one hand but in order to make it open easily, you will need at least two hands or even more depending on how many slats there are in your particular model.
How High Should Cafe Shutters Be?
Cafe shutters are measured in a specific way; they should be set at the height of your window. They should not touch the ground, and they must be able to accommodate the opening of your cafe window.
When measuring for cafe shutters, you will need to measure from the top of your window frame down to the bottom, where it meets the ground. Once you have done this, you can add 2 inches for both sides and divide by two for your final measurement.
Conclusion
When it comes to creating a new window treatment for your home, the possibilities are endless. Of course, there is always the tried and true of curtains or blinds but if you’re looking for something more interesting than that, then consider making shutters out of pallets!
It’s an idea that will give your room some charm while also being easy on your budget. Here are step-by-step instructions on making these yourself, so head over today before they go back in style! At this point, you should feel confident that you know how to make shutters out of pallets.
Check it out to learn- Alternatives to UPVC Windows


