The best way to remove a painted deck screw is with a drill. You can use any drill, but the cordless variety will save you time and have fewer accidents. Place the tip of your drill bit on top of the head, turn it on, and let it do its thing!
Keep in mind that drilling into metal is difficult because metals are complex materials. Make sure to use an appropriate-sized bit for your project and then go slow with pressure; too much pressure can cause problems when drilling into metal.
If you go too fast, your bit might slip, and you could damage your decking. However, once the head of the screw comes out just a little bit, you can use pliers to grab it and turn it the rest of the way. In this article, we’ll explore how to remove painted deck screws.
Step to Follow on How to Remove Painted Deck Screws
Step One: Determine the Type of Screw Head
The majority of screws on a painted or stained deck are either hex-head or Torx screws. There’s one in the photo at the top. These types of screws require different head bits to remove. If you’re not sure which kind your screw is, run the screwdriver’s shaft into the slot of the screw.
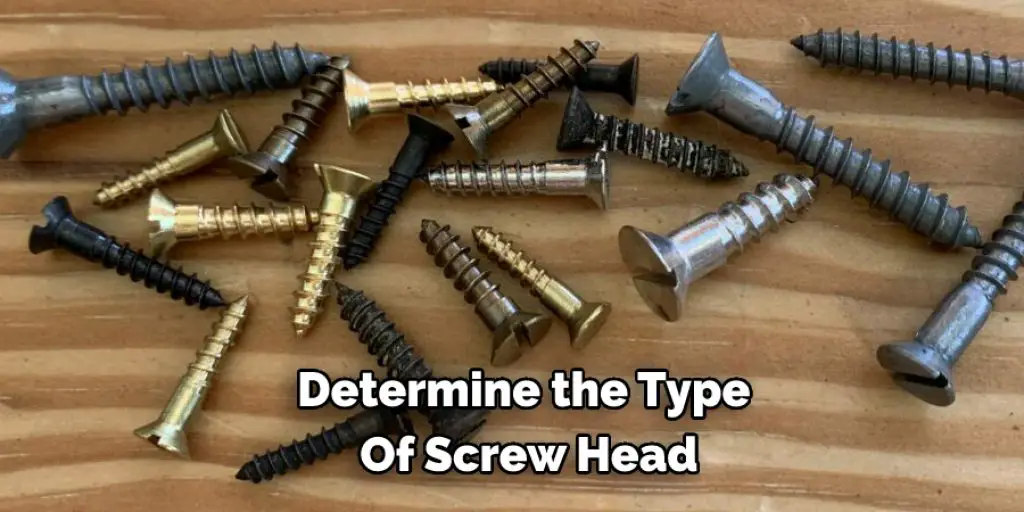
The article discusses how to tell what kind of screw you have and how to remove it. If the screw slides in easily, it is a hex-head screw and can be removed with a hex key or Allen wrench. If the screw does not slide in easily, it is a Torx screw and requires a Torx bit to remove. Works bits can be hard to find, but they can be found on the internet or at a local hardware store.
Step Two: Drill Out the Screw
Once your Torx or Allen wrench is ready, you can remove the screw. If there’s not a lot of pressure holding it in place, turn and pull. If it requires more force than that, clamp the head of the screwdriver into the slot and drill out each side of the head.
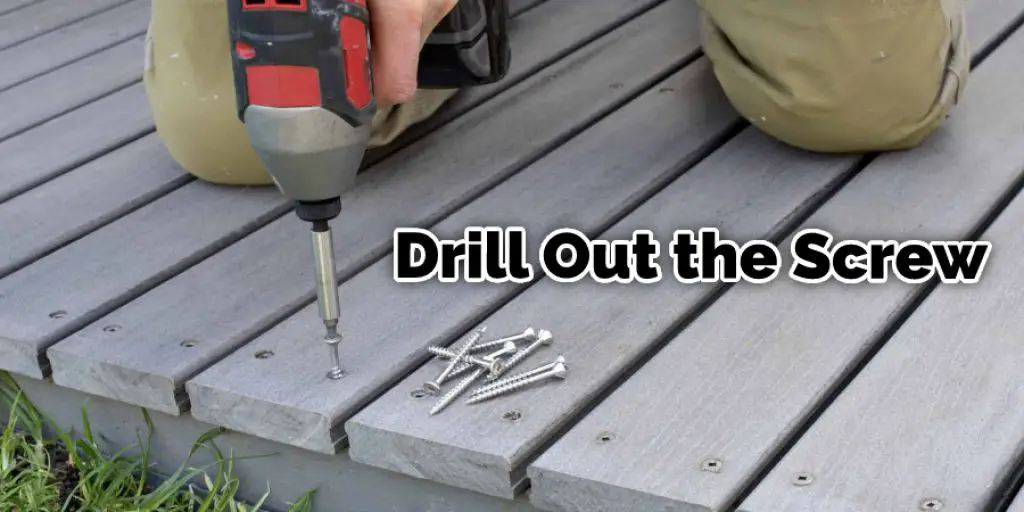
Once you’ve got one side, turn the screwdriver to remove the other side of the head. Sometimes the backside of the screw will come loose and fall out. Once you’ve got all four sides drilled out, you should be able to pull the bottom of the head away from whatever it’s holding up. If not, drill some more until it comes free.
Step Three: Fill the Holes
Once all four sides of the screw head are drilled out, fill the holes with wood filler or Bondo. It must be thick because it fills in gaps and spaces better than thinner materials. Make sure to move quickly; once it dries, you will not want to try and remove it.
If you wait too long and the filler dries, you can scrape it off or lightly sand it until you reveal the bare material; but make sure to wear safety glasses because dust particles will go flying.
Step Four: Sand and Re-Stain
Once your holes are filled, sand them to ensure they match the surrounding wood. If you have leftover filler, wipe it off with a wet rag before staining and sealing the deck. There’s one in the photo at the top. These types of screws require different head bits to remove.
If you’re not sure which kind your screw is, run the screwdriver’s shaft into the slot of the screw. If it slides in easily, you have a hex-head screw. To remove it, use a hex key/ Allen wrench. If the slot catches or won’t let go of your screwdriver, then you have a Torx screw that requires a Torx bit to remove.
Step Five: Re-Install with a Better Screw
The whole reason you’re removing the deck screws is to replace them with new ones. The screws that are holding up your deck are most likely made of soft metal. The screwdriver could drill it out too easily, with little pressure needed to get the job done.
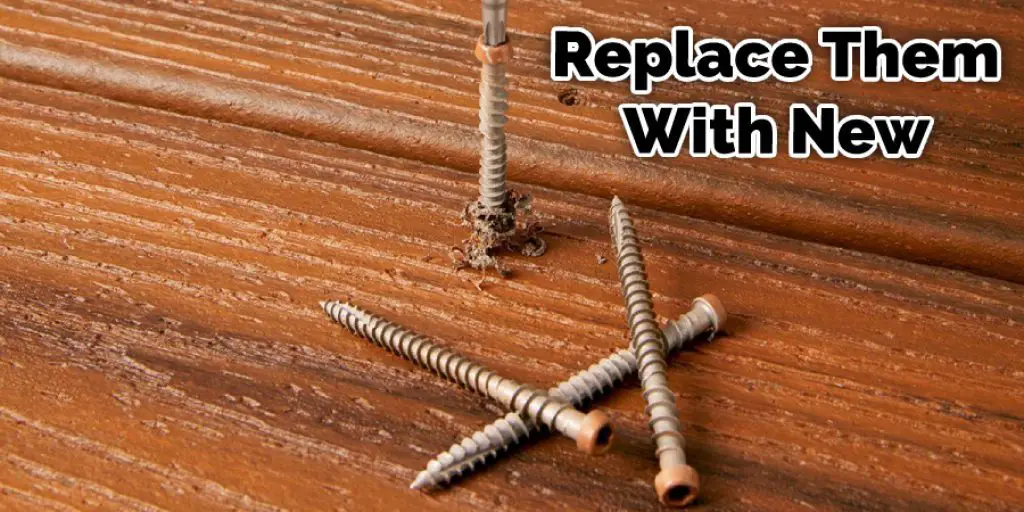
You’ll want to replace these with better-quality screws, so you don’t have to worry about the next time. Most screws on a painted or stained deck are either hex-head or Torx screws. This can be determined by running the shaft of the screwdriver into the slot of the screw. If it slides in easily, you have a hex-head screw. This will help in how to remove painted deck screws.
Step Six: Retreat the Hole
If you want to make sure your new screws don’t pop out, paint them with a wood hardener before screwing them back in. That way, they’ll set into place and not move if more pressure is applied later on. Once all four sides of the screw head are drilled out, fill the holes with wood filler or Bondo.
It needs to be thick because it fills in gaps and spaces better than thinner materials do. Make sure to move quickly; once it dries, you’re not going to want to try and remove it. If you wait too long and the filler dries, you can scrape it off or lightly sand it until you reveal the bare material; but make sure to wear safety glasses because dust particles will go flying.
Step Seven: Enjoy!
You will have successfully removed your painted deck screws if all goes well. Now is the time to break out the power sander and remove any remaining screw heads or cuss at your dirty deck. It needs to be thick because it fills in gaps and spaces better than thinner materials.
Make sure to move quickly; once it dries, you will not want to try and remove it. If you wait too long and the filler dries, you can scrape it off or lightly sand it until you reveal the bare material; but make sure to wear safety glasses because dust particles will go flying.
Frequently Asked Questions
Can T Remove Screws From Composite Decking?
If you have screws that are stuck in the composite decking, you can use a screw extractor to remove them. A screw extractor is a tool that has been designed for this purpose and will easily remove the screws without causing any damage to the surface of the decking.
The best thing about using a screw extractor is that it can be used on both wood and composite decks.
What Is the Fastest Way to Remove Deck Screws?
If you are looking for the fastest way to remove deck screws, then using a drill with a screwdriver bit is the best option. You can also use a ratchet wrench. However, if you want to avoid using power tools or risk damaging your deck, then using WD-40 and a toothbrush may be better options.
Should I Paint Over Deck Screws?
Deck screws are metal fasteners that have a round head and flat shank. These metal fasteners can be found on decks, porches, outdoor furniture, and other outdoor structures.
If you need to paint over deck screws, then it is best to use low-viscosity paint because this type of paint adheres better to metal surfaces than higher-viscosity paints.
Can You Sand Down Screws?
Yes, you can sand down screws. You will need a drill, screwdriver, and sandpaper. You should first unscrew the screws on the old head to remove it before you start sanding. Then use a drill to make a hole in the wood of your project where you want to place the new screw. Insert the screw into this hole with a screwdriver and tighten it until it is flush with the wood.
Conclusion
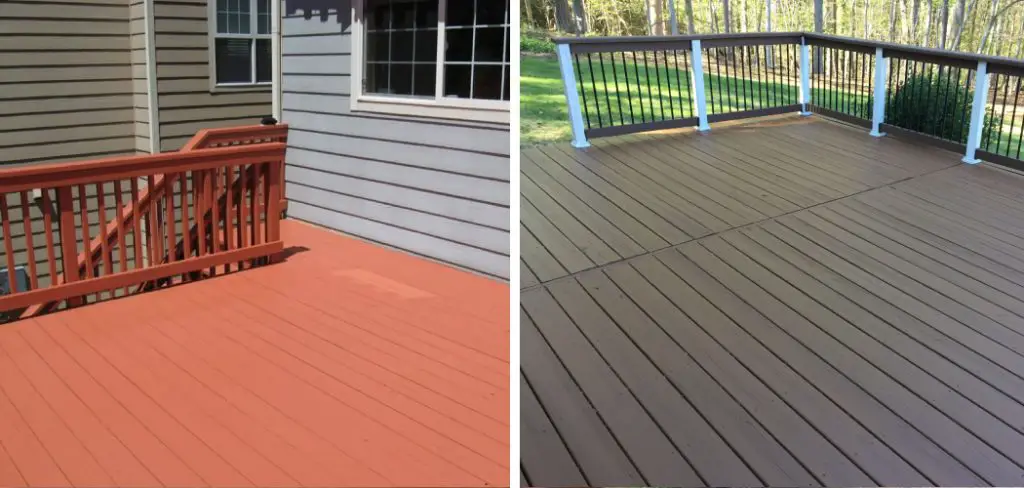
After reading this blog post, you should know how to remove painted deck screws and the best way to prevent them from sticking in your deck boards. Painted deck screws can be a pain for homeowners since they often get stuck when trying to unscrew them.
Luckily, there are ways around this issue! One of these is using a drill or power driver with an attachment that has a hexagonal head, such as a Phillips head screwdriver, so it fits over the top of the cap on the backside of the Philips-head screw.
You may also check: How to Install Lag Bolts on a Deck


