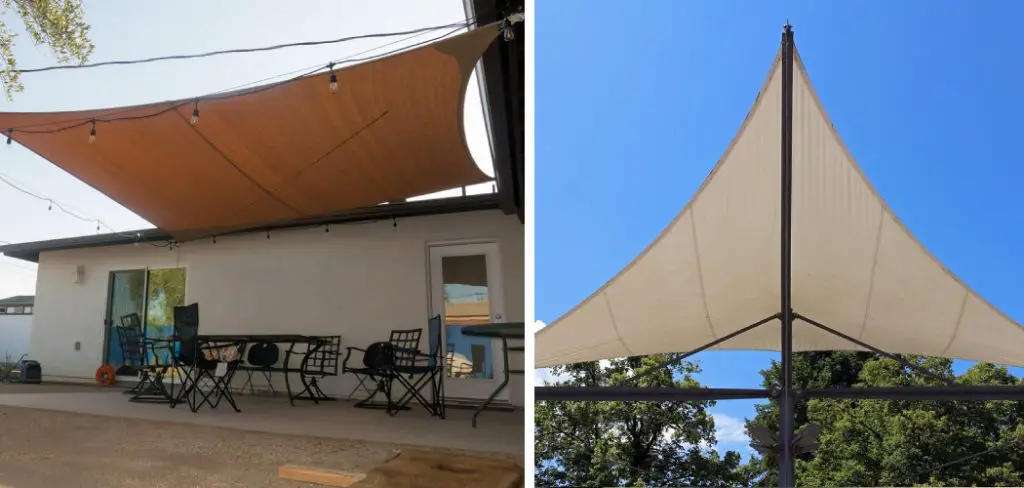
Tensioning a shade sail is an essential process to prolong the life of your shade sail. This blog post will discuss what tensioning means, how it can be done, and why it should be done for optimum performance. The first thing you need to know about tensioning a shade sail is that it’s not just a straightforward procedure.
The type of equipment offered varies significantly between companies and their products, so there are different ways to do this depending on which product you have purchased or plan to purchase. Therefore, you must review all instructions carefully with your manufacturer before starting any work on your project.
For example, if there are holes in the fabric like some fabrics offer, then these should be patched up before beginning! So, this article is for you. You will learn how to tension a shade sail with just one simple trick!
Step to Follow on How to Tension a Shade Sail
Step One: Attach a Line
Attach a line to each corner of the shade sail at a height equal to the middle height of the battens. Repeat this step for all four corners so that you have four lines hanging from your shade sail. Next, tie on weights every few feet along the top edge of your shade sail.

You can use rocks or bricks wrapped in a trash bag. This is much easier than trying to carry the rocks up through the house when you are finished! A 1 inch by 5inch eye bolt will do just fine. Just be sure to use a nail or screw that is long enough to go through your shade sail and 1/2 inch into the batten.
Step Two: Hanging from a Line
Add additional lines equal to 1/3 of the length of each side of your shade sail. The distance between each line is equal to the length of one batten. Add weights every few feet along the bottom edge of your shade sail. Hang all four lines from an eyebolt attached to a wall or post, be sure it is secure and sturdy!
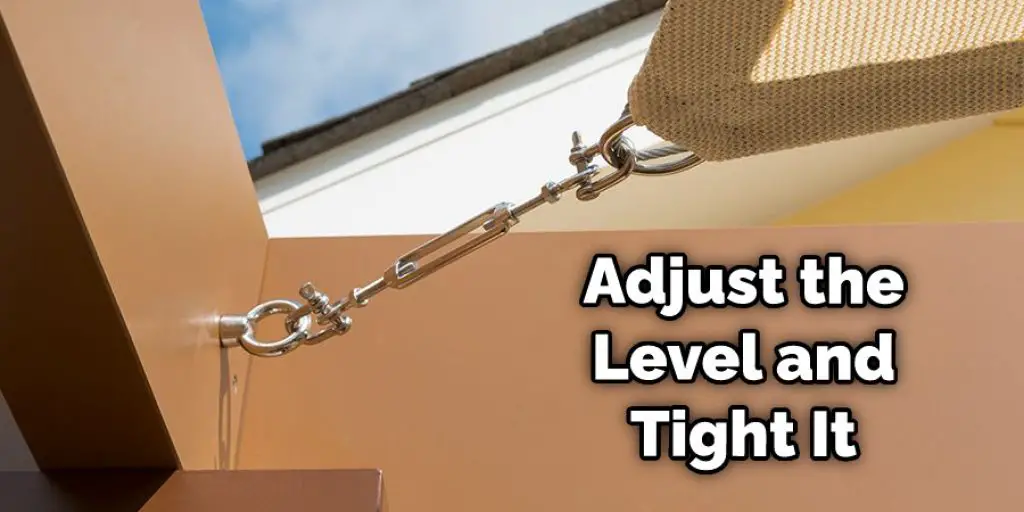
Once you have all your lines hanging, you will need to use a level to make sure they are hanging at the same height. If one side is higher than another, simply pull the line slightly until it matches up with the lowest part of that side.
Step Three: Tensioning a Shade Sail
Once you have pulled your lines to each side, readjust them, so they are all level and equally tight. This is when the correct knot comes in handy because you will need it to cinch up the slack! There should be no wrinkles or bulges in your shade sail; once you tighten into the point, it forms a decent angle.
This is where you will need to grab your long nail or screw, which you used in step one. Once the slack has been removed, tighten up the top corner lines by carefully pulling down on these lines with pressure! Your shade sail should not be touching the ground at this point, but it should be pretty taut.
Step Four: Flatten Lines
Take the weight you used to hang each of these lines on, and gently pull down on that line until the slack is removed. It should not be touching the ground but should be taut see above! You will notice that your shade sail forms a decent angle with the ground.
At this point, you can adjust the angle of your shade sail to fine-tune it if need be. You will notice that one side may be higher than another; simply pull on all four lines until they are level with each other again. Once the slack has been removed, tighten up the bottom corner lines by carefully pulling down on these lines with pressure!
Step Five: Rope a Sider!
If you want an even better angle for your shade sail, you can attach a line to each corner and then attach them to a neighboring post or railing. Just be careful not to pull too much tension because this could cause your shade sail to rip at the seams!
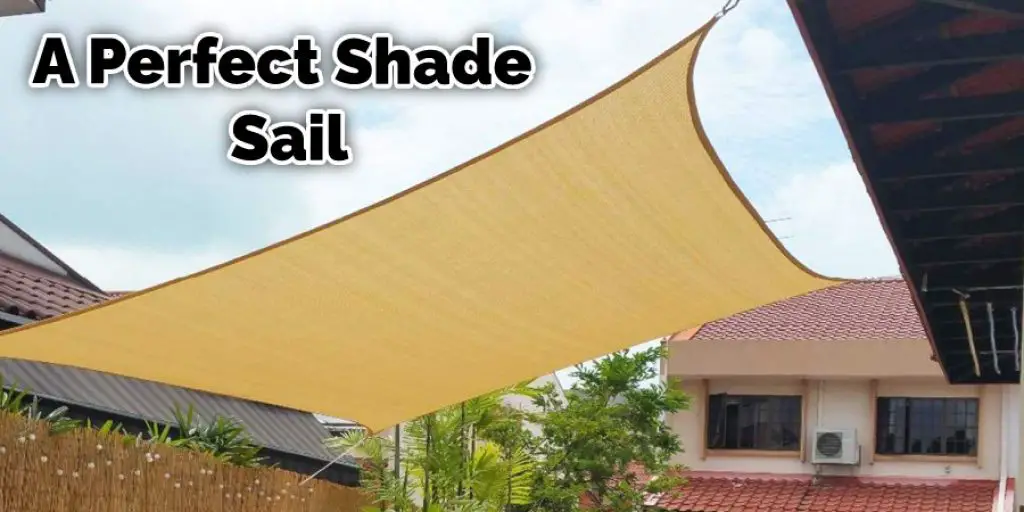
You are now finished with tensioning your shade sail; congratulations! Take a step back and admire your work because you did it, all by yourself! Filling your shade sail with insulation is the next step and will be coming up in a future post to help keep that cool air flowing.
Step Six: Stand Back and Admire Your Work!
Congratulations, you have tensioned a shade sail!! To keep this post short, I will not include insulating your shade sail in this post. Please keep your eyes peeled for the next installment of the how-to series, where we talk all about insulation options for keeping that cool air flowing through your shade sail during the summer.
Tie on weights every few feet along the top edge of your shade sail. Then, add additional lines every 3 feet along each side of your shade sail. Use a level to make sure they are at the same height before you start tightening them up. Now you know how to tension a shade sail.
Step Seven: Flatten Lines
Add additional lines equal to 1/3 of the length of each side of your shade sail. The distance between each line is equal to the length of one batten. Add weights every few feet along the bottom edge of your shade sail. Hang all four lines from an eyebolt attached to a wall or post, be sure it is secure and sturdy!
Once you have all your lines hanging, use a level to make sure they are hanging at the same height. If one side is higher than another, pull the line slightly until it matches up with the lowest part of that side. Pull-on each corner line individually so they are taut but not too tight.
Frequently Asked Questions
Should a Shade Sail Be Tight or Loose?
A shade sail should be tight to ensure that it is not blown off. It should also be loose enough so that it can move around and create the desired effect.
How Much Wind Can a Shade Sail Withstand?
The length of a shade sail is measured in feet. A 10-foot-long, 4-inch wide by 8-inch high shade sail can be subjected to winds up to 20 mph before it starts to lose strength and tear.
When Should Shade Sails Be Taken Down?
Sails Should Be Taken Down in the Following Conditions :
- If the sun is shining brightly and high winds are blowing, then you can use them as a sail on your boat to help you go faster.
- When they start to tear or come loose from their moorings.
- When they are damaged, they cannot provide any further service as sails.
Why Are Shade Sails Curved?
Shade sails are curved because they help create a uniform distribution of sunlight throughout the sails. To do this, shade sails are made with a series of vertical and horizontal sections that are then covered with fabric or some other material. The cloth is designed to act as a diffuser, allowing light to bounce off the surface and be dispersed evenly across the sail.
Do Shade Sails Really Work?
Shade sails are a product that is used to shade an area. They are mainly used for cooling purposes, shading the patio or pool from sunlight. There Are Many Benefits of Using Shade Sails Like :
- The sun can only reach the shaded area, which helps reduce heat and UV radiation exposure.
- Shade sails help keep the temperature cooler than it would be without them by reducing solar heat gain.
- It reduces direct sunlight exposure on surfaces such as lawns, patios, roofs, walkways, and more!
Why Does My Shade Sail Sag in the Middle?
There are a few potential causes for your shade sail to sag in the middle, and you may need to address each one. The most common reason is that the fabric has lost its springiness, which can be caused by water seepage or wear and tear. In order to restore the seamstress’s elasticity and help prevent future sagging, it is important to regularly resew seams using strong thread (thread count should not exceed 150).
The other main cause of shade sails sagging in the middle is rot. This often occurs when there is moisture trapped between the fabric layers, leading to mold growth. To prevent this issue from occurring, make sure all shades are kept dry at all times by storing them inside during rain or humidity events. Additionally, ensure that tight wires do not touch as this can also lead to rot issues.
Can Shade Sails Be Flat?
Yes, Shade Sails can be flat. However, if you want more coverage from the sun or prefer a sail that is slightly larger in size, then you might want to select a Dutch Style Sail.
Why Do Shade Sails Have Curved Edges?
Shade sails have curved edges because they are designed to catch and redirect the wind. When the sail is in direct sunlight, it can create drag which makes sailing difficult. The curved edge of the shade sail deflects wind away from the boat, allowing for a smoother ride.
Is It Safe to Attach Shade Sail to House?
It is generally safe to attach shade sail cloth or other forms of outdoor shade over an existing house. This type of protection helps reduce solar exposure and thereby reduces the risk of skin cancer and other sun-related problems. In addition, shading your home during hot summer days can help keep your property cooler in the summertime.
Conclusion
The shade sail is now ready to be installed. A few things you should know about installation include using a pole, locating the center of your desired area, and ensuring there are no obstacles in the way. You may also want to consider whether or not it will face south for maximum sun exposure if this is where you’re installing it!
After following these steps, install your new shade sail with confidence, knowing that all safety precautions were taken into account beforehand. This blog post has given helpful advice on how to tension a shade sail.


