How to Turn a Bed Into a Couch
The process of turning a bed into a couch is not difficult. All you need are some basic tools and about 1-2 hours. When done correctly, the end result will be an inviting place to sit that can also double as extra sleeping space when needed.
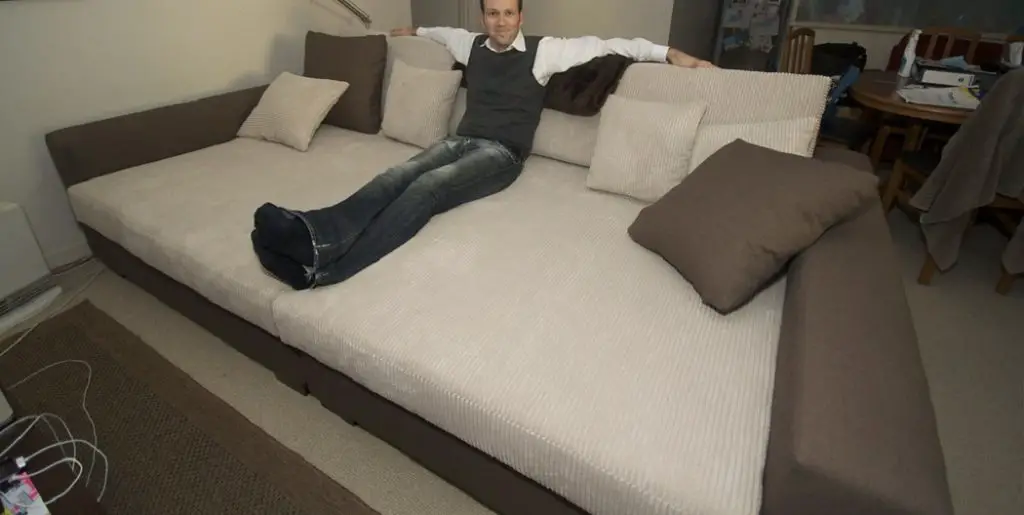
This article provides detailed instructions on how to make your own couch from scratch without needing any professional help. After following these steps, you’ll have more seating in your living room for less money than it would cost to buy new furniture!
Materials You Needs
- Box of hairpin or “L” brackets (about 30)
- 5 sheets of plywood (about 3/8″ thick) (make sure to get untreated wood as it will be easier to paint later on.)
- Screws (the number will depend on how big your couch is. I used about 1 lb of screws for three sheets of plywood)
- A hand saw
- Measuring tape (a ruler should also work)
- Sawhorses (these are helpful to have, but not absolutely necessary if you don’t mind sitting or kneeling on the ground)
- Painter’s tape (optional)
- A drill with a screwdriver bit and either a Phillips head or flat head bit (both if you have them).
Why Turn a Bed Into a Couch
- Beds are expensive (especially if you want a nice one)
- Every home needs more seating
- Extra sleeping space when needed. All you need is some extra blankets and pillows to make it into a bed again!
- It’s a great way to save money on your furniture when you’re just starting!
- Turning a bed into a couch is fairly easy to do yourself if you have the right tools. The result will be an inviting and functional piece of furniture that can also double as extra sleeping space when needed.
Steps on How to Turn a Bed Into a Couch
Step 1: Clear Everything Off
This is probably the most important step in the process. You want to start with a clean slate, so nothing gets lost, and everything will look nice when we’re done. Also, I usually like to take old bedding off because it always has patches on it and easily comes apart.
Step 2: Disassemble the Bed Frame
Depending on the type of bed frame you have, you will want to take apart the headboard, footboard, and possibly anything else attached to your bed frame. For example, the metal rods that connect them may need to be removed but do not worry about how they look because we won’t use those again. Most bed frames will come apart with a few bolts that you should take out and then pull the pieces apart.

Step 3: Measure the Space Between the Wood Floor and Plywood
You should measure this space so we can cut down the plywood accordingly to fit snugly in between them. When measuring, make sure to add an inch or two (or more) on the sides and the front of the plywood, so there is a little playroom. Of course, we can always cut off extra later, but we need to have enough for now.
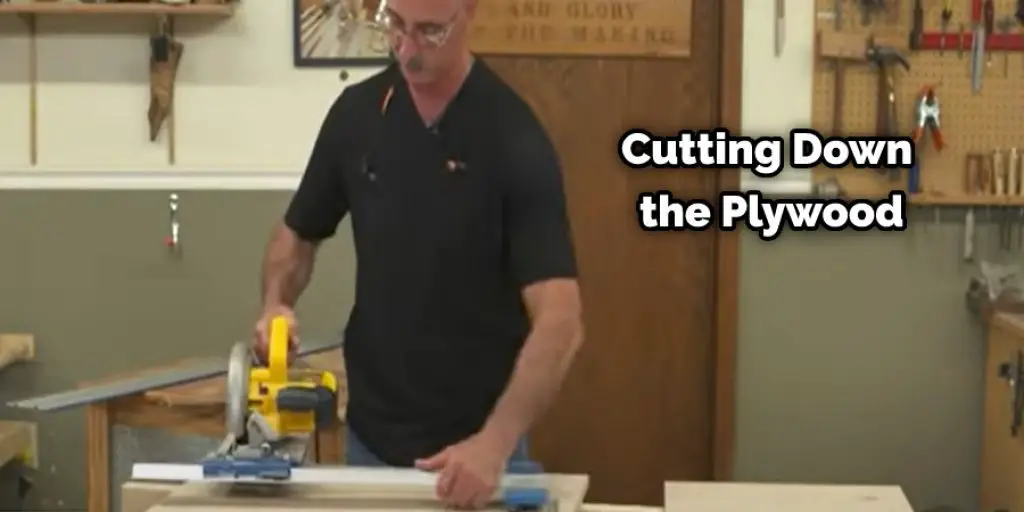
Step 4: Cut Down the Plywood to Fit Your Space
Using a circular saw, cut down your plywood, so it fits the measurements you previously took. I recommend doing this outside and putting something down on the ground, so debris doesn’t fly everywhere. Also, remember that we will cut off extra wood at the end, so don’t be precise with your cuts, or else we will have to start over.
Step 5: Sand Down the Surface of the Plywood
After cutting down your piece of plywood, you should sand it down to make it smooth and easier to work with. This will also take care of any uneven spots in the wood caused by a circular saw blade. This step can be done using a hand sander or just carefully sanding down by hand.
You Can Check It Out to Block Off Under Your Couch
Step 6: Measure the Space Between the Wood Floor and Plywood for Depth
Using your tape measure, take measurements of how deep you want your couch to be based on the height of your bed frame. During this stage, it’s important to keep in mind that we may need to add pieces of wood in between the plywood to make it even. I usually add about 2-3 inches in depth, so there is room for extra wood, but you can use less or more depending on your preference.

Step 7: Saw Your Additional Pieces of Wood
For this step, you will need to measure out how long and wide these pieces will be. This is important because they will determine the final depth of your couch.
Step 8: Sand Down the Additional Pieces of Wood
After cutting down your additional pieces of wood, you should sand them down to make them smooth and easier to attach to the base plywood.
Step 9: Attach Your Additional Pieces of Wood to the Base Plywood
This is where you attach your additional pieces of wood that will act as legs for your couch. Using nails or screws, tighten them down with an electric drill (ensure it’s secure). Then use nails or screws to attach the wooden legs on top of each other, so they hold together. If you’re working with nails, drill on the opposite side, so they come out on the other side. You should also measure for your depth and then see off any excess wood that does not fit between the floor and plywood.
Step 10: Cover Up Any Holes or Rough Edges of Plywood
At this stage, you should have a legless plywood base that is attached to additional legs. However, there may be holes from nails or screws, and the surface may not be smooth. To fix this problem, use wood filler or spackle on these areas and let it dry overnight.
Step 11: Sand Down the Board
Once the wood filler or spackle dries, use a hand sander to sand down these areas, so it’s flush with the rest of the plywood. This step will require some elbow grease but be careful not to go overboard otherwise. This can ruin your board.
Step 12: Stain the Board
If you want to stain your board, this is the time to do so. This will further improve the look of your board and give it more character. The color you choose should match your room, but if you want an ombre effect, you can use different colors on each side or section of the board.
Step 13: Attach Strips of Wood to the Back
Measure out and mark strips of wood that will be attached to the backside of your board. This is where you can use nails or screws and an electric drill, as well as a hand sander. Attach two pieces of wood across from each other for extra support, and then attach strips perpendicular to these pieces for stability.
Step 14: Attach the Board to Your Bed Frame
Now that you have your board attached to your bed frame, it’s time to finish up by attaching it in place on top of your bed frame. This process will again require some elbow grease, so keep this in mind.
You can check it to Get Rid of Fleas in Your Couch
Conclusion
Now you know how to turn your bed into a couch. Whether it’s for sleepovers or just because you have the information, there is no excuse not to try this project out! Give yourself some time and be patient with the process – remember that good thing come to those who wait. Good luck!
Thank you for reading our article. If you have any questions or concerns, please leave a comment below.
Check it out also – How to Fix a Broken Couch Leg .


