How to Vent Dryer in Basement
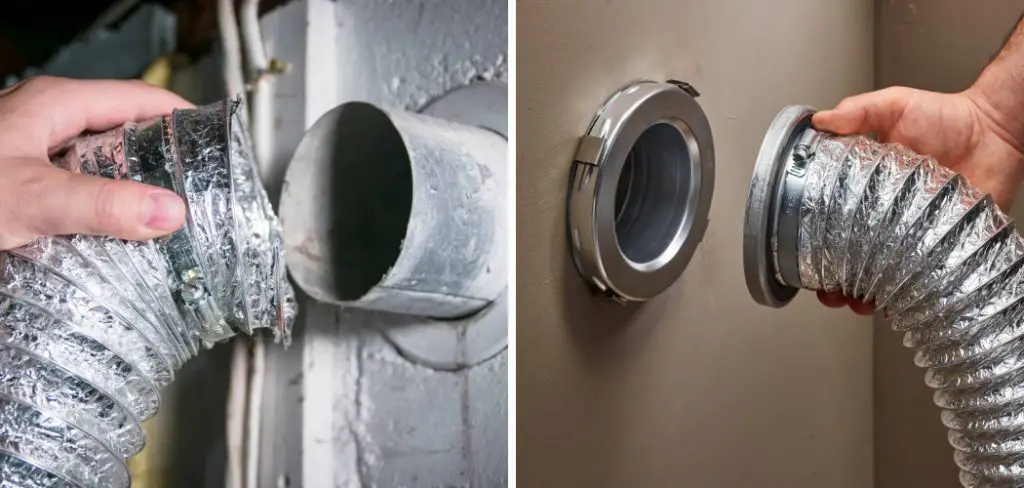
Venting a dryer in the basement is a great way to save energy and clean your clothes. Basements are often calm and damp, making them ideal for venting a dryer. In addition, a dryer vent in the basement is often an excellent option for homeowners without an outside wall to install a clothes dryer exhaust.
A dryer vent in the basement is a great way to save energy and clean your clothes. Basements are often calm and damp, making them ideal for venting a dryer. In addition, a dryer vent in the basement is often an excellent option for homeowners without an outside wall to install a clothes dryer exhaust.
If you are building a home or simply remodeling your existing laundry area, consider installing a dryer vent in the basement. This is an effective option for homeowners who do not have an outside wall for dryer exhaust. I’m going to show you how to vent dryer in basement.
Step to Follow on How to Vent Dryer in Basement
Step One : Determine the Path of the Ventilation Duct
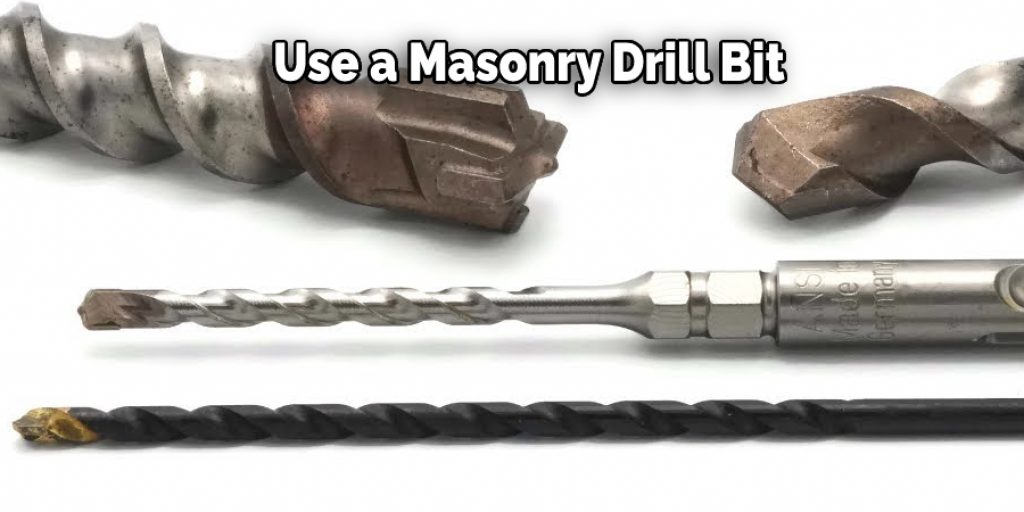
The first step to do is to determine the path of the ventilation duct. This can be done by drilling through some walls and using your hand to feel that the dryer’s exhaust will flow in the best direction. Use a stud finder if you have trouble finding studs within the wall.
If you need to do some drilling, I recommend using a masonry drill bit. This is because standard drill bits won’t drill as deep as you want. Masonry drills will go as deep as you tell it to go. To help keep the wall from being damaged during this process, cover the floor near the holes you are drilling with drop cloths or old newspapers.
Keep in mind that the ventilation duct will need to go up before it goes down again. If you choose your holes and drill path correctly, there is a good chance that the dryer’s exhaust will flow out through the garage floor instead of through the living space above.
Step Two : Prepare the Exhaust Hole
The next step is to prepare an exhaust hole through which you can run the ventilation duct. To do this, drill a hole through the drywall. This hole should be as close to the bottom of the floor joists as possible but no lower than six inches from the bottom of the joist.
The reason for this is that you will need to place some insulation around your ventilation duct before it goes into another wall. Also, you need to have at least six inches of space between the basement floor and your dryer’s ventilation duct so that you can cure it without the moisture being absorbed into the concrete or block walls.
If you are having trouble drilling this hole, there is a chance that your drill bit got stuck. If this happens, try turning your drill in the opposite direction. This will help to free it up so you can finish the job. Also, this will help in how to vent dryer in basement.
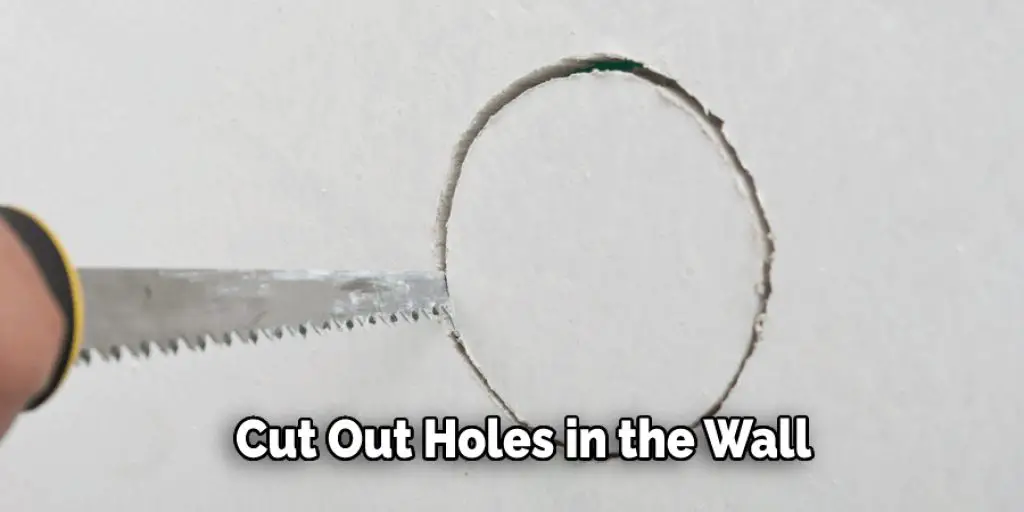
Step Three : Cut Out Holes in the Wall
The next step is to cut out holes in the wall that will allow you to run the duct through to another wall. Again, this should only be done if doing so does not require cutting into a load-bearing wall. To do this, use a drywall saw to cut the gypsum board from around the ventilation duct so that you can remove it without having to drill behind it.
You may need a partner for this part, as it is challenging to hold a piece of drywall up while also seeing what you are doing. If you do not have a partner, prop it up against the basement wall and use something like masking tape to hold it in place while you cut.
As always, be sure to put drop cloths down below where you are working so that no dust will fall through the floor above. Also, make sure that there is a clear path for the dryer’s ventilation duct to follow from one wall to another. This hole will be larger than the one you made in step two, as this allows you to pass your hands through and install a damper later on.
Step Four : Check the Duct for Leaks
The next step is to check your ventilation duct for leaks. To do this, pour a small amount of water into one end and allow it to run out the other end. For this test to work, you must maintain a seal with your hands over both ends of the ventilation duct.
If the water sprays out of more than one hole, you will need to go back and use the drywall saw to enlarge some holes until you can get a good seal. It is also possible that your ventilation duct was not manufactured correctly. Should this be the case, it will need to be replaced or repaired by an expert.
It is vital to seal off any open floor joists, as the basement air will rise through this route instead of being funneled downwards. If you cannot seal it off, consider filling the floor joist cavity with insulation. These steps should help you in learning how to vent dryer in basement.
Step Five : Install the Damper
Before installing the damper, you must know what type of ventilator you are using. To do this, consult your owner’s manual or look underneath the front of the dryer for a model number. If your dryer is vented inside, you will need to purchase an internal vent kit.
These usually consist of a metal plate with two screws. This plate should fit snugly against the duct and have both a male and female side that will work together to form an airtight seal. If your dryer is vented outside, you will need a vent kit with a damper that closes when the dryer is not being used.
These usually come in two varieties, those that incorporate a spring or those with a manual switch. You will also need a metal plate to attach the damper to. Dryer manufacturers usually include this as part of their internal vent kit, but if your dryer does not have one, you must purchase one from the same company as your damper.
Step Six : Test Your Installation
When you are complete with your installation, make sure to test it before putting everything back in place. Although dryers typically take around twenty minutes to run, leaving the ventilation duct in place for this time should ensure that there are no leaks in the system.
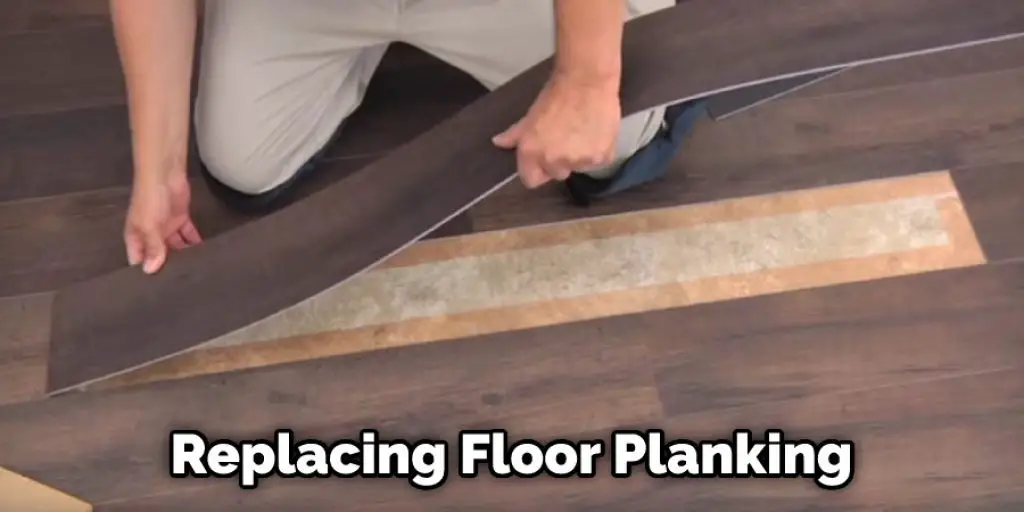
Once you are satisfied with your installation, replace the floor planking and drywall over the ventilation duct. Try to use a joint compound that matches the existing wall texture of your basement as closely as possible. This will help camouflage any potential flaws in your work, so they do not stand out by contrasting with the rest of the wall.
Finally, you should install new wiring for your dryer. Make sure to do this with care and attention to detail so that you do not cause any problems later on. This information will help you learn how to vent dryer in basement.
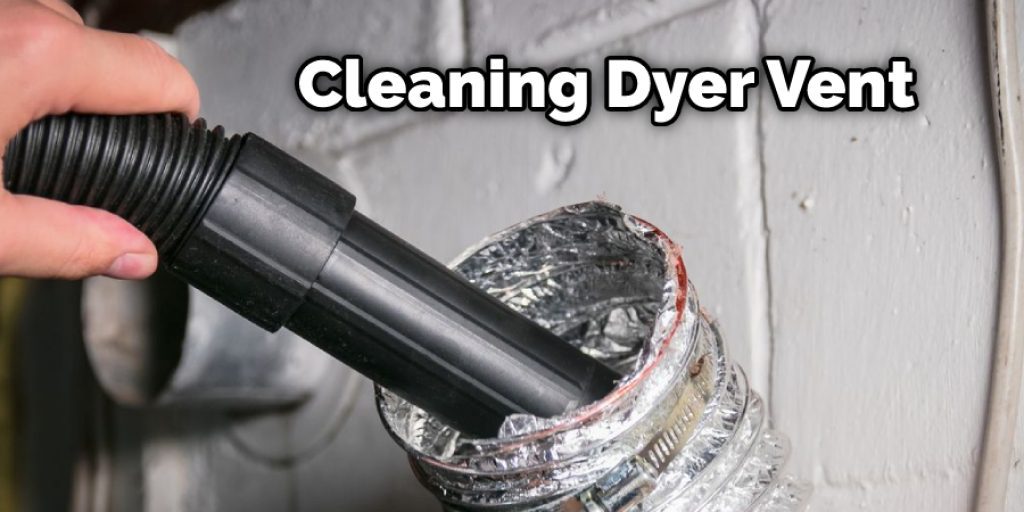
Step Seven : Maintain Your Dryer’s Vented Exhaust System
Maintain your dryer’s exhaust system by keeping it clear and free of obstructions. For example, suppose you allow the ventilation duct to become clogged. In that case, you will significantly decrease the efficiency of your dryer and aggravate any allergens that may be present in your basement.
For those dryers that are vented inside, you should remove any lint from the vent area and clean the drum with a damp cloth to remove any dust before putting it back in place. For outside exhaust dryers, use a window cleaner on both sides of the damper every six months to maintain its function correctly.
When cleaning this part of your dryer, wear rubber gloves to avoid skin irritation. If you have any questions about your particular situation, consult an expert such as a dryer repair technician or an HVAC contractor for guidance. Hopefully, the process of venting your dryer in your basement is complete, and you can begin using your machine right away.
You can check it to Clean Glass Shower Doors With Dryer Sheets
Conclusion
There are a few different options for venting dryer exhaust. You can choose to use the existing ductwork, create new ductwork or install an exterior wall-mounted unit. If you want to make sure your system is up-to-code and all of the appliances in your homework together seamlessly, we encourage you to consult with one of our HVAC experts before making any changes.
They’ll be able to guide what’s best based on where you live and how old your pipes are and help identify any potential problems that may arise if you go ahead without their assistance. We hope you enjoyed this article on how to vent dryer in basement.
You may read it also – How to Vent a Dryer in an Apartment


