Do you have a bathtub drain cover that is not screwed in, but it still won’t budge? You may have tried using a plunger or a wire coat hanger to get the screws off. If these methods didn’t work, don’t fret! This article will discuss how to remove bathtub drain cover without screws.
To remove your tub’s drain cover from its position on the floor, you’ll need an object that can be inserted into the space between the base and lid of your tub. A long screwdriver or metal rod should do nicely! Be sure to use caution when removing your drain cover because it could break if handled too roughly or with brute force.
Tools
- Flathead screwdriver
- Channel Locking Pliers
What You Will Need
- 1/2″ Wide Rubber Gasket (found at any hardware store)
- Leather Gloves (To prevent cuts on your hands! No one wants blood their bathwater!)
A Step by Step Guide How to Remove Bathtub Drain Cover Without Screws
Step 1
Turn off the water supply. To do this, find your main valve, usually located outside of your home, under a metal or porcelain cap labeled “Water Main”. Turn it clockwise until tight, wait about five minutes for any remaining pressure in the pipes to dissipate, then open one faucet inside your house long enough for the lines to clear out.
Step 2
Remove old drain plug. At first, Place a bucket or container under the drain to catch any water that may spill. The plug is usually located on the bottom of the tub, and it’s held in place by either a large metal screw or a plastic retaining ring. If you can’t remove it by hand, use a pair of pliers to loosen it.
Step 3
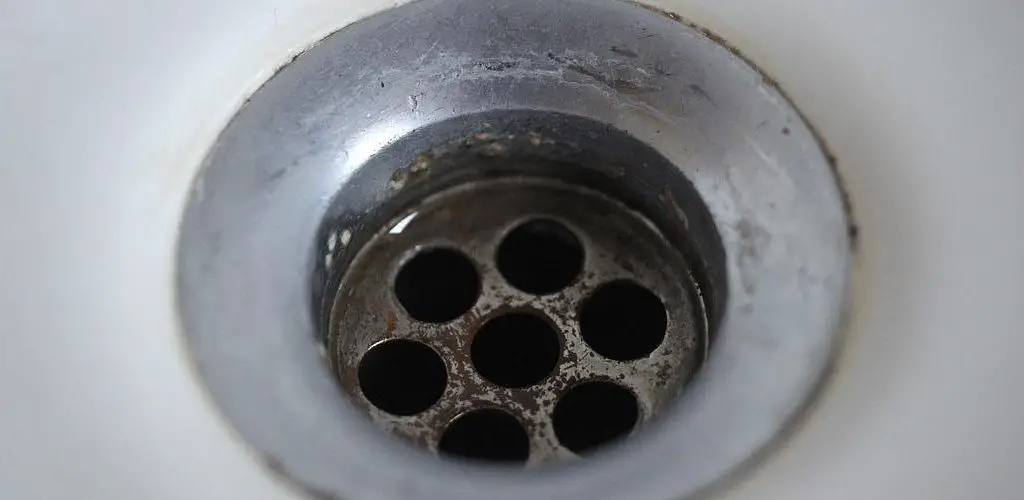
Clean the drain area. Use a small brush or vacuum cleaner to remove any hair or debris from around the drain opening. You can also use a stiff wire brush to scrape away any stubborn calcium deposits.
Step 4
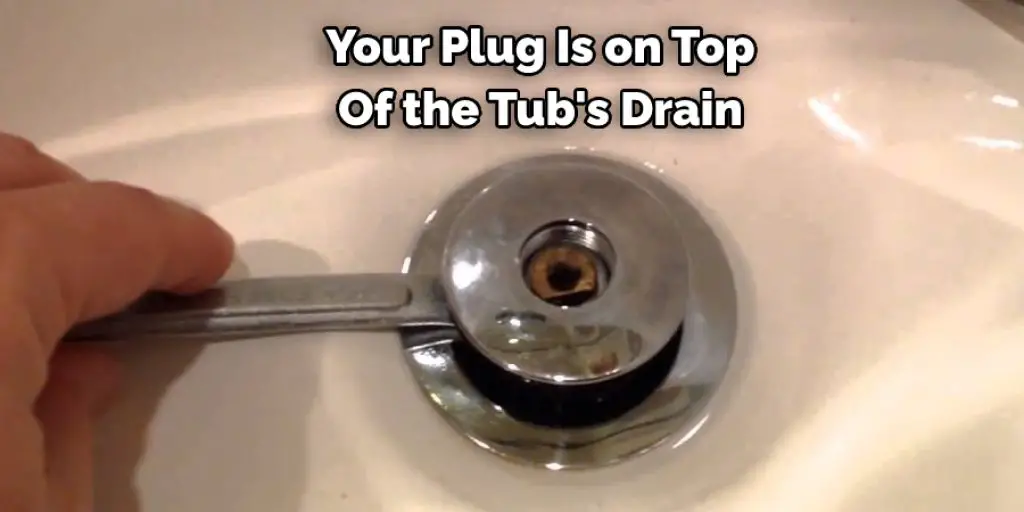
Remove drain. If your plug is on top of the tub’s drain, grasp it and turn it counterclockwise until you feel a release, then pull the plug out of the drain. After that, use a pair of pliers to unfasten the fitting from under the sink. The p-trap will come with it; if not, they’re separately attached to both ends of your plumbing system.
Step 5
Place new drain cover over surface holes in the drain. Spread some plumber’s putty around the lip of the drain, then set it in Place. Push on the center of the cover until you hear it snap into position. Make sure it’s centered, then use a screwdriver to tighten the retaining screws.
Step 6
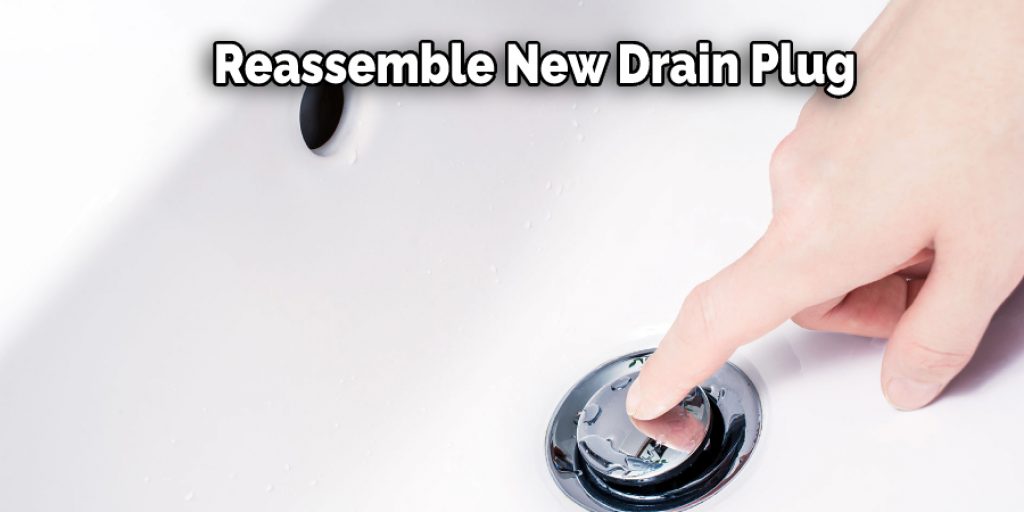
Reassemble new drain plug. Replace a screw plug by inserting a washer inside the hole in the bottom or side of your bathtub before slipping on the retainer ring and screwing tightly onto a threaded stem sticking up from between washers. If your plug doesn’t have a screw, line up the prongs on the retaining ring with the notches in the top of the drain and push down until it snaps into place. It will help in how to fix bathtub drain cover without screws.
Step 7
Turn on the water. Go back to your main valve and turn it on slowly. Check for any leaks around the drain cover, then check the plug for proper fit. If everything is tight, go ahead and take a bath!
Step 8
To prevent any problem with bathtub drain plugs in the future, it’s best to remove them and clean them underneath routinely. Also, make sure you have the right size rubber gasket to fit over the drain opening when tightening down your pop-up assembly. This will help prevent hair clogs from accumulating around these fine rubber gaskets.
You can check it to Connect Sink to Floor Drain
Tips
- Cutaway excess rubber before placing it on the drain.
- Apply powder or liquid soap around the top of the ring for lubrication while installing.
- Replace washers on the plug if they are not thick enough or too thick.
Warnings
- Drain Plugs – Turn clockwise to remove.
- Bathtub Drains – Remove all parts before removing the plug. It is recommended that you push down on the stopper while turning a wrench to free it.
- Never use pliers to turn screw or retainer ring unless they are specifically designed for this purpose. Also, do not hammer these pieces into Place as this could cause damage if inserted improperly, resulting in leaking problems later.
You Can Check It Out to Get Rid of Bubbles in Bathtub
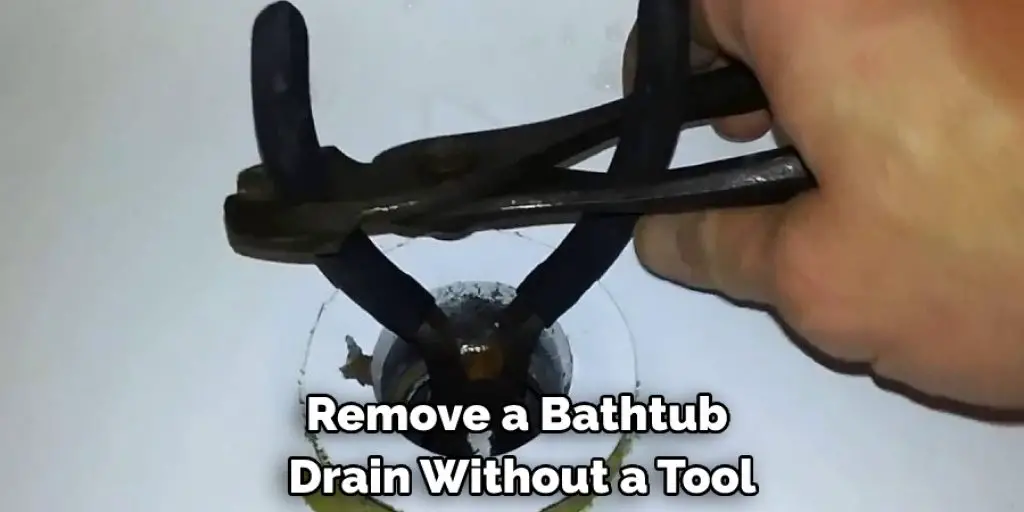
How Do You Remove a Bathtub Drain Without a Tool?
There are two ways to remove a bathtub drain without the use of tools; one is by using a strap wrench, and the other is by using a pipe wrench. To use either of these wrenches, you will need to place them around the drain plug so that they make a good seal. Once they are in place, use the appropriate pressure to loosen the plug.
If it doesn’t come loose with pressure, then try turning it counterclockwise. If that still doesn’t work, then you can try hitting it with a hammer while it’s still sealed in the wrench. If you’re using a pipe wrench, you may also have to apply some lubricant to get it to slide over the plug. If the plug is on the bottom of the tub, then you can use a Crescent wrench to get it loose.
Once the plug is removed, you will need to clean out the area around the drain so that any hair or debris doesn’t clog it up again. You can do this by using a small brush or vacuum cleaner. If there is any calcium build-up, you can scrape it away with a stiff wire brush. Once everything is clean, put the new drain cover in Place and tighten the screws. Reattach the drain plug (or stopper) in the same way that you removed it. Turn on the water and check for leaks. If everything looks good, take a bath!
Conclusion
I hope this article has helped you understand how to remove bathtub drain cover without screws. If it does, please share with your friends and family, as well as leave me any comments you have. Your feedback is important! Thank for reading!
You may read it also – How to Stop the Overflow Drain in a Bathtub


