If you’re like most people, your refrigerator is against a wall with cabinets above it. This leaves a big gap between the fridge and cabinet that can be difficult to fill. This blog post will show you how to fill the gap between your fridge and cabinet using trim pieces and filler pieces. We will also show you how to install the trim and filler pieces to look nice and correctly secure. So, if you’re looking for a way to fill the gap between your fridge and cabinet, read on!

A cabinet is one of the essential pieces of furniture in our daily life. It helps to keep our things organized and tidy. But sometimes, the space between fridge and cabinet can be challenging to fill. Finding the right items to put in that space can be a challenge. Many people try to put a plant in that space but finding one that fits well can be challenging.
Tools and Materials
- Measuring tape
- Pencil
- Drill
- 1-inch hole saw
- Jigsaw
- Sandpaper
- Stain or paint (optional)
- Trim pieces (we used 3/4 inch x 2 1/2 inch pine trim)
- Filler pieces (we used 3/4 inch x 2 1/2 inch pine)
- Liquid nails or wood glue
- Clamps
A Step by Step Guide on How to Fill Gap Between Fridge and Cabinet
Step 1: Determine the Size of the Gap
First, you need to determine the gap size between your fridge and cabinet. To do this, use a measuring tape to measure the distance between the two surfaces. Once you have determined the size of the gap,
Cut Pieces of Wood Once you have determined the size of the gap, you need to cut pieces of wood that will fit snugly into the space. To do this, use a saw to cut two pieces of wood that are the same length as the gap. The width of the wood should be the same as the depth of the fridge plus 1/8 inch. This will ensure that the wood pieces fit snugly into the space and do not protrude from the surface.
Step 2: Prepare the Area
Next, you need to prepare the area around the gap. First, use a pencil to mark the center of the gap on both the fridge and cabinet surfaces. Then, use a drill to create a hole at each mark. The holes should be large enough to accommodate a 1-inch hole saw.

Step 3: Cut the Holes
Once you have drilled the holes, you can cut them out using a 1-inch hole saw. To start, attach the hole saw to your drill. Then, align the bit with one of the holes you drilled in Step 2 and begin cutting. Once you have cut through both sides of the gap, remove the hole saw and set it aside.
Step 4: Remove the Excess Material
Now that you have cut the holes, use a jigsaw to carefully remove the excess material along the inside edge. Once you have removed the excess material, you can move on to the next step.
Step 5: Sand the Area
Once you have removed the excess material, you need to sand the area around the gap. This will help create a smooth surface for your trim pieces. To sand, the area, use a piece of sandpaper or an electric sander. Start with coarse grit and then switch to a finer grit until the surface is smooth.
Step 6: Stain or Paint (Optional)
If desired, you can stain or paint the area around the gap. This is an optional step, but it can help your trim pieces blend in with your cabinets or fridge. If you decide to stain or paint the area, let the area dry completely before moving on to Step 7.
Step 7: Cut Trim Pieces and Filler Pieces
Next, you need to cut your trim pieces and filler pieces. To do this, measure the length of the gap and then add 1/2 inch to that measurement. Then, use a saw to cut two pieces of trim and two pieces of filler at that length.

Step 8: Attach Trim Pieces
Once you have cut your trim pieces, it’s time to attach them. To do this, you will need wood glue or liquid nails. If using wood glue, apply it to the back of one of the trim pieces. Then, align the trim piece with the hole’s edge and press it into place. Repeat this process for the other trim piece. If using liquid nails, apply a bead of adhesive to the back of one of the trim pieces. Then, align the trim piece with the hole’s edge and press it into place. Repeat this process for the other trim piece.
Step 9: Attach Filler Pieces
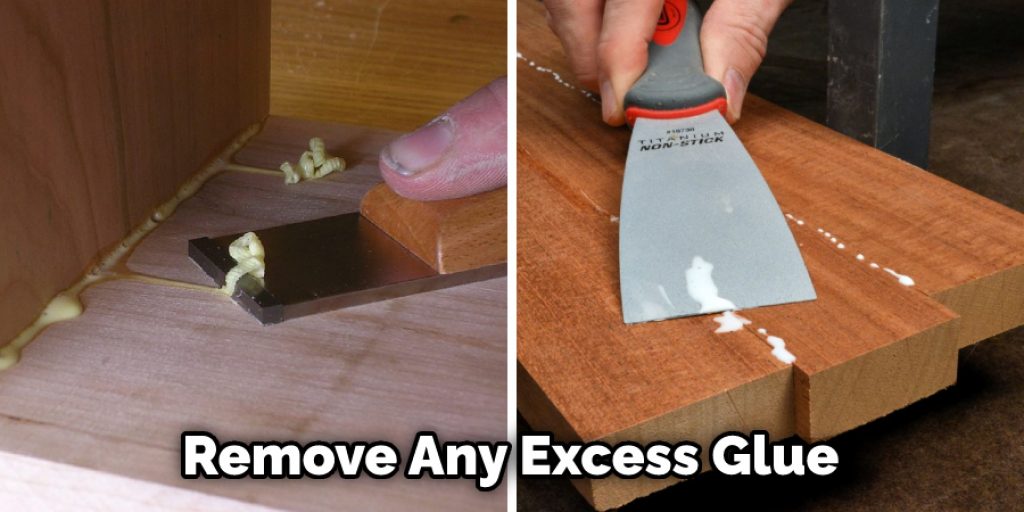
Now that you have attached your trim pieces, you need to attach your filler pieces. To do this, apply wood glue or liquid nails to the back of one of the filler pieces. Then, align the filler piece with the hole’s edge and press it into place. Repeat this process for the other filler piece. Once you have attached your filler pieces, carefully remove any glue that may have seeped out with a rag. You do not want glue to dry on the surface of your furniture piece.
Step 10: Clamp Pieces Into Place
Once you have applied your glue or adhesive, you need to clamp the pieces into place. This will help ensure a strong bond between the trim and filler pieces and the fridge and cabinet. To clamp the pieces into place, use C-clamps or bar clamps. Place the clamp around the trim or filler piece and tighten it until snug. Repeat this process for all of the pieces.
Step 11: Remove Excess Glue
Once you have clamped all of the pieces into place, you need to remove any excess glue or adhesive. To do this, use a putty knife or other sharp object to scrape away the excess material. Once you have removed the excess glue, you can move on to Step 12.
Step 12: Allow Pieces to Dry
After you finish gluing or attaching something together, you have to wait for it to dry. This usually takes a day, but it might take longer depending on the type of glue or adhesive you used. Once it’s dry, you can continue to the next step.
Step 13: Trim the Filler Pieces (Optional)
If desired, you can trim the filler pieces to create a flush surface. Use a saw to carefully cut along the edge of the filler piece to do this. Once you have trimmed the filler piece, you can move to Step 14.
Step 14: Attach Molding (Optional)
If desired, you can attach molding around the outside edge of the trim pieces. This is an optional step, but it can help give your project a finished look. To secure the molding, use wood glue or liquid nails. Apply a bead of adhesive to the back of the molding and then press it into place. Once you have attached the molding, you can move to Step 15.
Step 15: Caulk the Gap (Optional)
If desired, you can caulk the gap between the fridge and cabinet. This is an optional step, but it can help create a seamless look. To caulk the gap, use a caulk gun to apply a bead of caulking around the perimeter of the trim pieces. These steps will help in how to fill gap between fridge and cabinet.
Tips
If your fridge is too big for the space between your cabinets, you can use these tips to fill the gap and make it look seamless.
- Use caulk or weatherstripping to fill any gaps around the edges of the fridge. This will help prevent heat from escaping and keep your energy bills low.
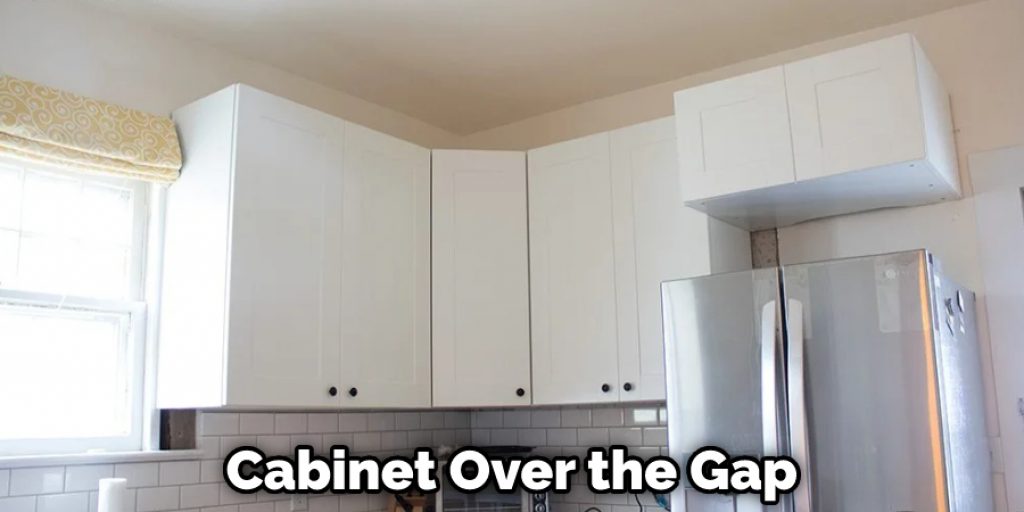
- Install a shelf or cabinet over the gap. This will give you extra storage space and make your kitchen look more polished.
- Hang a tapestry, curtain, or piece of art over the gap. This is a great way to add personality to your kitchen and make the space more inviting.
- Build a custom cabinet or shelving unit to fit the space. This is a more involved project, but it will give you the most seamless look.
- Use furniture to fill the gap. A small table or cart can be a great way to fill the space and add extra storage.
- Leave the gap empty. This is an unexpected look that can be quite stylish. If you have enough counter space, you may not need anything else in the area.
Is the Gap Between Fridge and Cabinet Bad?
The gap between the fridge and cabinet is a common issue in many kitchens. Several factors may contribute to this gap, including poorly designed cabinetry or improper kitchen layout. However, while it can be annoying to have things fall through this space constantly, there is also not necessarily anything wrong with having a small gap between your fridge and cabinet.
This space can be helpful for airflow and ventilation in your kitchen, as it allows cool air from the fridge to circulate into the rest of the room. Additionally, if you use magnetic covers for your appliance to prevent spills and food waste, the small space between the fridge and cabinet can help to keep these covers securely in place. So, overall, it is possible that this so-called “gap” could be an asset rather than a problem!
Conclusion
If you are looking for an easy way to fill the space between your fridge and cabinet, we have a few suggestions to make the process quick and straightforward. By following the steps on how to fill gap between fridge and cabinet, you can create a finished look in no time and enjoy your new kitchen space. If you have tried this method, let us know how it worked.


