How to Cover Plaster Walls
Plaster walls can be a beautiful addition to your home, but they also require maintenance and care. If you have ever had a plaster wall in your house, you know that it is straightforward to chip the paint or the plaster off of them over time. Therefore, to keep your wall looking nice and clean for years to come, you must take proper care of it.
This means covering up any scratches or chips right away to not get larger over time. You should also make sure that there are no cracks in the plaster because these can allow moisture into the wall, which will cause even more problems down the road. This blog post will show you how to cover plaster walls.
8 Steps to Follow on How to Cover Plaster Walls
Step One: Determine
First, decide what you plan to do with your walls. Next, decide if you want to paint, wallpaper, or cover the plaster in another way. If you are planning on painting, proceed to step two. For wallpaper, consult your local hardware store or home improvement center for advice and supplies needed before starting any job.
If you wish to cover up the plastered walls, there are several options for plastering. First, you can use drywall or panel board as a cover-up. Drywall is nailed directly to the wall and can be sprayed to match almost any color. Panelboard is another great look for your walls. It, too, can be primed and painted to match any colors you want.
Once you have decided on the covering material, purchase the correct tools to install them. Using drywall, have a nail gun, taping knife, pencils, and stud finder. If the panel board is what you are planning on using, purchase one of those instead.
Step Two: Prep the Walls
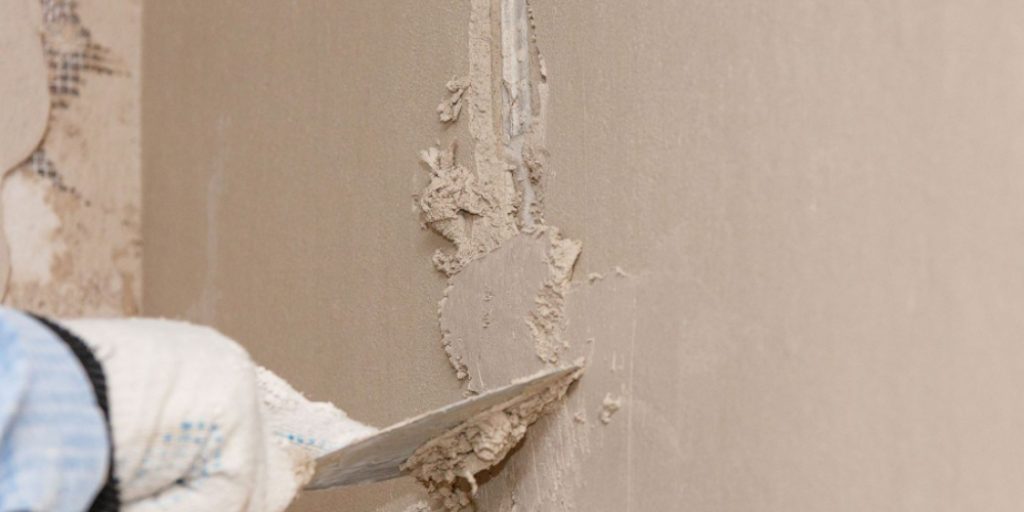
Before attaching the covering material to your walls, you must first remove everything from them. Anything connected to the walls must be removed or patched. Molding and baseboards that cannot be taken down should be painted to match the covering material before it is put up.
This means you spackle any holes and touch them up with paint so no one can tell where they were once placed if you need to patch them back in later. Once they are prepped to your liking, you will attach the covering material. If you are using drywall, you will first mark off where your studs are.
Studs are the heavy beams that support drywall on almost all walls. You can use a stud finder or simply knock on the wall with your knuckles to see if it sounds hollow or not. Once they have been found, measure how tall they are and cut a length of drywall to fit in front of them.
Step Three: Mark and Cut the Covering Material
Once you have marked and cut your covering material, it is time to install. First, nail or screw in place; then cover with paint or wallpaper depending on what was bought. Using a panel board, use a pencil to mark lines where you need to cut for around doors and windows, corners, ceiling, and the floor.
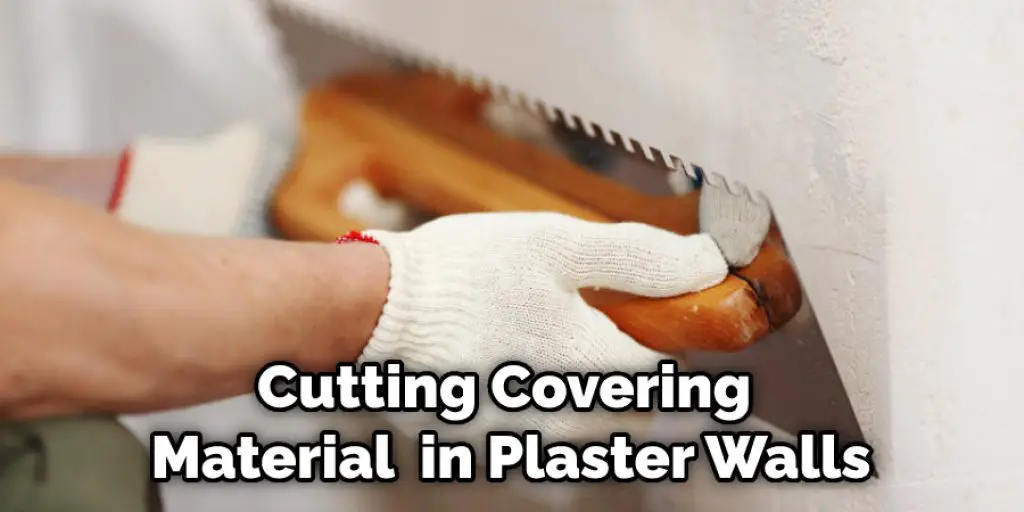
Use a utility knife to cut along the lines you marked off. Be careful when cutting because it is easy to make the cuts crooked. If you are using a panel board, all of your edges must be cut to fit perfectly. For this reason, use an electric saw instead of a utility knife if it is available since they are easier to control and gives cleaner results.
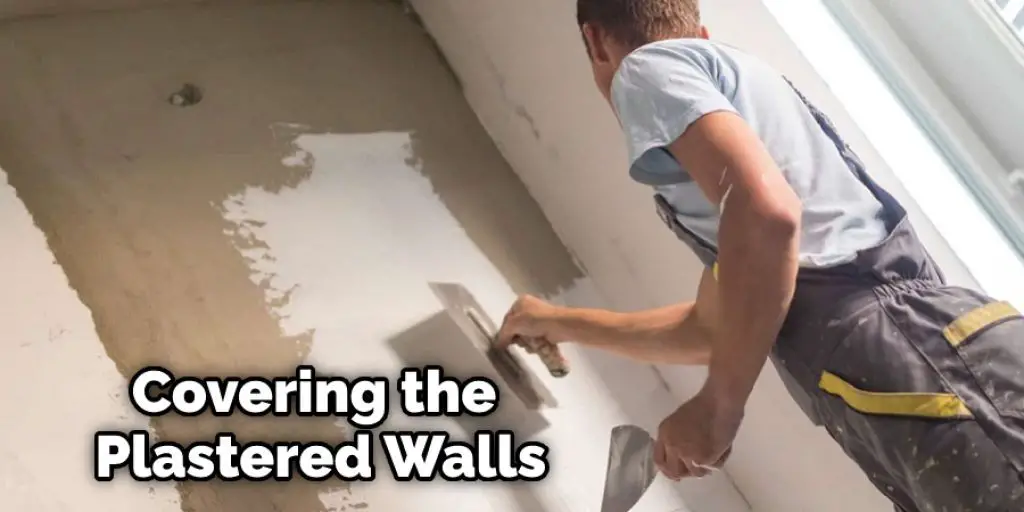
If using drywall, you must only cut off the excess. After it has been attached to your walls and matches up perfectly with the adjacent sheet of drywall, you are ready for paint. If using a panel board, one side will be solid, so paint or wallpaper that side before attaching to your wall. This will help in how to cover plaster walls.
Step Four: Attach the Covering Material
This is not as hard as it may sound. As long as you have purchased and prepared the covering material and tools to go with them, all you need now is a stud finder and pencil to mark off where your nails will go. Next, nail the drywall into place just above the height of your studs.
If you have any wiring or plumbing that runs through the wall, be sure to keep this in mind. You must avoid hitting it with a nail because you may accidentally pierce something important and cause damage inside your walls. Always attach drywall behind door frames to avoid any creases and cracks where the wall ends.
Nails can easily be removed when necessary, but they can become impossible to get out if you are too deep or go in at an angle. After it has been placed, attach the second piece of drywall on top with nails. You may need a small screwdriver to scrape off excess paint before attaching your new panel board.

Step Five: Paint
Once everything is in place, paint to your liking. You may tape off sections of the wall that you do not want to be painted if desired. For example, if you are using a pattern and only want one space to be solid, mark it off and put tape over the rest of the surface before painting.
If you are using a textured covering material, you will want to use a joint compound instead of paint. The joint compound is just like spackle but less watery and thicker. Use a putty knife to apply it over the seams of drywall in an even manner.
Once dried, sand down with fine sandpaper or steel wool until it matches up perfectly to nearby parts of the wall. If it is not even, you can apply a second coat and repeat until it is perfect. If you want to find out more about how to cover plaster walls, keep reading.
Step Six: Wait for Everything to Dry
This step is essential because it can be very frustrating if something goes wrong while working on the wall and you have no way to fix it. Do not expect anyone else to work on the covering material, even if they know what to do. If it is not done perfectly for some reason, you might have to start over from the beginning and make sure everything goes as planned this time around.
Once it has been pained or wallpapered, please wait until it is scorched before hanging anything on your walls. You can paint a room’s drywall a different color and hang lightweight things on it if you want to, but do not attach anything heavy to the wall, such as shelves or mirrors. Wait at least one week before hanging anything really heavy.
Doing any of these steps incorrectly can cause severe damage to your walls by creating cracks or holes where they should not be. To avoid this, make sure you have a friend or family member to help you with some of the more difficult parts.
Step Seven: Decorating!
Once it is scorched and finished, start decorating! Start with lighter items first until everything is up where you want it to be. Now that your walls are complete, you can hang up all of your favorite photos and paintings without the fear of anything falling.
When using decorative panels, place them roughly 1/8″ away from the drywall to create an excellent backing that will not warp or bend as much as it would if you were to push it directly into the wall. Also, please make sure they are level with one another when attached.
You have successfully finished covering up your walls! You can now spruce up your décor in a brand new room with a fresh wall design. If you need help, try asking a friend to come to help you. These instructions will teach you how to cover plaster walls.
Step Eight: Maintain Your Wall
After the wall has been finished, take care to maintain it. This means keeping nail holes filled in so no one tripping on your wall gets hurt and smoothing out the walls before painting, so cracks do not show up. If you have any issues with the covering material or how it has been applied, contact a professional for advice rather than doing it yourself.
This can prevent further damage to the wall, especially if it is something like wet paint that has seeped through. If you accidentally get anything on your new wallpaper or painting, take care of it quickly, so no one gets hurt.
If you are not comfortable doing any of these steps yourself, consider having a professional do them for you after hiring someone specializing in that type of work. It is always better to use a professional than to risk harming your walls while trying something new.
You can check it to Remove Sink Drain Pipe Coming Out of Wall.
Frequently Asked Questions
What Do You Cover Plaster With?
Plaster is a type of masonry that is used to cover walls and ceilings. The most common types are gypsum plaster, which is an economical option because it’s low in water content, and lime plaster, which has better weathering characteristics. Gypsum plaster can be applied using a trowel, brush-and-pad method, or pump sprayer. Lime plasters can be applied with the help of either a trowel or roller. Obviously, the use of these different methods will result in differences in finish quality and durability.
Should I Remove Plaster or Drywall Over It?
It needs to be treated. In general, if plaster or drywall is damaged and is not structurally sound, it should be removed in order to prevent further damage.
If the damage is minor or confined to a specific area, then it may be possible to repair the plaster or drywall without removing it. However, if the damage is extensive or involves a structural element (such as a beam), then it would likely be necessary to remove the plaster or drywall in order to restore the structural integrity of the building.
Conclusion
In this blog post, we talked about how to cover plaster walls. First, you need to determine what type of paint will work best for the room and then purchase a primer or sealer explicitly designed for covering plaster walls. Finally, when painting over your wall with latex paint, make sure it is not too wet so as not to smudge any texture on the plaster.
The key point was choosing the right paint for your specific situation, which can be tricky if you don’t know much about them! We hope this article has helped inform you enough that now you are ready to get started on all those rooms in your house, waiting patiently to have their walls painted!
You may also read this – How to Glue Plaster.


