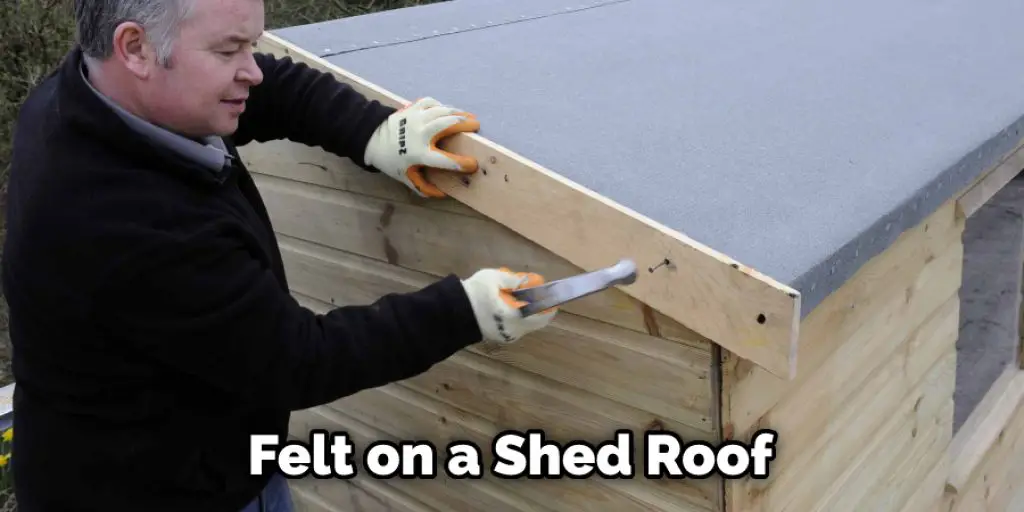
Felt roofs are not only an excellent choice for eco-friendly homes, but they also come pre-packaged with a natural water barrier. But what if you want to install one on your existing roof without the hassle of tearing it all down first? The answer may be felt installation. This blog post will teach you how to felt a shed roof without using nails.

The process is simple enough, but the roof may come apart and be ruined if done improperly. Therefore, you must take your time and work with precision to get an excellent finished product! In this article, I’ll show you step-by-step instructions on how to felt a shed roof without nails or staples. You can do it yourself or hire someone else for the job! All of the supplies are easy to find at your local home improvement store.
Step by Step Guide on How to Felt a Shed Roof Without Nails
Step One: Gather the Materials
To felt a shed roof without nails, you’ll need fifteen pounds of hair felt and one pound of seam cord. You’ll also need two sheets of heavy-duty plastic with grommets, five pounds of gravel, four pounds of fishbone base, three pounds of tar paper, six pounds of wood shingles, four cans of asphalt; two-thirds full, and one pound of a bristle brush.
Step Two: Lay Out the Shed Roof
Layout a sheet of heavy-duty plastic with grommets on top of a base layer of gravel. For the roof to properly shed water, all seams between sheets must be covered. The gravel will prevent any felt from sinking into gaps between boards and give the roof stability. If you don’t have an even and flat surface for the gravel, use a wooden board as a base.
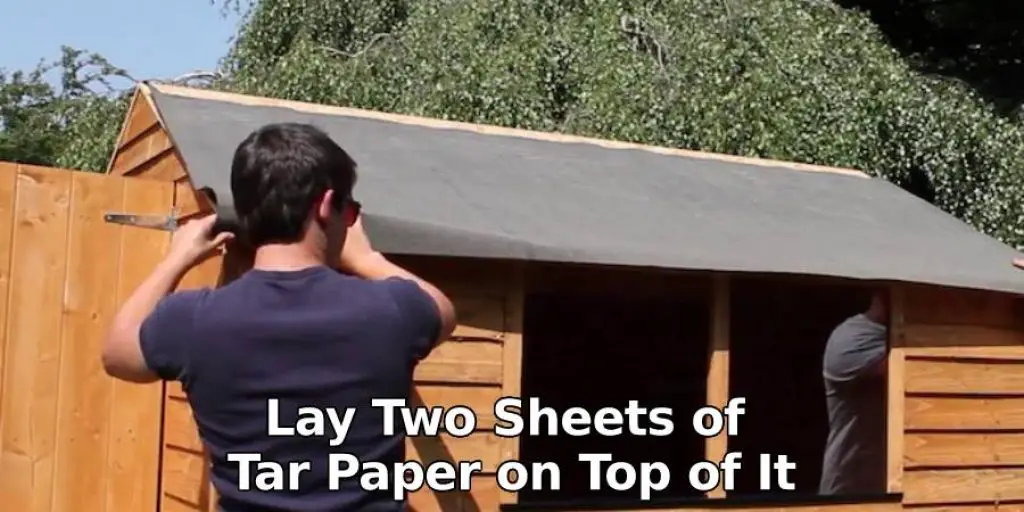
Step Three: Lay the Tar Paper
Once the gravel layer is laid down, lay two sheets of tar paper on top of it. Fold over any loose or excess pieces from around the grommets and staple them down to make the roof watertight. If there are gaps in the tar paper, add a third sheet and overlap sections of it on top of one another to plug any holes.
Step Four: Add Felt Layers
Layer four pieces of felt over the tar paper, starting with coarse hair felt and then continuing with medium, fine and smooth hair felt. The layers should be laid with coarse hair felt on the bottom, then soft, fine and medium felt on top. This will ensure that the roof is waterproof. Step Five: Add a Second Layer of Tar Paper
Once you’ve laid the four sheets of the felt roof over the top of the first layer, lay two more sheets of tar paper onto it, overlapping half of one piece and half of another. This is to make the roof even sturdier and more waterproof.
Step Six: Lay the Wood Shingles
Lay two layers of wood shingles on top of the tar paper and felt roof. They should overlap one another and overhang the edges by at least four inches to keep out any moisture or debris that may find its way into your shed. Also, they must be overhung by a minimum of two inches per layer of felt.
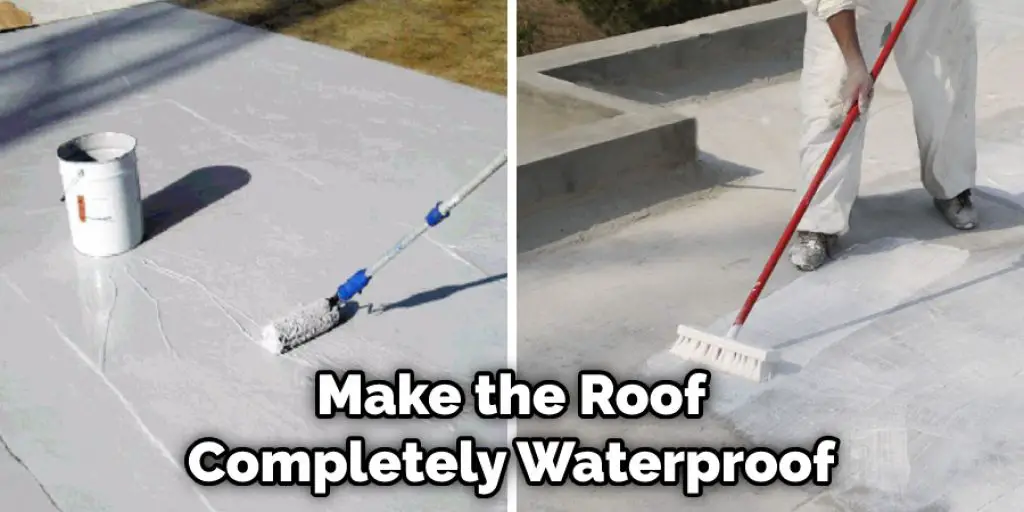
Step Seven: Make the Roof Watertight
Once the two layers of wood shingles have been laid down, it’s time to make them completely waterproof and impenetrable by water or wind. Add a third layer of tar paper onto the roof overlapping each new sheet on top of one another and adding an extra half-inch overlap with each new sheet to ensure the whole roof is watertight.
You Can Check It Out to Frame a Irregular Hip Roof
Step Eight: Apply a Skin Layer of Felt
To take your shed felt roof from waterproof to weatherproof, lay one final layer of fine hair felt over the top of the roof, overlapping the edges by at least an inch and securing it down with a seam cord. The seam cord will keep the fine layer of felt in place, prevent it from being blown off by the wind, and help protect against any mishaps that may damage it or allow water penetration.
Step Nine: Apply a Skin Layer of Seam Cord
To further weatherproof your shed roof without nails, you’ll need two pounds of seam cord. Apply the steam cord to the roof by laying it over any loose felt and stapling it down onto the existing layers. The seam cord will keep finer pieces of felt in place, prevent them from being blown off or getting dirty, and allow water penetration through small holes.
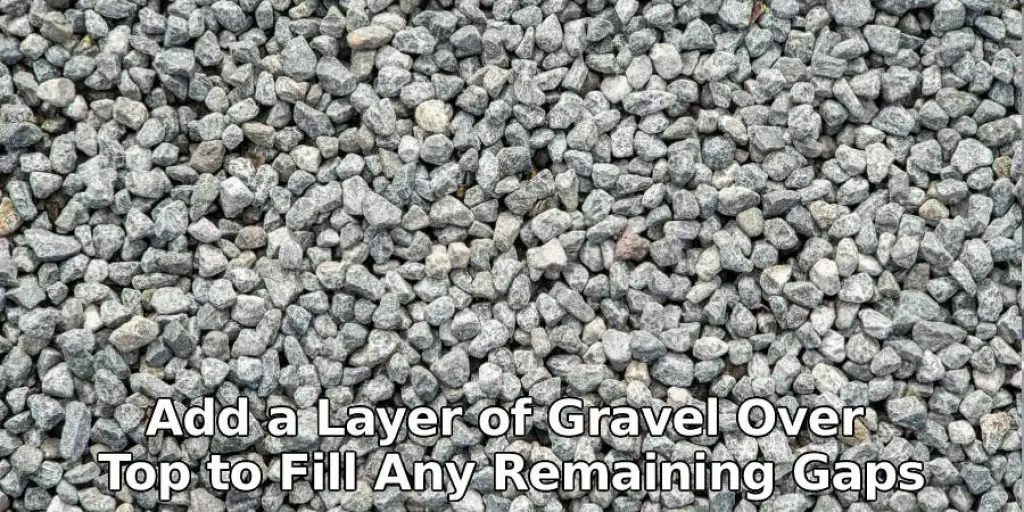
Step Ten: Fill the Gaps with Gravel
Once all of your felt roof layers have been laid down and secured, add a layer of gravel over top of them to fill any remaining gaps around the edges or between pieces. If there are any holes or spaces that can’t be patched with a piece of felt, use some gravel to plug them up. The gravel layer should be a minimum of half an inch thick. If you want to find out more about how to felt a shed roof without nails, keep reading.
Do I Need Adhesive for Shed Roof Felt?
No. Shed Roofing Felt Adhesive is not necessary for roofing felt to stick to the roof deck or other roof layers. However, if you are using asphalt shingles, a self-adhering waterproof underlayment will be needed between them and the felt.
Many roofers believe asphalt shingle adhesive will also hold the building paper in place. This is not so. The only thing holding the asphalt felt down is gravity and friction from being weighed down by several pounds of wet roofing felt.
What are the Benefits of Felt rather than Tar Paper?
The main benefit is cost. Roofing felt costs much less than tar paper, and it also requires less labor when installing. It lasts longer, too: while tar paper only has about five years before needing replacement, roofing felt can last up to 20 years before needing replacement.
Tar paper can also become slippery and dangerous in high-heat situations, such as those experienced in wildfires, whereas roofing felt remains stable when the temperature is high.
Frequently Asked Question
Can You Glue Felt to Shed Roof?
Yes. You can glue felt to the roof of your shed or any other project that you are working on by using a silicone adhesive.
First, clean the surface of the wood with a degreaser like Simple Green and let it dry for at least 30 minutes. Then use a paintbrush to apply an even coat of silicone adhesive to the entire surface of the wood, allowing about 10 minutes for it to set up before proceeding with laying down felt. Next, lay down your first layer of felt by using a hot glue gun and pressing firmly until it sticks well to the first layer.
Next, cut pieces from your second layer of felt and press them into place around each piece from step 2 so that they are overlapping in all areas where two pieces meet.
Lastly, once you have finished gluing all pieces together and smoothing out any rough edges, finish off by adding some trim around the bottom edge of your project if desired with either hot glue or regular white craft glue.
Can You Put Roofing Felt on Wet Wood?
Yes, you can put roofing felt on wet wood. You need to have a good weatherproofing sealant that is applied to the surface of the wood before applying the roofing felt. This will help ensure that water doesn’t get through and cause any damage to your house or building.
Can You Felt Over Old Felt on A Shed Roof?
The felt on a shed roof is meant to be installed and then covered with tar paper or other materials. Felt that has been exposed to the elements can be repaired but not removed and replaced.
Can You Put New Felt Over Old Felt on A Shed?
New felt can be put over old felt if you want to protect the old felt from any further damage. However, if you do not have any new felt, it is impossible to put on the new felt without taking off the old one first.
Conclusion
In this blog, we’ve laid out a few tips on how to felt a shed roof without nails. We hope that the information provided will be helpful as you work towards finishing your project and getting back to enjoying all of those activities that were put on hold while you worked on replacing the old roof.
If there are any questions about these steps or if you need help with anything else related to home improvement projects, please don’t hesitate to reach out! The felt on the roof should line up with your shingles. This will help prevent leaks and keep water from seeping through the seams of your roof. Your new felt is now installed!
Check it out also – How to Seal Corrugated Plastic Roof .


