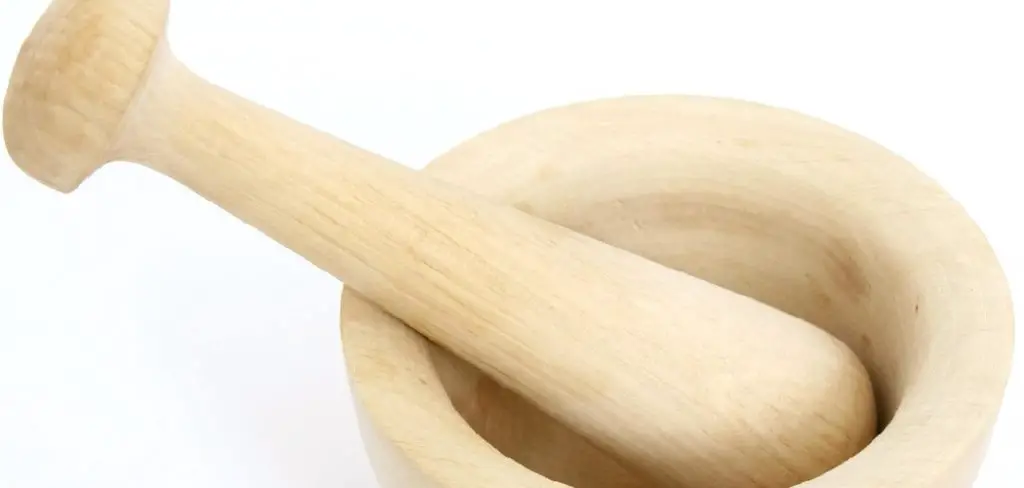
How to Make a Wooden Bowl With Hand Tools
There’s something special about wooden bowls. They’re appealing to the eye, and they feel good in your hand. Plus, there’s something very satisfying about making them with nothing but a few simple hand tools.
Making a wooden bowl with hand tools is a fun and challenging project that can be completed in a few days. In this blog post, we’ll show you how to make a wooden bowl with hand tools.
By reading the article, you will also know how to make a wooden bowl using just a carving knife, chisels, and a mallet. It’s a challenging but rewarding project that will give you a real sense of accomplishment. So let’s get started!
Is It Possible to Make a Wooden Bowl With Hand Tools?
The answer is a resounding yes! With patience and proper techniques, you can make a wooden bowl with hand tools.
One of the great things about making bowls with hand tools is that it’s very satisfying. Unlike using power tools, which can be noisy and messy, working with hand tools is calming and therapeutic.
Things You’ll Need:
- A piece of wood at least 10″ in diameter and 3″ thick. The type of wood you use is up to you, but a more complicated wood such as oak or maple will be less likely to warp than a softer wood like pine.
- A saw for cutting the wood to size. A handsaw, power saw, or even a miter saw can be used.
- A drill for making holes in the wood.
- A dowel jig or other method for drilling evenly spaced holes around the circumference of the wood.
- Dowels or other small pieces of wood for creating the bowl’s handles.
- A bowl gouge or other carving tool for shaping the bowl.
- A router for trimming the edge of the bowl smooth.
- A drill bit for making a hole in the bottom of the bowl for drainage.
10 Steps on How to Make a Wooden Bowl With Hand Tools
1. Choose Your Wood:
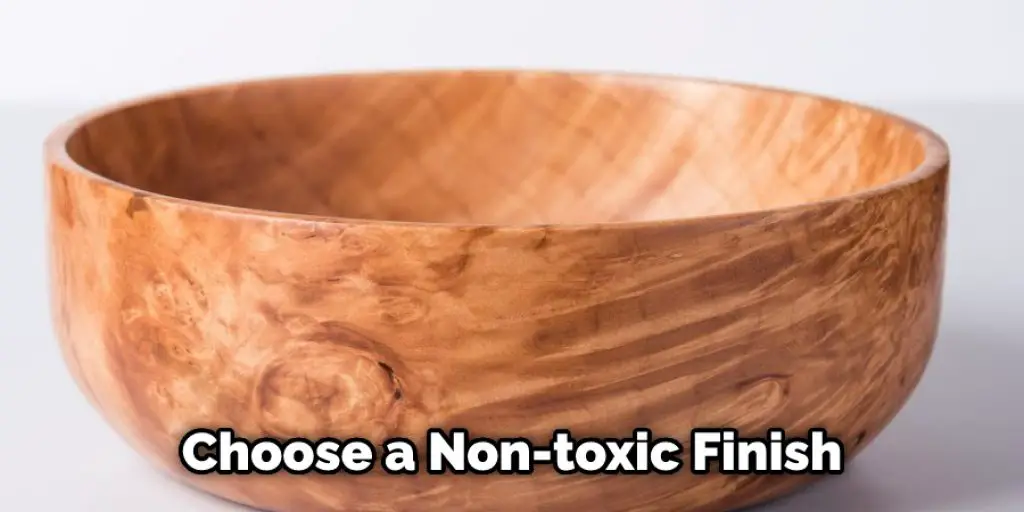
The first step is to choose the right wood for your project. The type of wood you use will largely be determined by what you’re going to use the bowl for. If you’re going to use it for food, make sure to choose a non-toxic variety like maple or cherry. If you’re going to use it for decoration, any type of wood will do.

2. Cut Your Wood:
Once you’ve chosen your wood, it’s time to cut it into pieces. You’ll need two pieces for the sides of the bowl and one piece for the bottom. The size of the pieces will depend on the size of the bowl you want to make.
3. Start with the Right Wood
As we mentioned before, the type of wood you use will largely be determined by what you’re going to use the bowl for. If you’re going to use it for food, make sure to choose a non-toxic variety like maple or cherry. If you’re going to use it for decoration, any type of wood will do.
4. Find a Template or Create Your Own
If you’re not confident in your ability to freehand the shape of a bowl, it’s best to start with a template. You can find these online or in woodworking books. If you’re feeling creative, you can even create your own template out of cardboard or thin plywood.
5. Cut Out the Bowl Shape
Once you have your template, use a saw to cut out the rough shape of the bowl. If you’re using a hand saw, it’s best to start with a straight cut and then switch to a more delicate sawing motion once you’re inside the template lines.

6. Smooth the Edges
Use a rasp or file to smooth out the edges of your bowl. If you’re using a power tool, be careful not to remove too much wood too quickly, or you could ruin the shape of your bowl.
7. Drill a Hole for the Handle
If you’re going to add a handle to your bowl, now is the time to drill a hole for it. The size of the hole will depend on the size of the handle you’re using.
8. Carve the Bowl:
Now it’s time to start carving! Use a carving knife to remove the bark from the wood. Then, use a chisel and mallet to shape the wood into a bowl shape. A chisel is a versatile tool that can be used for a variety of tasks, such as shaping wood, removing excess material, and carving details. And mallet is a great way to apply force to the chisel without damaging the wood.
9. Sand the Bowl:
Once you’ve carved the bowl, it’s time to sand it smooth. Start with coarse grit sandpaper and work your way up to a finer grit. This will help to remove any roughness and imperfections from the wood.
10. Finish the Bowl:
The final step is to finish the bowl. You can do this by applying a food-safe oil or wax or by simply leaving it natural. If you’re going to use the bowl for food, make sure to choose a non-toxic finish. And that’s it! You’ve now learned how to make your wooden bowl with hand tools.
Making a wooden bowl with hand tools can be completed in a few days. In this blog post, we’ve shown how to make your wooden bowl with hand tools. By following the steps, you’ll be able to create your own wooden bowl for decoration or everyday use. Get started today!
Additional Tips and Tricks
1. If you’re having trouble shaping the bowl with your hands, try using a small piece of sandpaper to smooth out the edges.
2. If you’re using a power drill, be careful not to overheat the wood and cause it to catch fire.
3. Always wear safety goggles when working with power tools.
4. When drilling the hole for the handle, make sure to use a bit that’s slightly smaller than the handle so it will fit snugly.
5. If you’re not skilled in woodworking, it’s best to ask for help from someone who is.
Making a wooden bowl with hand tools is a satisfying project that can be completed in a few hours. All you need is a piece of wood, some hand tools, and a little bit of elbow grease.
Some Creative Ideas to Make a Wooden Bowl With Hand Tools:
- Use a router to create a design on the outside of the bowl.
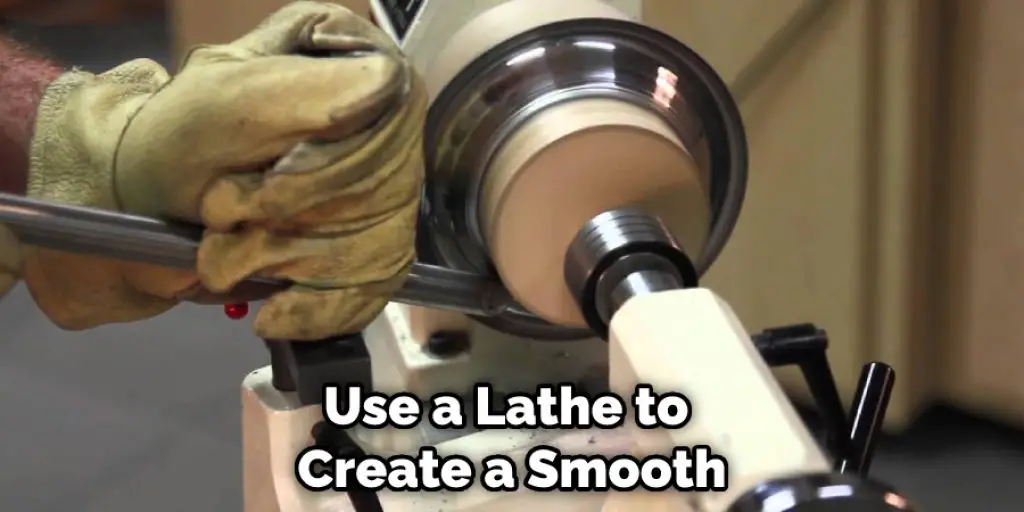
- Use a lathe to create a smooth, even surface on the inside of the bowl.
- Carve a design into the side of the bowl with a chisel.
- Create a raised design on the outside of the bowl by gluing pieces of wood to the surface.
- Paint or stain the bowl to create a unique design.
- Use a woodburning tool to create a design on the outside of the bowl.
- Attach handles to the sides of the bowl for a unique look.
- Create a rim around the top of the bowl by attaching strips of wood to the edge.
Precautions You Need to Follow
- Do not over-tighten the screws or nails. This can cause the wood to split.
- Do not work with wet or green wood, as this can cause the wood to warp.
- Always wear gloves and eye protection when working with power tools.
- Measure twice, cut once.
- Make sure the work area is well-ventilated.
These are some tips that will help you to make a wooden bowl with hand tools. Follow them and create your own unique wooden bowl. Thanks for reading!
Is It Difficult to Make a Wooden Bowl With Hand Tools?
The answer to this question is both yes and no. On the one hand, it is more difficult to make a wooden bowl with hand tools than it is to purchase one from a store. This is because you have to put in the time and effort to carve the bowl yourself.
Additionally, you need to have some basic woodworking skills in order to make a wooden bowl with hand tools. However, on the other hand, it is not difficult to make a wooden bowl with hand tools if you have the right tools and materials.
In conclusion, making a wooden bowl with hand tools is more difficult than purchasing one from a store. However, it is not impossible to do if you have the right tools and materials.
Conclusion
Bowl making is a great way to spend some time outside in the fresh air, and it’s also a very satisfying woodworking project. You can make bowls from all kinds of different woods, and you can use them for all sorts of things.
If you’re looking for a new woodworking project, give bowl-making a try. It’s a lot of fun, and you’ll be able to show off your finished product to your friends and family.
Hopefully, these tips have given you some ideas on how to make a wooden bowl with hand tools. If you have any questions, please feel free to leave a comment below. Thanks for reading!


