How to Ground a Light Switch Without Ground Wire
Are you wondering how to ground a light switch without ground wire? It’s a common question, and there are several ways to do it. If you’re renovating or remodeling your home, and need to replace a light switch without a ground wire, you may be wondering how to properly ground the switch. In most cases, it’s actually quite easy to do!
There are several ways to ground a light switch without ground wire. One of the most common methods is to use metal conduit or Romex® electrical cable. You can also use a metal water pipe or an electrical grounding grid. Make sure you consult with an electrician to ensure your installation is safe and code-compliant. Here are a few steps to help get you started.
Is It Possible to Ground a Light Switch Without Ground Wire?
It is possible to ground a light switch without ground wire, but it’s important to understand the risks involved. Without a proper grounding system in place, your home could be at risk for electrical shocks and fires. Always consult with an electrician before beginning any electrical work in your home.
The NEC (National Electrical Code) requires that all switches be grounded. However, there are some exceptions. If you’re replacing an old switch that wasn’t originally grounded, or if you’re installing a switch in a new location, you may not have access to a ground wire. In these cases, it’s still possible to ground the switch, but you’ll need to take some extra precautions.
10 Steps on How to Ground a Light Switch Without Ground Wire
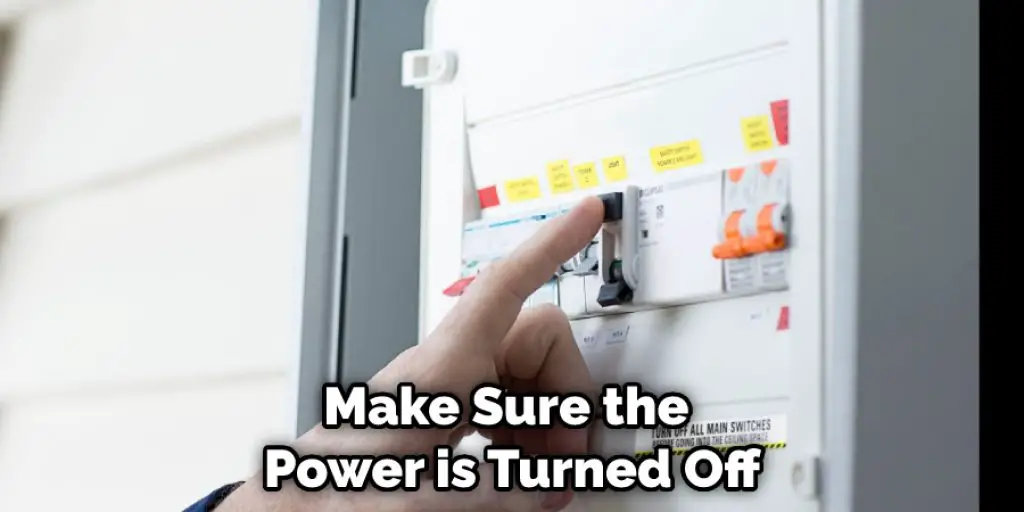
1. Turn off the Power:
Before you begin any electrical work, it’s important to make sure the power is turned off. Locate the circuit breaker box and switch off the power to the area where you’ll be working. If you don’t turn off the power, you could be electrocuted.
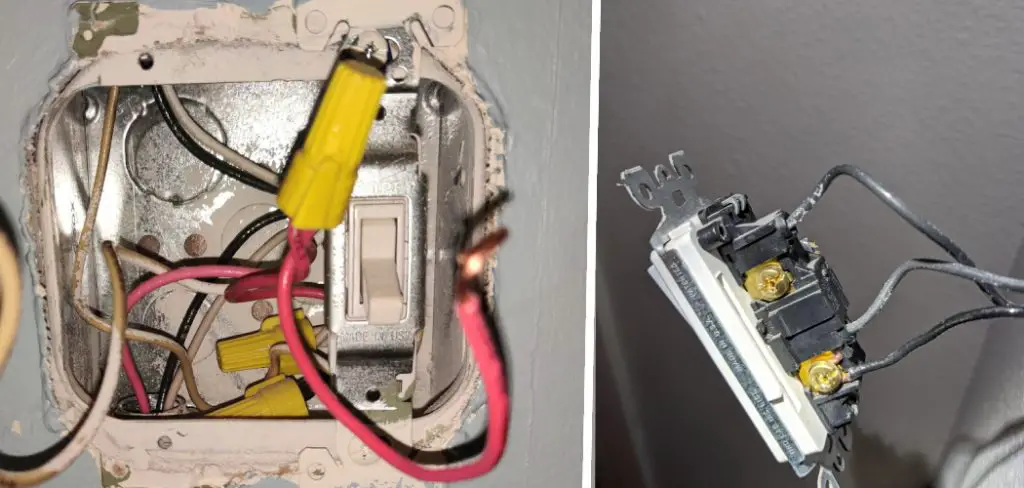
2. Remove the Old Switch:
Use a screwdriver to remove the screws that secure the old switch to the electrical box. Carefully pull the switch out of the box, being careful not to touch any of the wires. If you’re not sure which wire is which, take a picture of the wiring before you disconnect anything.
3. Install the New Switch:
Place the new switch in the electrical box and secure it with screws. Be careful not to overtighten the screws, as this could damage the switch. This step may vary depending on the type of switch you’re installing. There are a few kinds of switches like 3-way light switches and 4-way light switches which have more than two wires. So, you need to consult an electrician or the instruction manual that came with your switch before proceeding.
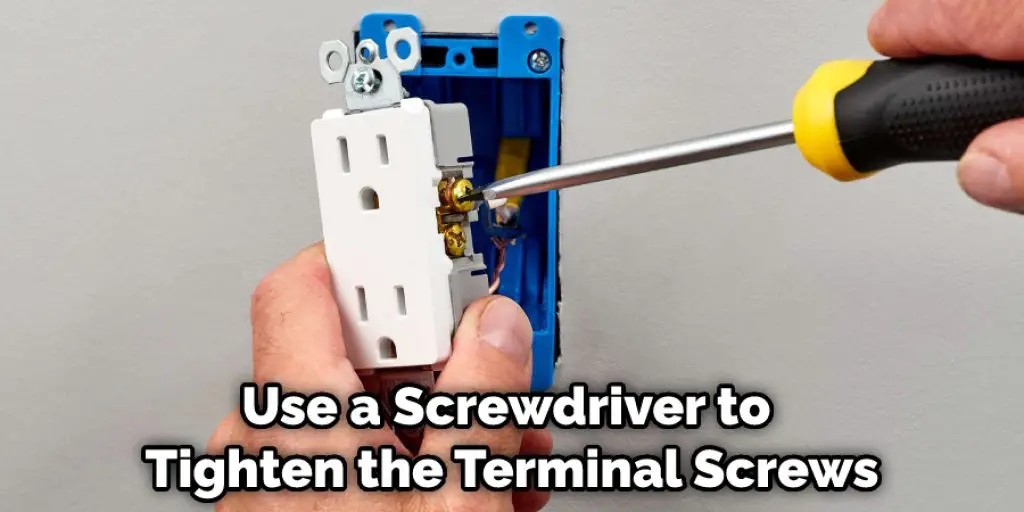
4. Connect the Wires:
The next step is to connect the wires to the new switch. Start by matching up the wires to the terminals on the switch. If you’re not sure which wire goes where, refer to the diagram that came with your switch, or consult an electrician. Once the wires are connected, use a screwdriver to tighten the terminal screws.
5. Ground the Switch:
There are several ways to ground a light switch without ground wire. One of the most common methods is to use metal conduit or Romex® electrical cable. You can also use a metal water pipe or an electrical grounding grid. Make sure you consult with an electrician to ensure your installation is safe and code-compliant.
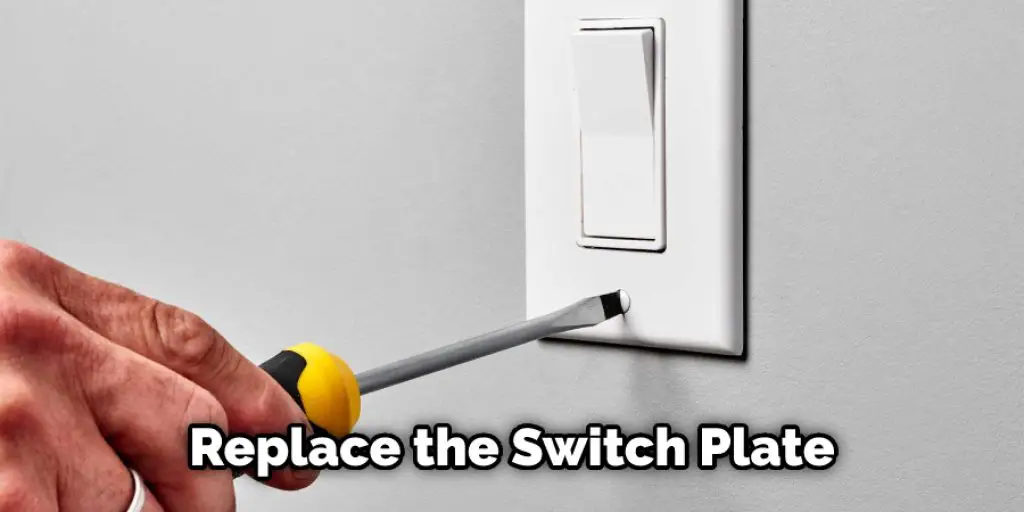
6. Replace the Cover Plate:
Once the switch is properly grounded, you can replace the cover plate. Screw the plate onto the electrical box, being careful not to overtighten the screws. Make sure the plate is properly aligned before tightening the screws. Otherwise, the plate could be crooked or loose.
7. Turn on the Power:
Before you test the new switch, make sure all the wires are properly connected and the switch is securely in place. If any wire is loose, it could cause a short circuit. Once you’re sure everything is properly connected, go to your circuit breaker box and turn on the power to the switch. Becareful while doing this.
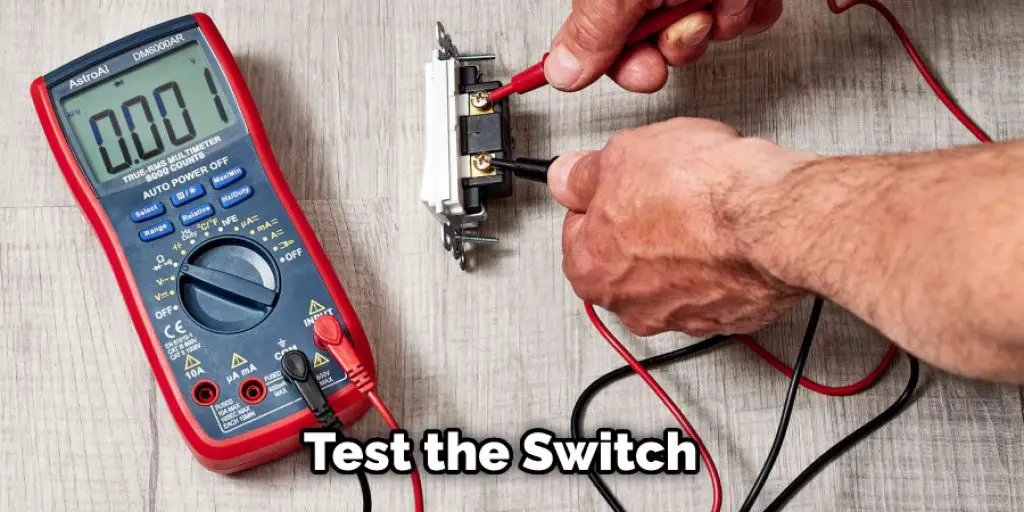
8. Test the Switch:
To test the switch, simply turn on the light that’s controlled by the switch. If the light doesn’t come on, double-check your wiring to make sure all the connections are tight. You may need to consult an electrician if you’re still having problems.
9. Inspect the Switch:
Once you’ve confirmed that the switch is working, take a close look at the switch and the surrounding area. Make sure there are no signs of damage or lose wires. The sign of any damage could indicate a serious problem. If everything looks good, you can put away your tools and enjoy your new light switch.
10. Troubleshooting:
If you’re still having problems with your light switch, there are a few things you can try. First, check the breaker box to make sure the power is turned on. Next, inspect the wires to make sure they’re all properly connected. If everything ok, consult an electrician for further assistance. Make sure you don’t try to repair the switch yourself if you’re not qualified. Otherwise, you could cause serious damage or even electrocute yourself.
By following these simple steps, you can ground a light switch without ground wire. Just be sure to take all the necessary safety precautions and consult an electrician if you’re unsure about anything. With a little effort, you can safely install your new switch and enjoy the convenience of having lights in your home.
Additional Tips and Tricks
- If you’re having trouble getting a good connection with the ground wire, try using a copper grounding rod.
- Another way to improve the connection is to use sandpaper to roughen up the area around the grounding screw.
- If you still can’t get a good connection, you may need to replace the switch plate with one that has a metal ground strap.
- If you’re working with an older home, you may need to install a ground wire in order to comply with current building codes.
- Always consult an electrician if you’re unsure about any wiring project.
With these tips in mind, grounding a light switch without ground wire should be a breeze!
Precautions You Need to Follow When Ground a Light Switch Without Ground Wire
- Know the NEC requirements.
- Check if there’s a green screw.
- Inspect the switch for signs of wear and tear.
- Test the light switch with a circuit tester.
- Turn off the power to the circuit before you begin working.
- Use proper wiring techniques.
- Connect the bare copper wire to the green screw.
- Replace the cover plate and turn on the power.
Makesure to take all the necessary precautions when grounding a light switch without ground wire. By following these simple steps, you can safely install your new switch and enjoy the convenience of having lights in your home. If you’re not comfortable working with electricity, it’s best to hire a professional electrician to do the job for you.
Is Ground Light Switch Necessary?
No, it’s not necessary to ground a light switch. However, it’s always best to follow the National Electrical Code (NEC) when working with electricity. The NEC requires that all switches be grounded in order to protect against electrical shock.
If you’re not sure whether or not your light switch is grounded, it’s best to err on the side of caution and ground it. Grounding a light switch is relatively easy to do, and only takes a few minutes.
How Do You Ground an Ungrounded House?
If your home doesn’t have a ground wire, you can install one by running a grounding rod into the ground. Attach a bare copper wire to the grounding rod and connect it to the green screw on the light switch. This will provide a path for any excess electricity to flow safely into the ground.
Your home should have been inspected by an electrician when it was built to make sure that it meets all NEC requirements. However, if you’re not sure whether or not your home is properly grounded, it’s best to consult a professional.
You Can Chack It Out Bypass Low Pressure Switch on Ac
Conclusion
Grounding a light switch without ground wire is possible, but it’s not recommended. If you’re not comfortable working with electricity, it’s best to hire a professional electrician to do the job for you.
However, if you decide to do it yourself, just be sure to follow all the NEC requirements and take all the necessary safety precautions.
In conclusion, it is possible to ground a light switch without a ground wire. By following the simple steps in this article, you can make your home safer and reduce the risk of electrical shock.
Hopefully, this article has helped you understand a little bit more about how to ground a light switch without ground wire. If you have any questions or concerns, be sure to consult a professional electrician. They will be able to help you figure out the best way to ground your light switch and ensure that your home is safe and up to code. Thanks for reading!
You Can Chack It Out Wire Rope Lights to a Switch


