How to Cast Off a Loom Blanket
It can feel like a daunting task to start weaving on a loom, even if you’ve already mastered the art of knitting and crocheting. That’s why we’re here with some helpful tips for getting started! Weaving is an ancient craft that has been around since humans first discovered how to manipulate fibers into thread.
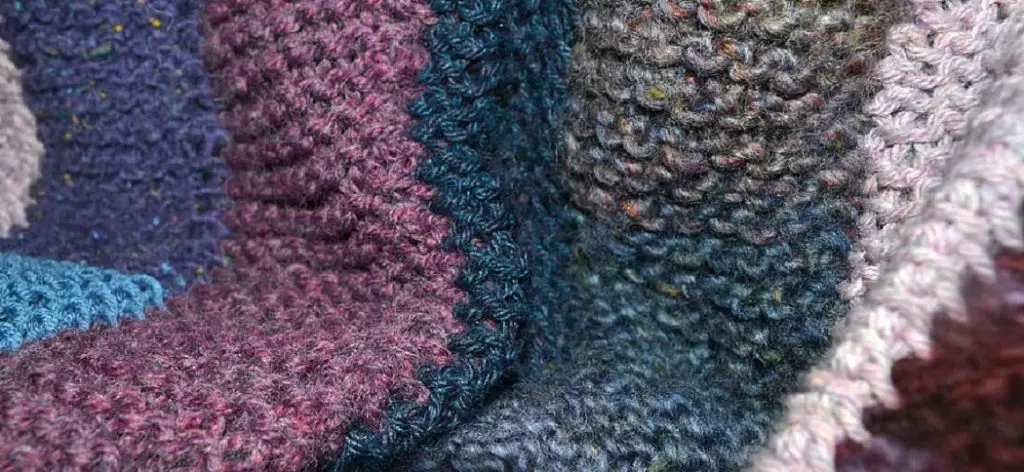
It’s also one of the most versatile crafts out there because it opens up opportunities for creating everything from clothing to blankets, rugs, and tapestries. You can use just about any type of fiber in your warp lengthwise threads, including cotton, linen, or wool, while your widthwise weft threads are usually made from silk or rayon yarns.
If you have experience working with needles but are new to the loom, you might be surprised how tightly woven your final piece will be. Therefore, it is essential to know how to cast off a loom blanket.
8 Steps to Follow on How to Cast Off a Loom Blanket
Step One: Determine
First, you need to determine where to place your last row. It is best to plan since finishing a project can be frustrating if you make a mistake. Once I got the hang of it, I found this video helpful because it explained things pretty well as how and why they would do it in different ways depending on what was going on.
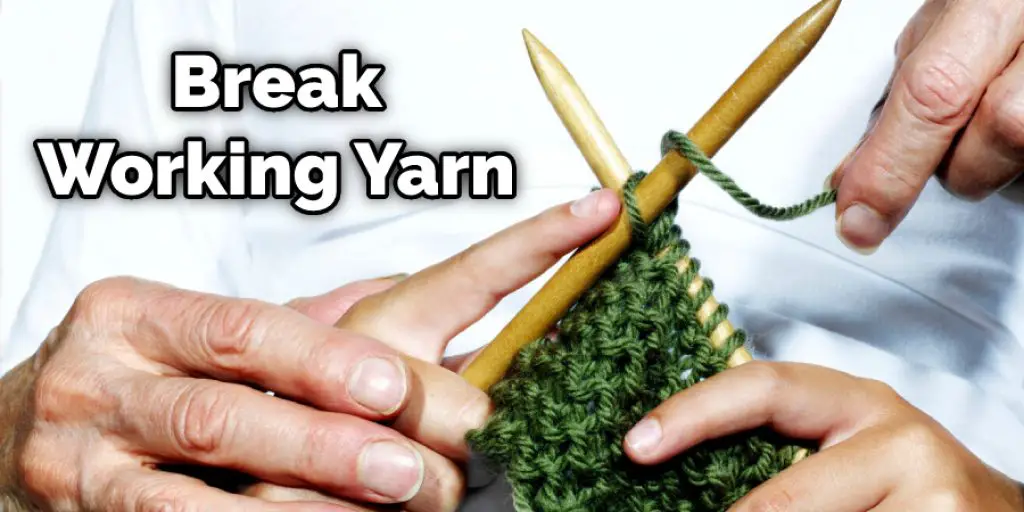
I recommend you watch it. This is a technique I learned from the video, and it is what I used in my project. The footage suggests, however, that you do not cut the yarn after each row. Instead, they tell you to break your working yarn and continue with a new one for each row.
Step Two: Draw the New Yarn Through
Thread a new piece of yarn through your work. This is going to be your string for dropping off stitches one at a time, so make sure it’s long enough to get what you need to be done. To do this, I made a second stitch on my loom using the other end of the same working yarn.
You’ll pull your new string through, so it should be twice the length you need. In my project, I needed about five inches of string on either side of where I dropped a stitch, so I made my string ten inches long. It is helpful to wrap your string around a knitting needle or pencil at this point, so it won’t get in the way later on when you begin dropping stitches.
Step Three: Drop Stitches
Now that you have your working yarn threaded through your work go ahead and drop off one of the stitches from your working yarn. At this point, you have a stitch on either side of where you’re going to drop stitches, and there is a new piece of string sticking out from the top.
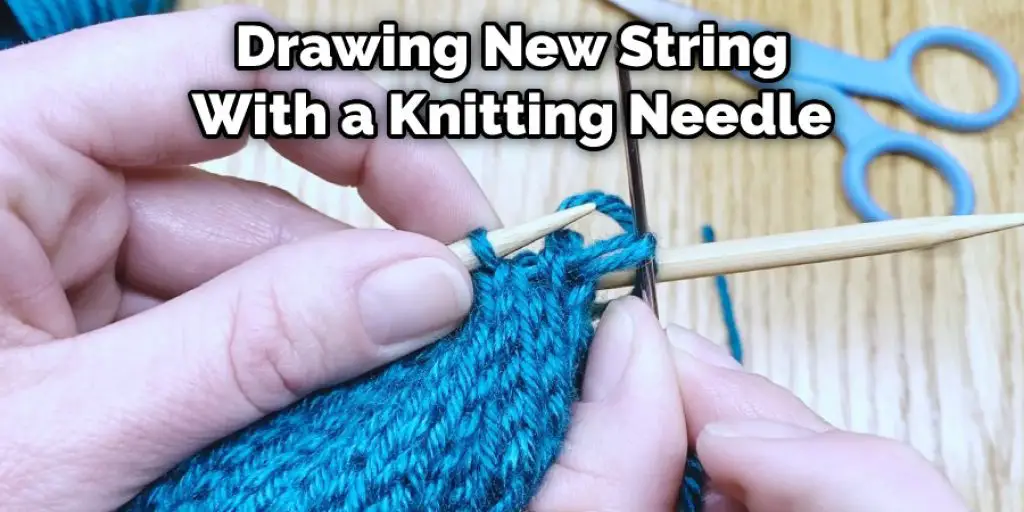
You can do this at any point in your project. Most people do it when they get to the edge of their project, so they don’t have to cut their working yarn and rejoin it later. If you’re doing that, then I recommend you do it now. After dropping the first stitch, start drawing your new string through with a knitting needle or crochet hook, so it is easier to pull out later.
Step Four: Thread the New String
If you’re like me, your project is less than enthusiastic about staying in its stitches while you have to set it down for a moment. Like magic, though, it should magically reform once you come back. I usually push my knitting off of the top bar or take off my crochet hook because then it doesn’t get in the way.
Now, thread your new string through from left to right underneath all of your other strings on your project. You do this because it keeps a straight line for when you need to pick up the stitches again. These steps should help you in learning how to cast off a loom blanket.
Step Five: Pick up Stitches
Now, pick up those stitches from where you dropped them. Take your needle or hook and gather them together as best as you can. You’ll probably have a big knot of yarn, which you can easily cut at this point since it’s no longer attached to the working yarn.

I recommend gathering up all of your stitches before you draw the string completely through your work, just in case any weren’t picked up. You can then pick them up individually. It’s also nice to have the working yarn close by so you don’t have to go searching for it later on when you need it again.
Step Six: Tie the String
Once you’ve got all of your stitches on, make sure to tie off the string. At this point, my working yarn is hanging out in front of my project. I weave it through my work once or twice so that it isn’t dangling around everywhere and then just cut it at that point with scissors because my string is long enough that it doesn’t matter.
You can take your time with this step if you like. I usually do because I yarn over at the end of my rows, and it’s nice to hide that string ends in with the row it’s attached to. Of course, I usually weave the two ends together and knot them off close to my project, but you can also leave it like this if you don’t mind seeing the string.
Step Seven: Maintain Your Work
Once you’ve finished, there are a few things to do to maintain your work. First of all, if you’re like me and you thought ahead, then you’ll use the next string over, which leads to my second string as the working yarn for my next row. However, if that’s not what you did or if your project is longer than mine, then you need to rejoin your working yarn.
The easiest way is to push it through the knot and pull until it’s complete, but you can also go ahead and play the cat’s cradle with the strings to get it entirely through. This will help in how to cast off a loom blanket.
Step Eight: Enjoy
Once you’re done with that, enjoy your new edge. I’ve found that my projects look neater when I do this, and it makes a whole lot less mess. Of course, you can also do the same thing at the beginning of your project if there’s going to be a big gap in your work when you’re done.
Switch colors for fun; you can stack the same color every time or follow a design. It’s up to you! Either way, it’ll be some good motivation for those projects that have been sitting around for a while.
You Can Check It Out to Stop a Blanket From Shedding Lint
Frequently Asked Question
How Long Does It Take to Loom Knit a Baby Blanket?
To make a baby blanket, you need to use worsted weight yarn and a size I crochet hook. It will take about one hour and fifteen minutes for each square of the blanket to be completed.
Knitting is one of the most popular forms of handcrafting in the world today. There are many types of knitting, such as:
- Aran Knitting
- Baby Blanket Knitting
- Bracelet Knitting
- Crochet Knitting
- Double Pointed Needles (DPN) Knitting
- Easy Woolen-Woolen (EWW) Socks or Stockings
- Hardanger Shawl Knitting or Lace
- Interchangeable Circular Needles (ICN) knitting or Brioche knitting with 2 needles at once – this type is called Tubular Cast On or Magic Loop Cast On.
Can You Make a Baby Blanket With Loom Knitting?
Loom knitting is an excellent way to make baby blankets. It’s simple and fun, but can also be quite tedious at times.
There are many steps involved in making a blanket with loom knitting, including:
- Creating the pattern on the loom that will produce the desired fabric
- Knitting the stitches into rows
- Removing the finished work from the loom
Can You Knit a Blanket on a Round Loom?
Yes, you can! The way to do this is by starting with a large circle of yarn that you are going to use as your foundation.
Place the yarn on the loom in one of the centers. Then wind up the warp and tie it off. Now take another piece of yarn and tie it off just like before, but don’t knot it yet. Take the third piece of yarn and tie it off on top of the first two pieces. Finally, place your needle through all three loops, then bring them together in front for a big knot to secure them into place, so they don’t slip or unravel while knitting.
Is It Easier to Knit on a Loom?
It is easier to knit on a loom because it is more portable and easily stored. You can use a knitting needle for all the stitches, making it easier than using your fingers. You also have more control over the tension of the yarn when you are knitting with a loom.
Conclusion
It’s time to start wrapping up your loom project. First, you will need a crochet hook and the tail end of the yarn attached to one side of the blanket to cast off. You can use any size or style of crochet hook; just make sure it fits through all loops on your last row before casting off.
Inserting your hook into each loop in turn, pull tight enough, so there are no gaps between them but not too tightly as this may distort the stitches below. This blog post has given helpful advice on how to cast off a loom blanket.
Check it out also – How to Clean Alpaca Blanket .


