There are a few ways to finish a basement floor. You can use concrete, which is the most popular option, or you can use tiles or other flooring materials. But one of the essential factors in deciding how to finish a basement floor is whether you want it to have a drain.
A drain in your basement floor will allow water and moisture to escape, which is essential for keeping your basement dry and preventing damage to your home. So if you’re thinking about finishing your basement floor, read on for instructions on how to finish a basement floor with drain.
Tools and Materials:
- Concrete backer board (3/4″ thick)
- 1/2″ or 3/8″ subfloor plywood sheets
- Tape measure and square
- Pencil, straightedge, utility knife with #11 blade
- Carpenter’s pencil or crayon
- Felt paper or house wrap
- Exterior grade (non-sag) liquid polymer adhesive, such as Weldbond; 4 to 8 tubes depending on floor size and thickness of adhesive
- 2 x 4 lumber or wood strips that will be used for stair nosing
- 3/8″ staples
- “Skinny” metal flat wainscoting molding (about 1 inch wide) for cheap horizontal dress up-not required or necessary, but nice looking.
A Stepwise Guide on How to Finish a Basement Floor With Drain
Step 1: Determine How Big Your Flooring Project Will Be
Your floor size will depend on how much money you want to spend. How big your floor will depend on what kind of stuff is in the basement (water heater, furnace, nice inner bathroom with shower and tub, etc.)
How thick your floor will depend on whether you want every new joist installed with fresh concrete poured underneath it or if you’re okay with using the existing concrete as the footing for new concrete laid on top of it (in other words–if you plan on having a drain in your floor).
How deep your finished wall height may also determine how laborious this project will become; more labor means a higher cost. How steeply sloped & pitched your basement floor is may also factor into this. How deep your finished wall height may also determine how laborious this project will become; more labor means a higher cost. How steeply sloped & pitched your basement floor is may also factor into it.
Step 2: Clean Out Your Basement
If you have a house that’s been lived in for a while, chances are there is lots of dust and other junk down there. Clear out all this crap and get rid of it. This includes the water heater, furnace, etc.
If you’re having your basement be finished from scratch or already have a bathroom down there, make sure to get rid of anything non-load-bearing, including walls and doors (even if they’re nice-looking–you can put them back up later). This will make it easier to work with throughout the project.
Step 3: Start Your Drainpipe Installation
Mark the outline of your subfloor flooring on the subfloor, including where all drains will go. You can also include any footings that are underground that you want to leave exposed (for example, if you have a lovely stone wall down there next to your isle of laundry).
Draw a line with chalk or crayon before cutting & laying down backer boards. It is advisable to make sure this marking has been done correctly because one missed mark can mess up an entire line and thus require significant re-work.
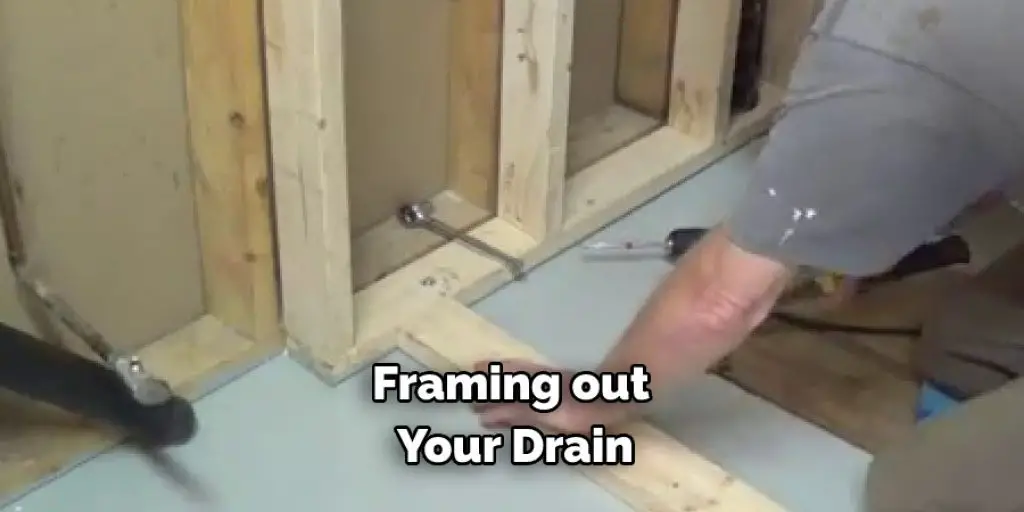
Once the marks have been made, start framing out your drain installation according to local code requirements and manufacturer’s instructions, as well as placing any necessary concrete board overhead such as at stair landings to avoid water damage. This is where you would put concrete board anywhere else, like around the toilet (tiled or not), near a water heater, furnace, etc.
How deep your finished wall height may also determine how laborious this project will become; more labor means a higher cost. How steeply sloped & pitched your basement floor is may also factor into it.
Step 4: Lay Down Backer Boards for Drain Installation
Now that all of your drain layouts have been determined, cut backer boards to fit–this includes any extra walls and stair landings if you’re working with a finished rough-in ceiling height of less than 8′. How deep your finished wall height may also determine how laborious this project will become; more labor means a higher cost. How steeply sloped & pitched your basement floor is may also factor into it. This is a crucial step in how to finish a basement floor with drain.
Step 5: Install Drain Pipes, Channels, etc.
Install drain pipes (P-traps), knee walls, and all other components according to the manufacturer’s instructions, local code requirements, and how many layers of concrete you plan to put down before tiling over the finished floor.
How deep your finished wall height may also determine how laborious this project will become; more labor means a higher cost. How steeply sloped & pitched your basement floor is may also factor into it.
Step 6: Build Your Drain Bed
You can build up the drain bed by adding materials above and below ground level to accommodate the lift and grade of your floor. To do this, you’ll need materials like engineered soil stabilizing products such as Quikrete 5000 or Thinset Mortar, crushed stone, pea gravel, clay balls, etc.
How much material you choose to add is up to you–the more profound the drain bed, the lower the grade between it and the finished floor. How deep your finished wall height may also determine how laborious this project will become; more labor means a higher cost. How steeply sloped & pitched your basement floor is may also factor into it.
Step 7: Tile Your Floor
Tile your floor following the manufacturer’s instructions, local code requirements, and the finish you want for your basement. How deep your finished wall height may also determine how laborious this project will become; more labor means a higher cost. How steeply sloped & pitched your basement floor is may also factor into it.
Step 8: Clean Up
Cleaning up is the very last thing you’ll want to do at the end of any project, but this is especially true if it’s a dusty job. How deep your finished wall height may also determine how laborious this project will become; more labor means a higher cost. How steeply sloped & pitched your basement floor is may also factor into it. These tapes will help in how to finish a basement floor with drain.

Tips and Warnings:
Tips:
- When you are finished, test your new subfloor. Place several drops of water on it and see if it can absorb the moisture or any leaks. If there are not, you have successfully installed a subfloor that will allow for proper drainage in case of a flood or other water-related problem.
- If you plan to use your new subfloor for a bathroom, patio, or laundry space, consider using tile. This will allow for easier cleaning and more durability than regular flooring.
- You can also buy pre-sloped subfloors at places like Home Depot or Lowe’s that only require the installation of rubber gaskets on each side of the drain hole. These special subfloors also come with preinstalled drains, so all you have to do is pour the cement between them and wait for it to dry before moving on.
- When installing a drainage floor in your basement, remember that you need only slope the floor toward one wall just enough so that water has a place to go when flooding occurs. Do not slant the floor too much, however, or you will not be able to move around in your basement.
Warnings:
- If you do not get the floor slopes right, water will pool on your basement floor and cause damage.
- You may also have to hire a contractor with experience in putting together drainage floors if you are unsure what kind of slope is needed or how it should be installed.
- Hire a contractor if you are unsure how drainage slopes should be installed.
- Do not let water pool on your basement floor if the slopes are wrong.
Frequently Asked Questions
Can You Put a Drain in a Concrete Floor?
Yes, you can definitely put a drain in a concrete floor. All you need is a trench that is at least 4 inches deep and the appropriate drain fitting. Make sure to use a material that will not damage the flooring – typically, this would be an impermeable membrane, such as polyethylene.
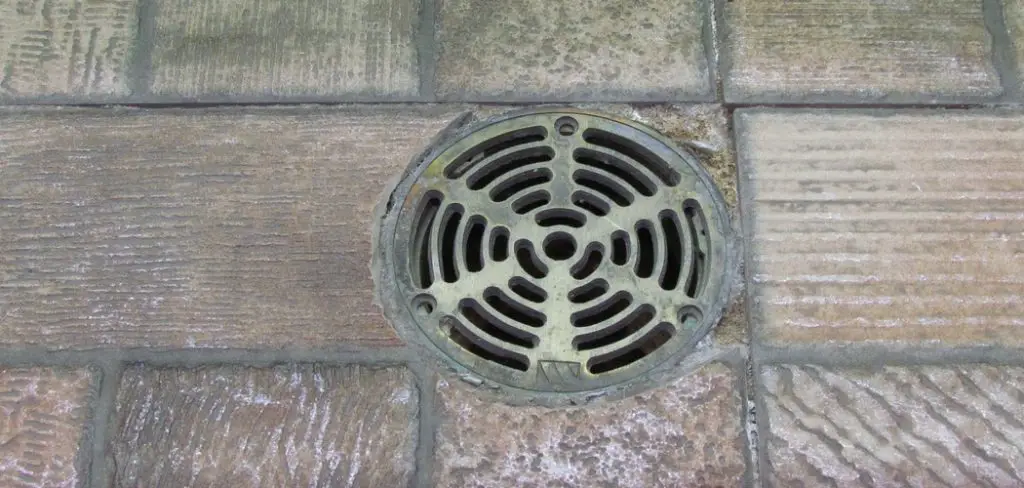
What is the Drain Hole in My Basement Floor?
A drain hole in your basement floor is typically an opening that allows water and sewage to escape from the ground level. Over time, this can lead to damage to foundation walls and tiles as well as structural instability of the house. If you’re experiencing any of these symptoms, it is important to have a professional inspect your basement and locate and seal any potential leakages.
Professional installation may be required in order for the drainage system to function properly, so make sure not to take on this task yourself if you don’t know how!
Is a Basement Floor Drain Necessary?
A basement floor drain is not necessary in most cases, but there are certain instances when it might be helpful. For example, if you have a wet bar or pool area that drains into the basement, or if the room below your main level floods regularly. In these cases, a drainage system would help to prevent water from collecting and damaging your floors and furniture.
However, if all you need is an extra layer of protection against sewer backup during heavy rains (or sudden snowmelt), then a floor drain can’t hurt anything!
Conclusion
We hope you have learned how to finish a basement floor with drain. When you’re done installing the flooring, it’s time to install your drain. The type of drainage system will depend on where your basement is located and what kind of soil was there before construction.
If you don’t want a french drain or water flowing too slowly through an earthen trench, try one of these other options to finish up your new floor. Installing a sump pump in the middle of the room might be an easy solution that solves both problems at once!


