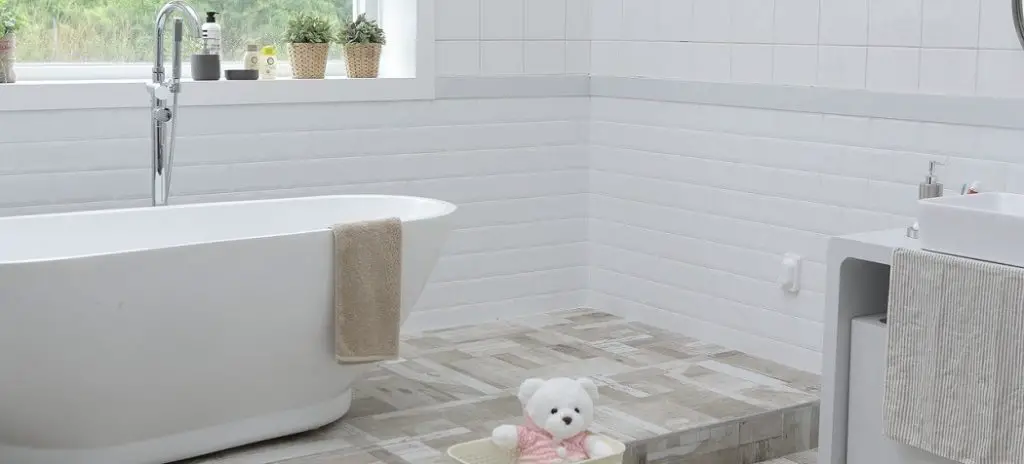
Underneath your bathroom floor, there are floor joists that run between the studs of your home’s foundation. Over time, these joists can rot away and start to sag. This is a common problem among homes with bathtubs because water from the bathtub seeps into the joist space below it over time, washing away any natural wood preservative oils.
If you have this issue in your home or are just looking for some tips on how to fix a rotten floor joist under the bathtub, then read on! So, this article is for you. You will learn how to fix rotten floor joist under bathtub with just one simple trick!
8 Steps to Follow on How to Fix Rotten Floor Joist Under Bathtub
Step One: Determine
First, you have to determine how far the joist was compromised. An experienced person can do that by visual inspection only, but if you are not, you need to take some detective work into it. Your first task would be to find out where the floor joist ends up.
It would help if you marked its position on your sketch to avoid losing track of it. Then proceed to measure its length and width on the opposite side of the wall under examination. To save time, you should take more than one sample to eliminate some variables from your equation on the rotten joist’s bad.
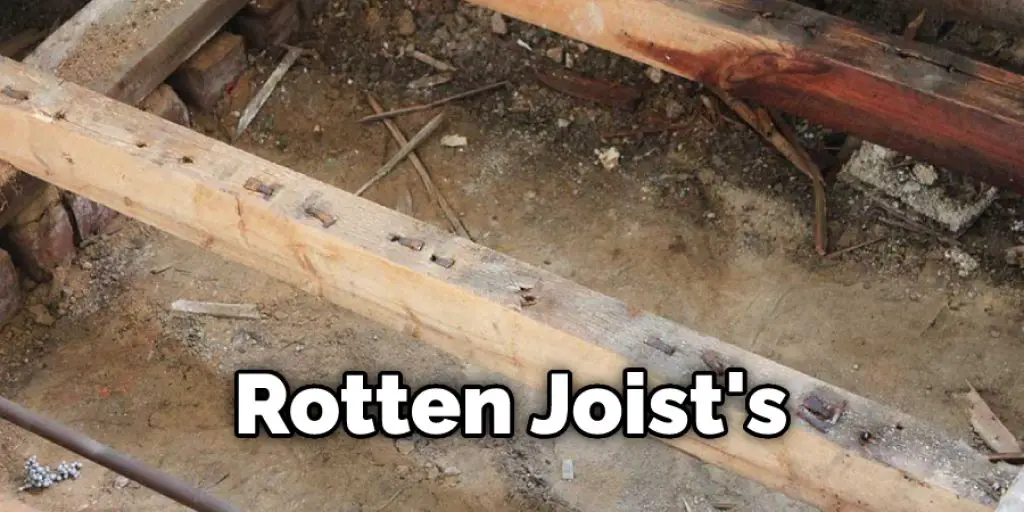
You will need to call in experts on this matter since it is very complicated and only a professional can tell you if the joist needs to be replaced or only a part of it. If it is a case where only a part of the joist has to be replaced, then you should start by cutting off the compromised section.
Step Two: Cut off the Compromised Part
First, you need to determine where the rotten joist is and then mark that with a pencil. After doing that, it’s time to cut through the joists with a circular saw. This is the only way to fix the rotting floor joist under the bathtub and any other problem related to flooring and ceiling.
You may want to wear a mask if you use a power tool on it, as wood can be very dusty, especially when it is not new. Once the joist has been cut, you should test it with your weight to ensure no more problems will pop up later on.

If the piece you cut off is still intact, you can take a nail and hammer it into the joist to make sure that the wood will not disintegrate. However, if it’s been compromised, you should consider cutting off another section of it instead of taking your chances with the weight on top of it.
Step Three: Replace the Compromised Part
If you have determined that it is necessary to replace a part of the joist, you should use an identical material. This will help in keeping the flooring even and avoiding any problems later on. Also, reading a few articles on how to fix rotten floor joist under bathtub before starting will give you a better idea of how to complete the task effectively.
You should make sure that your new piece of lumber is not an inch thicker or thinner than the original one because this could be problematic later on when you start to install the flooring. You should nail the joist section in with a drill and wood screws when it is exactly where it was before when you cut off the compromised part.
This will stop the weight from putting more pressure on that specific area and prevent further damage to the flooring. It is suggested that you use a drill with a driver to fix the joist as this will give you better accuracy and a more professional finish.
Step Four: Fix Caused By Water
Once you have completed fixing the rotten floor joist under the bathtub, it is time to move on to other problems caused by water. If there are deteriorated sections of your foundations, you will need to fix them before removing any more parts from your wooden flooring or ceiling.
You can find the areas that need to be fixed by running a stud finder or even an electronic device that can send out waves that will come back with the moisture readings. Again, it is recommended that you use plastic wood for this part and mix it with some adhesive and hardener before applying it.
To give it more strength, you should give it 24 hours to dry and then paint over the material with a clear coat of acrylic paint. You can now test your flooring and ceiling by standing on it or running your finger along with them to ensure everything is all right.
Step Five: Test Your New Flooring
Testing your new flooring is an essential part of the entire process because this will help you see if there are still many problems with it or if you need to fix something else. You can test your wood by using a level while standing on top of it.

This way, you will be able to tell if there are any inconsistencies in height or if you have not cut the joist correctly. In addition, you can now use a concrete trowel to apply two coats of concrete over the damaged area so that it will look almost as good as new.
If you are worried about how to fix a rotten floor joist under the bathtub and other parts of your house, then you should consider hiring a professional who can do the task for you. This will ensure that everything is done correctly, and you won’t have to worry about doing it yourself. In addition, this will help in how to fix rotten floor joist under bathtub.
Step Six: Clean Up Your Mess
After you have finished fixing the rotten floor joist under the bathtub, it is time to clean up all the mess created during this process. You can use a vacuum or broom to pick up all the debris leftover, then start cleaning with soap and water. This will help get rid of any dust that has accumulated during this process.
You should make sure to check your walls, ceiling, and floor for any adhesive or filler that has been accidentally spilled over them during the process. If you have not glued down the bathroom panels, you can use soap and water to clean them up.
Using a wet cloth on these areas will help eliminate any dust or debris that could be stuck to them. After cleaning, you should immediately apply the sealant in the areas where you cleaned off any filler or concrete. If you can’t finish all these steps in one day, it is best to leave everything overnight to dry properly.
Step Seven: Finishing Touches
After everything has dried, you are ready to start putting your bathroom back together. You can now reinstall the flooring, tiles, or paneling in the bathroom and make it look new again. If done right, this is a very simple process, but you should consider hiring someone who has more experience in doing this kind of job.
They will be able to do it for you and not leave any damage behind. Once the bathroom is back together, you can put all your furniture and fixtures back into place. The last thing that you should do is test this room again by running water over the floor or placing a heavy object like a chair or table on top of it.
This way, you will tell if there is any damage that has not been fixed yet. If you do find anything, don’t hesitate to call a professional to fix it for you. All of this information will help you learn how to fix rotten floor joist under bathtub.
Step Eight: Maintain Your Floors
It is not enough that you have repaired your rotten floor joist under the bathtub or other areas in your house. It is also essential that you follow up with maintenance to ensure that everything stays nice and secure for many years down the road.
It would help if you kept an eye out for any breaks or cracks when using your bathroom. These may be signs that you have a bigger problem on hand or that the area underneath your bathtub is rotting again. Repairing any further damage to these areas as soon as possible can help prevent future issues from occurring in your house.
You can check it to Finish Floating Floor at Bathtub.
Frequently Asked Questions
How Do You Reinforce a Floor Under a Bathtub?
There are a few ways to reinforce a floor under a bathtub, but the most common is to use metal reinforcing bars. These bars can be placed at regular intervals around the perimeter of the tub and should extend about 2 feet below the water line. Reinforcing mesh or netting can also be used in similar ways, but it’s not as reliable as metal reinforcement. It may eventually tear or tear more easily than metal reinforcement given its open nature.
Does Subfloor Go Under Bathtub?
In most cases, it is not possible to install a new floor under the bathtub. The reason for this is that the bathtub is an integral part of the floor system. The bathtub sits on a foundation that supports the floor above it. If you remove or replace the bathtub, you will have to replace the foundation as well.
What Do You Put Under a Bathtub for Support?
If you’re looking for an easy and cost-effective way to support your feet and legs while in the bathtub, you can use a footbath. This is simply a basin of warm water with legs raised over it. The heat from the bathtub will gently loosen any build-up on your feet and help them feel more comfortable when immersed. Additionally, using a footbath before going to bed may help reduce swelling throughout the day.
How Much Support Does a Bathtub Need?
A bathtub needs a minimum of 60 inches of clearance beneath it in order to avoid water damage. Clearances can vary depending on the bathtub style and its construction, but most need at least 6-12 inches of clearance. If you have any questions or concerns about your bathtub’s clearance, please feel free to contact an installer at our dealership.
Conclusion
This article has given you a few ideas of what can be done to fix the rotten floor joist under the bathtub. Of course, some fixes are easier than others, and some will involve hiring professionals, which is perfectly fine as long as they’re licensed and insured for such work.
But whether you hire someone else to do the repair work or do it yourself, you should know what can be done to fix your bathtub area. Once this area has been repaired, you will need to maintain it properly by keeping an eye out for any new signs of damage that might occur over time.
This way, you will be able to prevent future problems and save money to fix any damage that might happen. This article has covered some of the most common issues that occur with floor joists under your bathtub. We hope you enjoyed this article on how to fix rotten floor joist under bathtub.
You may read it also – How to Connect Sink to Floor Drain .


