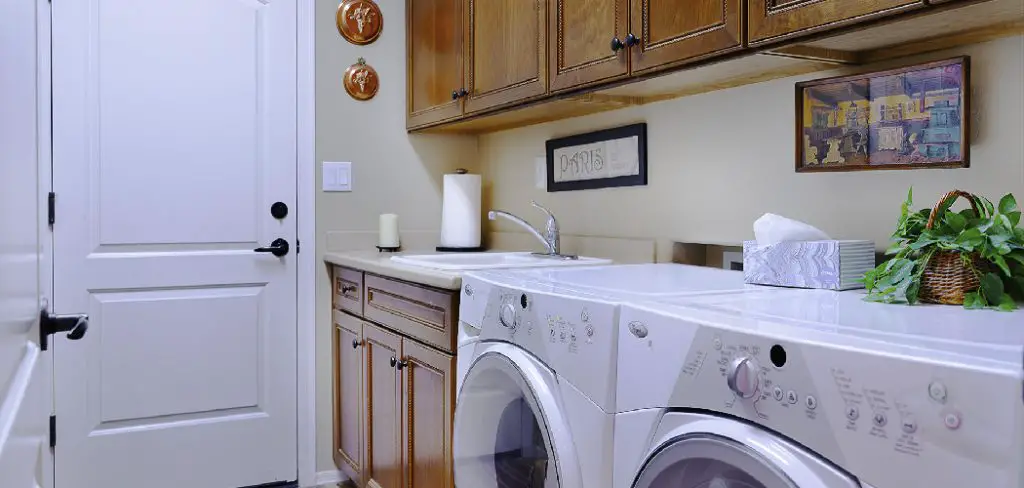
When it comes to creating your dream home, there are many things that you want to make sure you have. One of these is a nice laundry room with lots of storage space and the perfect utility sink.
If this sounds like something that would be right up your alley, then read on so we can go over how exactly you should install one in your laundry room. This way, nothing will get missed or forgotten about when it comes time to do the actual installation process itself.
There are some great tips out there for anyone who wants to start this project themselves instead of hiring someone else to come in and do it all for them too! So, this article is for you. You will learn how to install a utility sink in a laundry room with just one simple trick!
Step to Follow on How to Install a Utility Sink in a Laundry Room
Step One: Locate Hookups for Sink
Find the spots where your utility sink will hook up to water and drain. The most common locations are near the top or bottom of a wall, with one side or corner able to hook up on both walls. Measure the distance between these two points, giving yourself enough room if something goes wrong during installation.
Next, turn off the water valves for these hookups. Give yourself about 12 inches away from each connection to make sure you have room to do what needs to be done. Don’t forget the hot and cold valves for the sink, too. The tools you’ll need will depend on the type of valves you have.
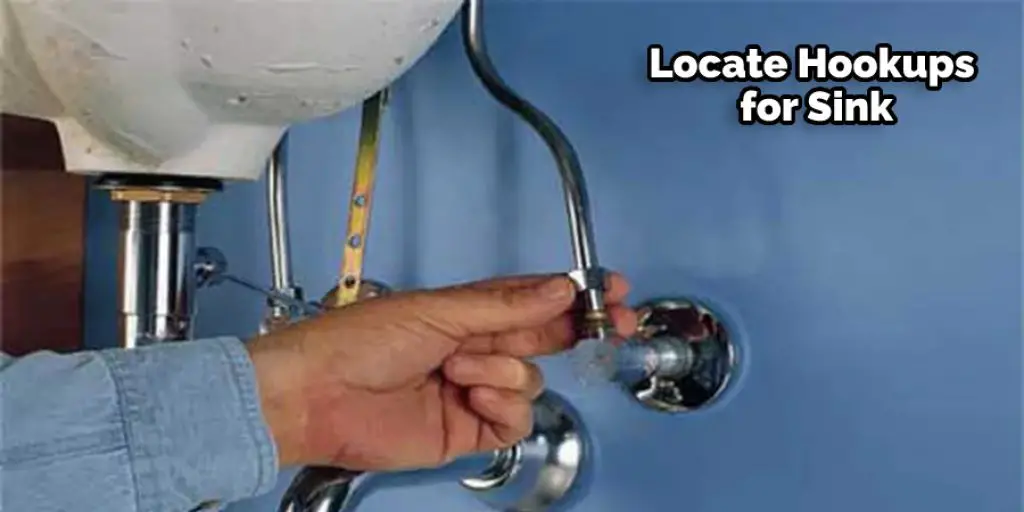
If your sink doesn’t have built-in connections, you’ll need to install the links. A basic connection kit includes a stop valve for hot and cold water, fittings for connecting the tubing to your laundry hookups, and compression nuts that hold the tubing in place after you tighten it up.
Step Two: Prepare the Area for Sink
Once you have the hookups in place, it’s time to prepare the area for your sink. If your laundry is located near a finished wall or ceiling, go ahead and cut through it to run the tubing. You can patch things up later with sheetrock or spackle. Keep an eye out for any obstacles, including drainpipes or support beams that could get in the way.
The easiest way to deal with them is to run all your plumbing in one spot, then move it if needed. Then, after you’ve sketched out how things will lay out, make sure there’s enough room for you to work comfortably. You’ll need at least 10 inches on each side of the sink to get in there and do your thing.
It’s also best to cut your hole for the sink first. Next, measure your new sink and find a small, circular saw that will work with it. Then carefully cut through the wall or ceiling where you want to place your sink. These steps should help you in learning how to install a utility sink in a laundry room.
Step Three: Put in the Sink
Now that you’ve got the space for your sink and all of its hookups, it’s time to get this baby in there. First, make sure the rubber gasket is attached to the bottom of your new sink. Then place it through your hole into position. Finally, make sure that everything is level and plumb before you start screwing things together.
If it isn’t, cut another small hole to give yourself more room until the sink is in the right position, then patch up the area with spackle or sheetrock. After everything is positioned correctly, start screwing it all together from underneath. You can also place a bead of silicone around the top edge to keep out any dirt and moisture that might get in there.

Now that your sink is secure hook up the water supply lines by attaching them to your shutoffs and turning the valves on. First, check to ensure there are no leaks, then try out the drain tube by filling up the sink with some water. When you’re done with that, patch up any holes you made to get everything into position.
Step Four: Hook Up Drain
Depending on what kind of washing machine you have, you may need to hook up additional drainpipes for your laundry. If you have a newer washer with a hose connection, hook it straight to the wall near the sink with a hose clamp and some plumber’s tape.
Older washing machines usually have a trap underneath that needs to be adjusted so water can flow through it. This is done by twisting the hose barb and lifting it on the plunger inside. If you can’t do this, try using a closet auger to break through any blockages that might be down there.
Once your drain is hooked up, double-check all of your connections. Next, turn on both water valves and let them run for about 5 minutes. If the drain is slow, try running a few loads of water through it while you finish up. After all this, your laundry room sink should be ready to go!
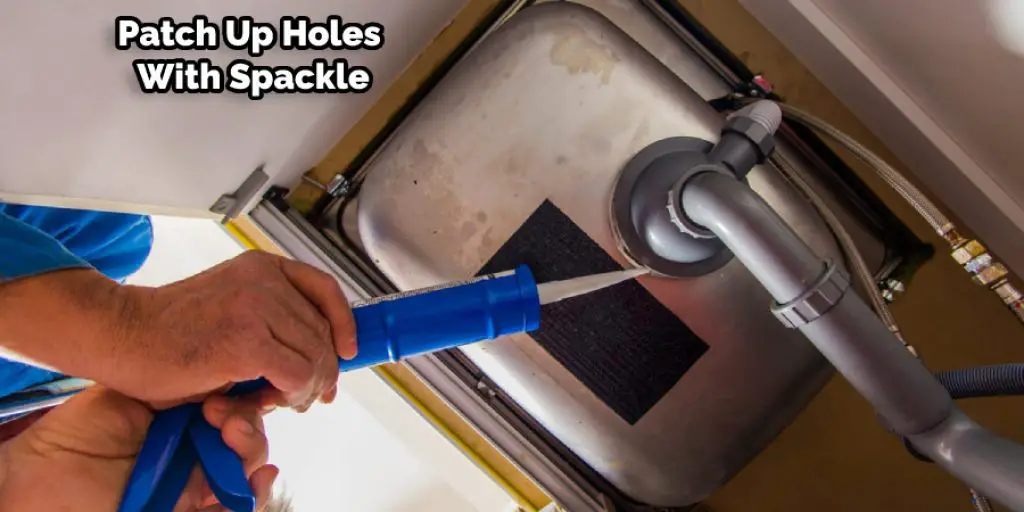
Step Five: Patch Up Holes With Spackle
After you’ve let everything dry thoroughly, use a spackling compound and a putty knife to patch up any holes you created to get your sink into position. Depending on where your laundry is located, you may also need to add some paint or paneling over the cut lines.
Once you’ve patched everything up, you’ll probably want to add some wallboard over the entire setup. This is a matter of personal preference, of course. But if you do decide to make things look nice and clean by installing paneling or drywall, remember that more layers will bring down your overall water pressure.
So choose your materials carefully and leave yourself some room to work with. You might want to start with just a single layer of drywall and see how that works out for you before adding more. This will help in how to install a utility sink in a laundry room.
Step Six: Adding Extra Plumbing
You can also increase your water pressure by hooking up a secondary plumbing line. You’ll want to do this if you have more than one sink in the room or if it’s just time to upgrade your system anyway. The basic idea is that you run a new line from your main shutoff valve to the area where you want your extra water to go.
You can do this by running a new, larger metal pipe right next to the original one with about two inches of space between them. If you think you might need more room in the future, make sure that your pipes are set up so they’ll eventually be able to accommodate adding another one.
Frequently Asked Questions
Can I Put a Utility Sink in My Laundry Room?
There are many factors that need to be considered before you install a utility sink in your laundry room.
To start with, make sure that the area is properly ventilated. This means there should be proper ventilation for the air coming out of the drain as well as ventilation for all the water coming out of your washing machine.
Next, consider installing a catch basin to collect any overflow or leaking water from your washing machine and sink, which will help prevent damage to your flooring and walls.
Finally, make sure that you have enough space on top of the washing machine and in front of it so that you can reach it without having to move anything else around.
Do You Have to Have a Sink in the Laundry Room?
You do not have to have a sink in the laundry room, but it is always a good idea to install one. Having a sink allows you to wash clothes more efficiently and effectively by washing and rinsing large items together. It also saves water as well as time.
What Is a Laundry Sink Bypass?
A laundry sink bypass is a method of washing clothes without the use of a washing machine. It is similar to a washer-dryer combo, but can be used in conjunction with an existing sink or tub.
There Are Many Benefits of Using This Technique :
- It saves time and money.
- It’s good for families who have limited space in their homes.
- It’s good for those who don’t have access to electricity, as it can be done using only the power from water and gravity (no electricity required).
- You can wash multiple items at once, reducing your work load considerably.
Conclusion
If you are looking to install a utility sink in your laundry room, here is how it can be done. First, be sure that the space will accommodate the size of the sink drain and any pipes necessary. The next step would be to cut out an opening in the wall where you want to access it.
Measure carefully so as not to make too large or small an opening which could cause leaks when water goes through it. To finish up, use silicone sealant all along around both sides of this hole before installing the faucet pipe and attaching drywall screws on the other side, securing them into place with anchors if needed. We hope you enjoyed this article on how to install a utility sink in a laundry room.
Check it out to learn- How to Unclog Coffee Grounds From Sink


