If you have ever had a water bubble form in your drywall, you know how frustrating it can be. It is an eyesore, but it can also be a sign of bigger problems with your home. In this blog post, we will show you how to repair water bubble in drywall so that your home looks and functions like new again.
Why Repair Water Bubbles in Drywall?
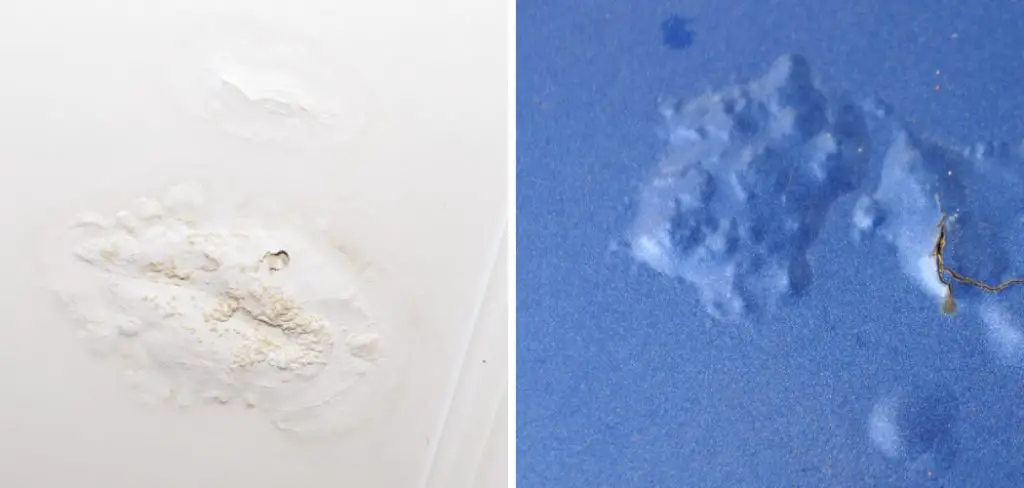
Drywall is a common material used in the construction of homes and businesses. However, because it is made from gypsum, a soft mineral, it is prone to damage from water. Water bubbles, or blisters, are one type of water damage in drywall.
While they may not seem like a big problem, repair water bubbles in the drywall as soon as possible to prevent further damage; if left unrepaired, water bubbles can cause the drywall to swell and eventually crumble. In addition, they provide an entry point for mold and mildew to grow.
By repairing water bubbles quickly, you can help prevent more serious damage and keep your drywall looking its best.
Things You’ll Need
- Tape measure
- Pencil
- Utility knife
- Sandpaper
- Putty knife
- Drywall compound
- Paintable caulk
How to Repair Water Bubble in Drywall Step by Step Guide
Step 1: Determine the Damage
Before beginning any repair project, it is important to assess the damage. In the case of a water bubble in drywall, this will help you determine how extensive the repair will be.
If the bubble is small and only the paint is bubbling, the repair will be minor. However, if the bubble is large and the drywall is bulging, the repair will be more significant.
Step 2: Locate the Source of The Water Leak and Fix It
The next step is to find the source of the water leak and fix it. If you can’t find the source, or if it’s not possible to fix it, then you’ll need to take preventative measures to make sure that the water doesn’t come back.
One way to do this is to install an interior drainage system. This will collect the water and redirect it to a sump pump or other outlet.
Another option is to install a moisture barrier. This can be done by painting the walls with a waterproofing sealant or covering them with a waterproof membrane.
Step 3: Cut a Hole in The Drywall Around the Bubble
Use a utility knife to cut a hole around the water bubble in your drywall. Ensure that the hole is big enough to access the drywall’s back easily.
Step 4: Remove the Bubble
Now that you’ve found the source of your water bubble, it’s time to remove the bubble itself. To do this, start by puncturing the bubble’s center with a sharp knife or utility blade.
Next, use a putty knife or other flat object to press down on the bubble’s center and force out as much water as possible. If the bubble is large, you may need to repeat this process a few times to remove all the water.
Once most of the water has been removed, use your knife or blade to cut away any loose or damaged drywall paper. Finally, use a dry cloth to soak up any remaining water and let the area dry completely.
Step 5: Apply Spackle or Joint Compound
Applying spackle or joint compound is how you will fill in the water bubble. Be sure to apply a generous amount so that it can easily fill the hole. Next, you can use a putty knife or your fingers to smooth out the surface. Allow the area to dry completely before moving on to the next step.
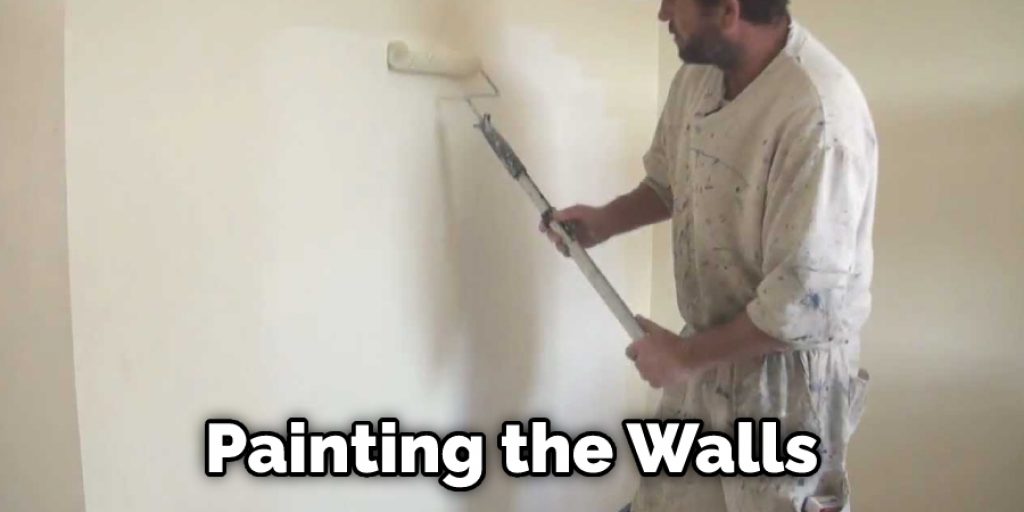
Step 6: Prime and Paint the Repaired Area
Once the repair is dry, you will need to prime and paint the area to match the rest of your wall. You can use a regular primer and paint or purchase a touch-up kit that includes both the primer and paint in one. Follow the manufacturer’s instructions for priming and painting over new drywall.
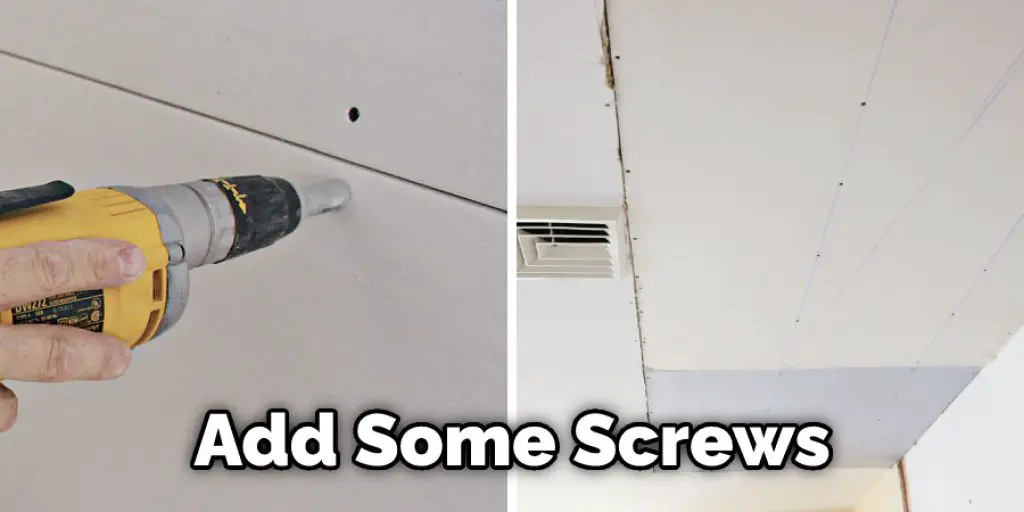
Step 7: Reinforce the Drywall with Screws or Nails:
Once the adhesive has been set, it’s time to add some screws or nails around the patch’s perimeter to secure it in place. This will help to prevent any further movement or damage. Be sure to use screws or nails that are long enough to penetrate through the drywall and into the studs behind it.
Step 8: Tape and Mud Over the Repair to Make It Look Seamless
Apply a thick layer of joint compound to the area around the repair, then lay a strip of drywall tape over it. Run your knife along the edge of the tape to remove any excess compound, then smooth it out with your putty knife. Let the repair dry overnight, then sand it down until it’s flush with the rest of the wall.
Step 9: Paint the Area
Once the repair is complete, it’s time to paint the area. This will help blend in the repaired area with the rest of the drywall. Choose a paint color that closely matches the surrounding walls, and use a brush or roller to apply paint to the area. Allow the paint to dry completely before moving on.
Now that you know how to repair a water bubble in your drywall, you can fix it quickly and easily. Be sure to follow the steps listed above to ensure a successful repair. Keep reading for more information about how to repair water bubble in drywall.
How to Fix Water Leakage
If you have a water bubble in your drywall, the first thing you need to do is identify the source of the leak. Once you know where the leak is coming from, you can then begin to repair it. If the leak is coming from a pipe, you will need to replace the damaged section of the pipe. If the leak is coming from a hole, you will need to patch the hole.
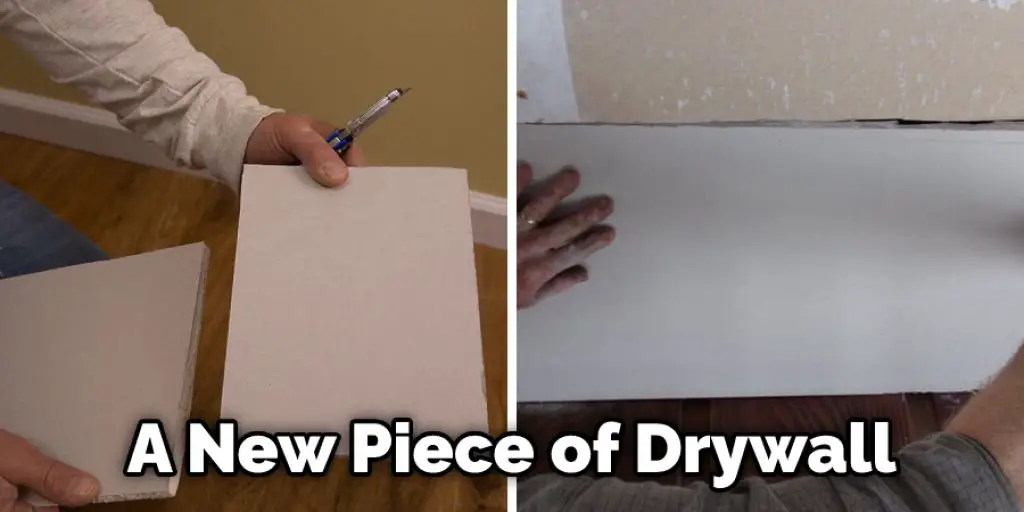
Once you have identified and repaired the source of the leak, you can then begin to repair the water damage. First, you will need to remove the damaged section of drywall and replace it with a new piece. Once you have replaced the damaged section, you will need to apply a sealant to the area to prevent future leaks.
Repair Any Wiring or Plumbing that Was Damaged
If your water bubble in the drywall were caused by a broken pipe, you would need to repair the plumbing before repairing the drywall. Otherwise, the problem will continue, and you’ll have to repair the drywall again.
Use a utility knife or box cutter to cut along the edge of the water bubble. Be sure not to cut into the drywall too deeply. You want to make a shallow cut to access the broken pipe or wiring.
Once you have repaired the plumbing or wiring, patch the drywall with the joint compound and sand it down until it is flush with the rest of the wall. Repaint if necessary.
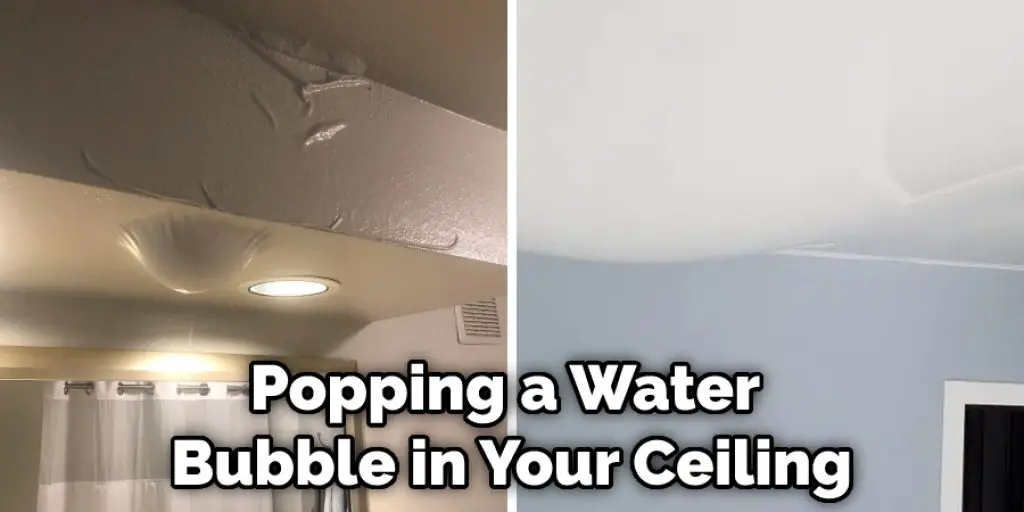
Should You Pop a Water Bubble in Your Ceiling?
If you have a water bubble in your ceiling, you may be wondering if you should pop it or not. If the bubble is small and doesn’t appear to be causing any damage, it’s probably okay to leave it alone. However, if the bubble is large or growing, it’s best to burst it and repair the resulting hole.
Popping a water bubble in your ceiling is generally best. This will release the pressure causing the bubble and allow you to patch the hole left behind. If you have a small bubble, you can use a needle or something sharp to burst it. For larger bubbles, you may need to use a utility knife. If you want to know more about how to repair water bubble in drywall, keeps reading.
Frequently Asked Question
What Causes Drywall to Bubble?
The most common cause of drywall bubbling is moisture infiltration. It swells when the drywall gets wet, and bubbles form as the water seeps through the paper facing. If the problem is not addressed, the water can eventually cause the drywall to rot and fall.
What Does a Water Bubble in The Wall Mean?
Water bubbles in drywall can be caused by several things, but the most common is a leaky pipe or roof. If you see water bubbles in your drywall, it’s important to find and fix the source of the moisture as soon as possible to prevent further damage.
Can Water-Damaged Drywall Be Repaired?
Yes, water-damaged drywall can be repaired. You will need to cut out the damaged area and replace it with a new piece of drywall. Make sure to seal the seams between the new drywall and the old drywall with a joint compound to prevent water from seeping through.
Conclusion
Water bubbles in drywall are a common problem, but they can be fixed. If you’re experiencing this issue in your home, don’t panic! We’ve got the steps you need to take to repair the water damage and get your walls to look good as new. Thanks for reading our post about how to repair water bubble in drywall.


