Introduction
Wobbling is the unevenness of your table. This can happen when you put a table on top of a carpet because it will come up with different heights in some areas. If this is a new problem, there’s a good chance that the legs aren’t even beneath the bottom of your tabletop. If you have wobbling furniture and want to fix it, then this article is for you. In this article, I will discuss how to stop table from wobbling. So let us get started.
What Causes Wobbling?
The leading cause of table wobbling is the condition of the floor, particularly if it has a wooden subfloor. Other causes are shelves that are not appropriately secured to support posts or walls, uneven countertops that are not adequately supported, cabinets that are attached poorly to walls and floors, rusty hardware on caster wheels, loose screws in casters or caster bases, and caster legs that are not level with each other. If you have been having problems with this kind of thing happening in your home or office space, then there’s no need to despair. You can do something about it yourself.
A Detailed Stepwsie Guide on How to Stop Table From Wobbling
This simple but helpful guide is a step-by-step pictorial on tightening a wobbly table until it becomes sturdy. To stop a table from wobbling, all you need are:
1) A wrench or screwdriver with centimeter measurements for more accurate readings on tightening pressure. Wrenches/screwdrivers without centimeter measurements can be used, although some might find the measuring process time-consuming. In this case, however, using one of these tools would probably make you look more professional even if your table is not perfectly stable yet.
2) Chewing gum. Yes! Chewing gum will do! Its stickiness and flexibility make it an effective tool in stabilizing your wobbly tabletop.
3) A hard surface on which you will be using the gum. In this case, a small billboard will do.
4) Optional: Stapler and stapler remover. This is only if your surfaces are made of paper or thin wood. You can use regular staple adhesive instead of gum, but I am not sure how effective it would be since everyday staples have a round head. Of course, you can permanently remove them later on with a stapler remover!
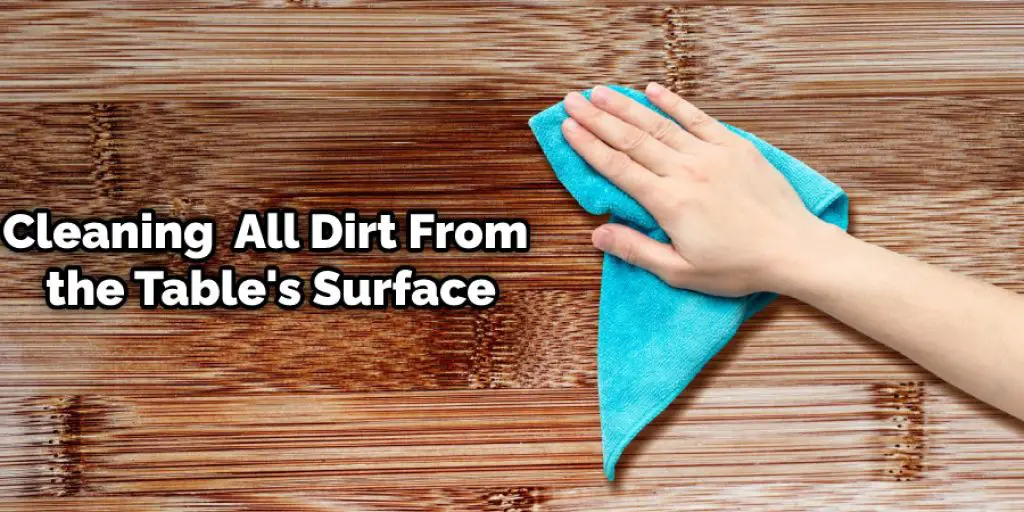
Step 1 :
Clean all dirt from the table’s surface, then thoroughly dry it to avoid unwanted accidents that can result in injuries or injuries caused by damage to property as a result of accidental slips and falls because of excess moisture.
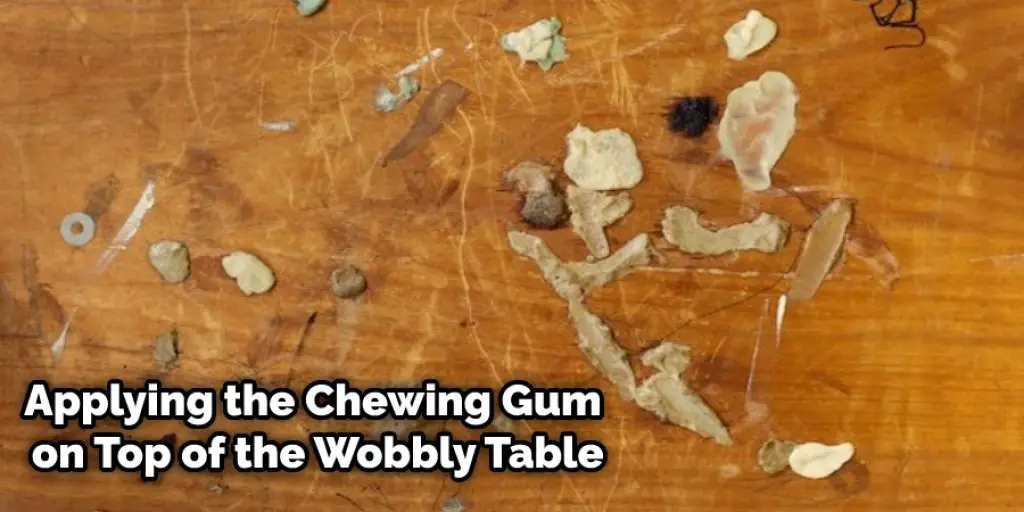
Step 2 :
Put chewing gum on the table surface. Again, be generous but do not spread the gum throughout the surface. It is sufficient to roll a thin layer of the gum and let it stick to one side of your table’s topmost surface. This will act as the base of your newly made adhesive.
Step 3 :
Use one end of the stapler (not staple remover end) to attach gum on the table surface to the tabletop itself. Again, it would be best if you hold down your gum while stapling it, although doing this is not necessary, especially if it’s already stuck on the table’s surface well enough. You can also use a ruler or something else heavy enough that can cover all but one edge of your gum.
Step 4 :
Repeat steps 2 and 3 on the other side of the tabletop where there are no staples yet, just gum. Yes, it’s okay to have two pieces of gum stuck on a tabletop. This will make your tabletop more balanced and sturdy in the end.
Step 5 :
Repeat steps 2 and 3 again if there are still other wobbly areas left on your tabletop. If you find your gum isn’t sticky enough to be stabilized, don’t hesitate to use a small piece of tape or regular adhesive instead. Using standard adhesive is certainly an option but be sure that it does not affect the material of your table itself. Otherwise, this may come back to haunt you! In some cases, though, using regular glue might be better since its stickiness can last longer than chewing gum.
Step 6 :
Let the stabilizing gum/adhesive sit overnight, or its most extended dependable presence, before removing this from your tabletop. This will give time for the glue to settle in and eliminate any chance of slipping afterward while still allowing enough room for removal if ever you find yourself needing to clean your surface.
Step 7 :
Remove your gum/adhesive by using a screwdriver or other similar tool that can fit into the holes of your staples. It would also be best to use an end with a straight edge rather than a cylindrical one since having a cylindrical lot might make it harder for you to remove said adhesive. After removing all gum/sticky pieces, scrutinize your table and see how more balanced and sturdy it has become.
The whole process is tedious, but if you follow the steps correctly, you’ll end up with a table that’s balanced and sturdy as can be!
You Can Check It Out to Make a Massage Table at Home
Why Do We Need A Chewing Gum?
It acts like double-sided tape or adhesive after applying the chewing gum on top of your wobbly table. Instead of having to drill holes into your tabletop for you to attach screws on both surfaces (or use adhesives), using chewing gum would make things easier. It is also cost-effective since most household items are already available in our environment, plus they don’t cause any significant damage to your tables.
Lastly, by using household materials instead of expensive tools and equipment while maintaining the elegance and beauty of your table, there is no reason why you will not be able to achieve a perfect wobbly table.
Precautions While Fixing a Wobbling Table
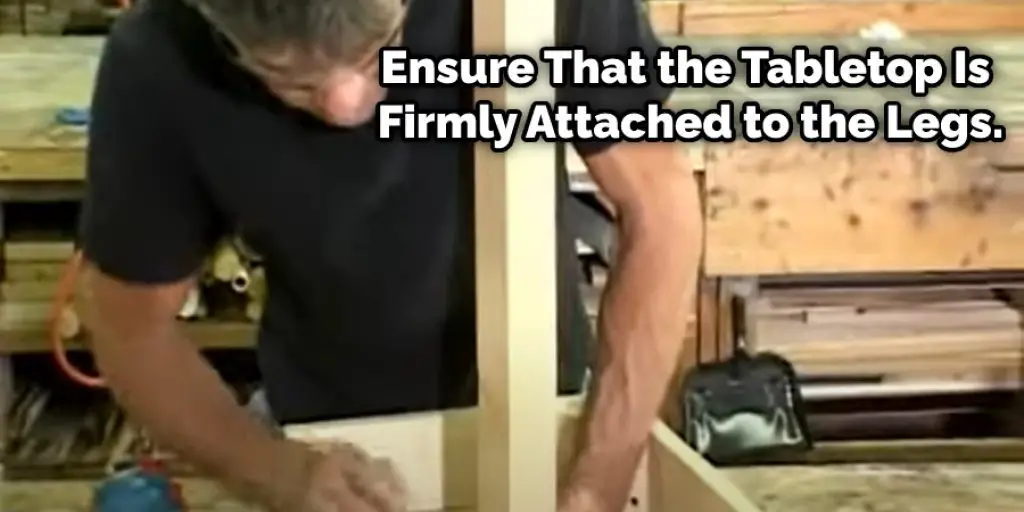
** Ensure that the tabletop is firmly attached to the legs. If it is not, use wood glue and clamps to reinforce them together.
** Use a comprehensive piece of tape to measure where you need to cut your shim. Wrap it around the offending leg and mark with a pencil where you need to cut the shim so that it fits snugly against another leg.
** If there are screw holes in your tabletop from previous attachments, fill them up with putty before applying new ones during the repair or refinishing process. Otherwise, stains will seep into these holes and give away the age of your table if they become visible again.
Conclusion
I hope this article has been beneficial for learning how to stop table from wobbling. Make sure you use all the authentic materials for this process. Thank you and have a nice day!
You may also read this – How to Remove Super Glue From Glass Table .


