When it comes to sanding your hardwood floor for that nice cottage home or the remake of your living room’s floor, think no further from using the orbital floor sander as your main tool. The orbital floor sander is a finishing tool purposely designed for the sanding of hardwood floors. Its existence is why we have neatly and smoothly finished hardwood floors that allows us to walk on it barefoot without suffering from splinters. Orbital floor sanders do not only smoothen the wood, but also adds design and beauty to your finished work, as it is as aggressive as using the belt sander.
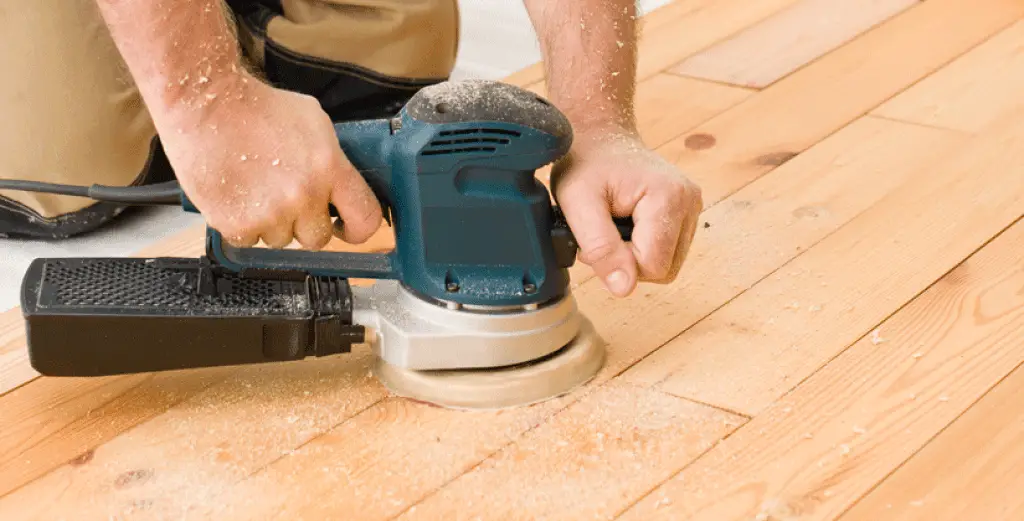
Orbital floor sanders can be a dangerous equipment in the wrong hands, or might not be able to perform what you intended it to do if you do not know how to go about its technicalities. Also, a good orbital buffer can help you to remove swirls. Knowing how to use an orbital floor sander and using it properly will not only help you get a beautiful and accurate finished work but also help prevent harmful injuries and haphazard works. To acquire the perfect hardwood floor finish that you want, you must know a few things about the operating of an orbital floor sander, put in consideration the amount of scratches and injuries on the floor and other alarming factors, which are all put in the steps below:
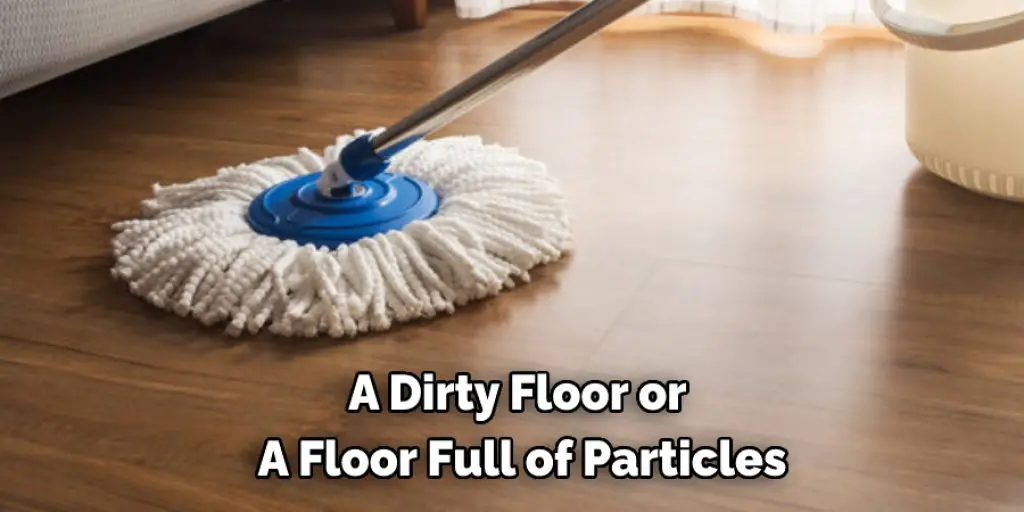
Step-1: A dirty floor or a floor full of particles and other foreign materials will definitely make sanding the floor difficulty and will affect the beauty. So, first step here is to sweep and vacuum the floor. All obstacles, nails, tacks and any other materials should be gotten raid off as this might also damage your orbital sander.
Step-2: At this step you will need to attach a course grit and sandpaper to the orbital sander so as to get ready in commencing work. For more aggressiveness in the sanding, one should start with a lower grit normally a 40-grit sand paper
Step-3: The rule in commencing work is to begin at the farthest end of the room. This is so because starting there will give your work a perfect look when it comes to the wood grain. It also gives you time to develop a pattern and a perfect finish.
Step-4: At this step it is to make sure you are using the same level of grit paper for the sanding of your low spots and edges and this is easily done by the use of a hand sander. Smaller sanders allow the reach of places that a normal sander can’t go. Knowing how to use a random orbital floor sander will also be an added bonus here.
Step-5: Step 5 entails an important rule when it comes to getting a perfect finish. Always and constantly keep your sanding area clean. Repeat sweeping and vacuuming as your sander, as this will go in a long way to make your floor smooth and prevent any foreign material in getting in to your sander and damaging it.
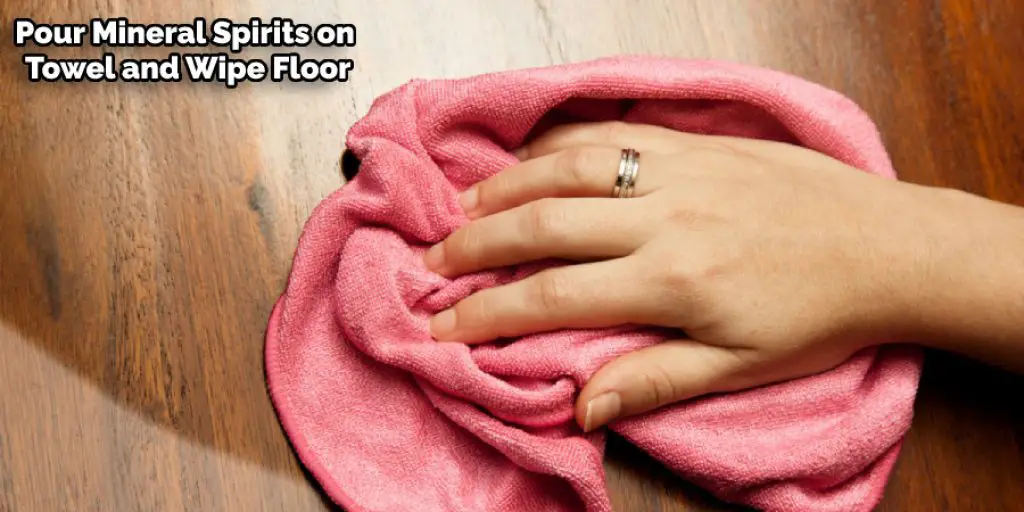
Step-6: This is a very important step. After sweeping and vacuuming your floor from dust and other substance, you pour mineral spirits on a towel and wipe the whole floor down with it. This method is done to get rid of the fine layer of dust on the floor that sweeping and vacuuming couldn’t just not get rid off. The wiping it with mineral spirits also gives your work the smooth look. Now since you will be working with chemicals at this stage, caution should be exercised and the wearing of gloves is a must.
Step-7: Once your floor is dried, apply your floor finish that works best on the hardwood your choice. Local retailers could easily help you on which finish will work best as well as your manufactures manual.
With the above simple steps, one could easily acquire a beautiful hardwood floor and a perfect smooth finish.
Frequently Asked Questions
Can You Use an Orbital Sander on Wood Floors?
Yes, you can use an orbital sander on wood floors. However, it is important to take into account the grain of the wood and adjust your sanding accordingly. If you’re not sure how to do this, then consider getting help from a professional contractor or furniture maker who is familiar with using an orbital sander on wood floors.
Should I Push Down on Orbital Sander?
If the sandpaper is not moving, it may be clogged. Check the dust cap for any chunks that may have become trapped. If there are none, the sandpaper may be jammed. Remove the sandpaper by pulling it straight out from the machine. If this does not work, turn off the power to the machine, unplug it, and remove the belt. Clear away any debris from around the rollers and sandpaper and replace the belt. Try rotating the rollers by hand; if this does not work, it may be necessary to take it to a repair shop.
What Grit Do I Need to Sand Floors?
It can be difficult to sand floors if you don’t have the right grit. When choosing a grit, it’s important to consider how much scratch and abrasion your floor will handle. Rough grains will help create more wear and tear on the surface of the floor, while finer grains will cause less damage. The average household uses about 150-200grits when sanding floors, but this number may vary depending on the type of floor being sanded (carpet vs hardwood).
What Is the Easiest Floor Sander to Use?
The lighter the floor sander, the easier it will be to move around your room. In addition, a powerful motor allows you to sand more quickly and evenly without causing damage. Some of the best options for easy-to-use floor sanders include those from DeWalt, Bosch, Panasonic, Makita, and Sandvik.
Each of these brands offers different features that can make life easier on your hands (and back!). For example, DeWalt has an oscillating feature that helps in cutting even edges, while Bosch has a dust cup with two levels so you can optimize fine or aggressive roughness depending on what is needed. And if the cordless operation is preferred over plugging in every time there’s a need for dusting (or polishing!), then check out Panasonic’s model, which includes chargeable batteries!
You may read this posts also:


