A lot of people are searching for ways to make their homes more energy-efficient. It is a great goal, but it can be expensive to replace all the windows in your house or install solar panels on your roof. However, you can save money and make your home more energy efficient by making swing arm curtain rod curtains.

Swingarm curtain rods mount directly onto the window frame without requiring any drilling or other permanent installation. This lets you easily remove them when they are not needed, such as when you want to keep out cold air during the winter months.
You also do not have to worry about drilling into walls because they attach with screws that go into tiny grooves rather than straight holes drilled into drywall. So, this article is for you. You will learn how to make swing arm curtain rod with just one simple trick!
6 Steps to Follow on How to Make Swing Arm Curtain Rod
Step One: Determine
First, measure the width and height of your window. Also, make sure to consider the depth and weight of the rods you plan on using. Swingarm curtain rods are usually mounted within two inches from each side of a window/wall corner or into a wall stud.

If you cannot mount it to a stud, use wall anchors that support at least 25 pounds. Please note that the rods will only extend up to 4 inches from a corner, so plan your window covering before installation. As well as measuring how much space you have above and below your window for the rod swings.
If you plan on making a swag or jabot, determine how long it needs to be. For swags, the top should be 6-8 inches longer than your window length, while jabots are typically two to three times wider than your window length. The next step is to determine how much space you need between each rod when fully extended.
Step Two: Purchase
To determine how much material you need, measure the width and height of your window, then add 2-3 inches to each dimension. Most rods have a mounting bracket that slides onto the side of the window. For this size, multiples of two should do the trick.
Since you will be drilling through the brackets, look for rods made of stainless steel or brass instead of aluminum. Brass rods are less likely to bend, while steel rods tend to be heavier. Also, it would help if you looked for rods that are at least an inch and a half in diameter to ensure durability.
If you are planning on making a swag or jabot, find rods that have an adjustable bracket so that you can mount each one separately. Lastly, choose the hardware for mounting your new curtain rod. Several options are available, from simple drywall anchors to advanced technology that allows you to drill directly into the wall stud.
Step Three: Mount
Using a standard drill, bore a hole into the side of your window. Insert hardware and tighten until it becomes flush with the wall. If you plan on installing more than one rod, mount an additional length of hardware to accommodate each side. Remember that brackets will only slide onto the outside edge of window openings.
Once mounted, attach the rod by sliding the brackets over each end of the rod. If this is a drywall installation, make sure to put a screw at each end for additional support. If you plan on making a swag or jabot header, use multiple rods and slide one header bracket onto each rod before mounting them.
Now your window embellishing will never be limited by your window size. If you cannot use wall anchors, attach the rod to a second device mounted on either side of the corner or extend out from under the window frame. These steps should help you in learning how to make swing arm curtain rod.
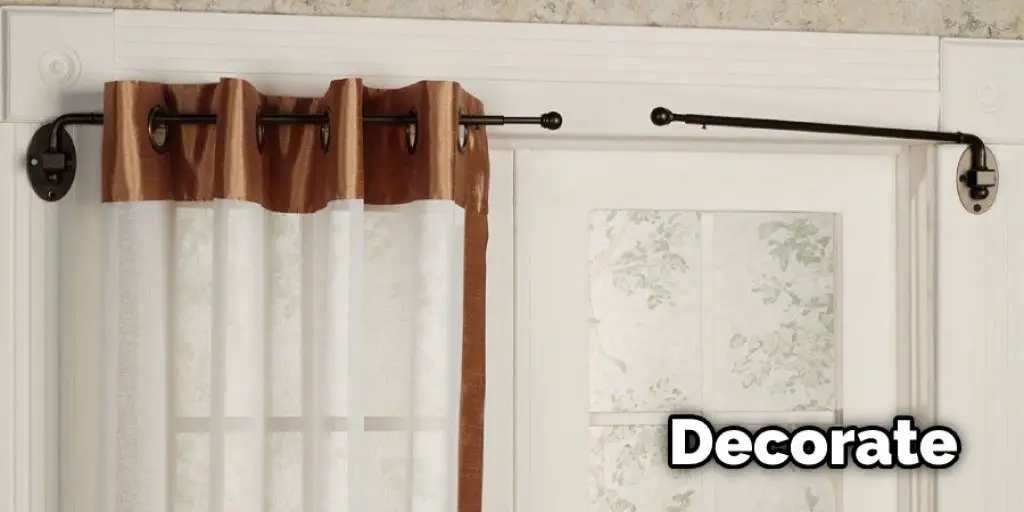
Step Four: Decorate
Once your window covering is impeccably arranged, it’s time to celebrate. Your new curtain rod allows you to create the perfect drapes and swags for any room and can accommodate different types of applications, such as a jabot or top treatment.
If you plan on installing more than one curtain rod, remember that they should be the same size. The overall look of your room will be more consistent if all rods are made from the same material and finish. As far as decorating is concerned, you can add just about anything to your rods, such as knitted ties, dried flowers, or even a few decorative weighted balls.
Just remember that once the swing arm rods are extended, their weight requires an exceptionally sturdy bracket and wall anchor installation. So next time you’re faced with a window project that seems too difficult, don’t give up. With the right measurements and a little creativity, you can achieve custom window treatments that look just as good as professional installations.
Step Five: Drilling
Mounting brackets are used to secure your new curtain rod. Your choice of mounting hardware will depend on the type of wall you have, as well as how many rods you plan on using. The more heavily weighted your drapes are, the sturdier your installation needs to be.
Some brackets come with screw holes for drywall installation. If you choose this mounting method, make sure to drill your holes at least 3/4 inch in from the edge of the bracket to avoid damaging the wall. In addition, some types of brackets come with expandable wings that expand out when attached to provide additional support.
If you plan on installing more than one rod, attach wall anchors to an additional length of hardware. This is especially important if you cannot mount into the studs in your drywall. Once attached, insert rods and slide holders onto each end. This will help in how to make swing arm curtain rod.
Step Six: Secure
Once you have your brackets mounted, slide rods through each end to secure them. If you use more than one rod, it is best to mount the holders on the same side. This ensures uniformity between both sides of your window treatment.
Add drapes or other embellishments, and enjoy the flexibility of swing arm curtain rods to change your look with the seasons if installing in a kitchen or other area where water splashes frequently, consider using silicone caulk to seal all screw holes, joints, and openings in the holders.

Silicone caulk is waterproof, flexible, and durable. It prevents moisture from collecting inside wall anchors or brackets, which can cause rusting over time and damage your drapes. If you choose silicone caulk over standard caulk around the perimeter of your rods, remember that it is flammable and should be kept away from areas where open flames or lit cigarettes may come near it.
Conclusion
Now you can make your own swing arm curtain rod with this tutorial. You don’t need any special skills or tools, just a little time to put it together! This DIY project is easy enough for anyone and will create the perfect swinging curtains that will impress everyone who sees them. So get started now by reading below for all of the details.
We also have some great tips about measuring correctly so that you end up with exactly what you want without having too much fabric hanging outside of your window frame. Finally, the conclusion paragraph is informative and provides information on how to make swing arm curtain rod.
You may also read it: How to Hang Curtains Around a Window Air Conditioner


