Introduction
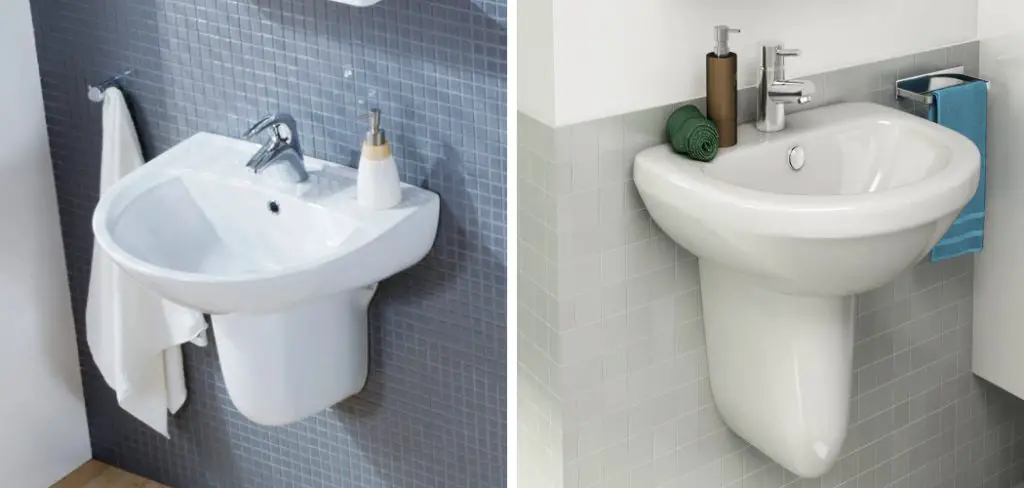
A pedestal sink is a type of sink that usually stands on four legs and has a basin at the top, giving it a small platform. The bottom part is referred to as the pedestal. Pedestal sinks became popular in American homes during the Victorian era because they were considered more ornate than other sinks installed into countertops. They are still used today, although their popularity has declined somewhat due to new technology such as double-bowl sinks and the widespread use of granite and marble for kitchen counters. In this article, I will discuss how to remove a half pedestal sink. So let us get started.
A Detailed Stepwise Guide on How to Remove a Half Pedestal Sink
A half pedestal sink is a fitting which has a broad base and a single leg. It can be placed in the middle of a room on a tiled floor or cover an existing vanity top with additional support provided by the legs. Removing one involves knowing some basic plumbing skills and how to remove the tile surrounding it so that you can pry away the old sealer and create space for the new one. Here is your step-by-step guide:
Step 1:
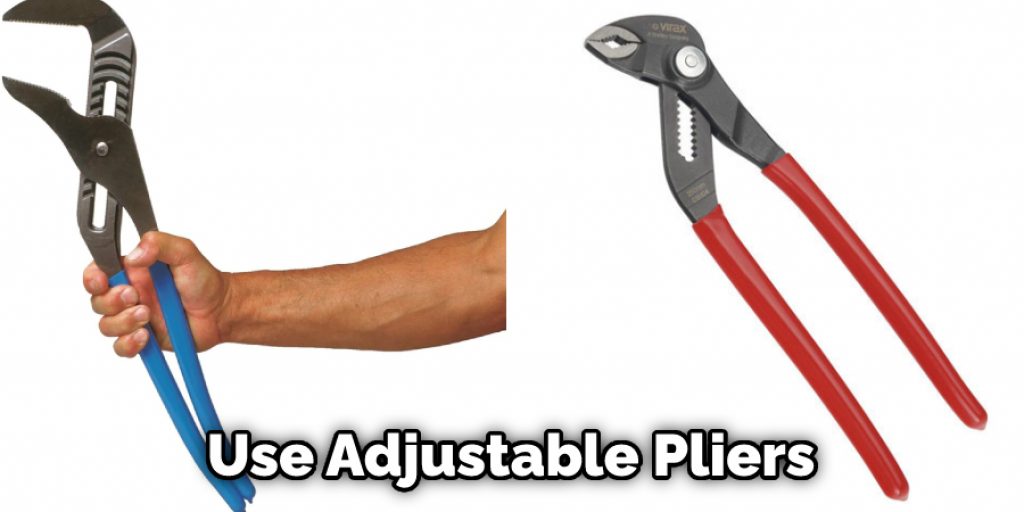
Turn off all water supply lines downstream from the faucet. Usually, there are two valves underneath, but if not, there may be shutoff valves located under each side of the sink or behind where it meets the wall. If you have a double-handled faucet, you’ll need to turn off the lock nut underneath it using adjustable pliers.
Step 2:
Crawl under the sink and find the copper supply lines leading from each water shutoff valve. Use wire cutters to snip them along their length so that they are separated. If only one line is visible, try wiggling it up and down while pulling on it gently to see if there’s another hidden below.
Step 3:
Once all of the connections have been severed, remove the aerator from the end of your faucet spout by twisting it counterclockwise with your hand or using adjustable pliers if it seems stuck. Set aside for later use in reattaching finished drain lines after the new sink is installed.
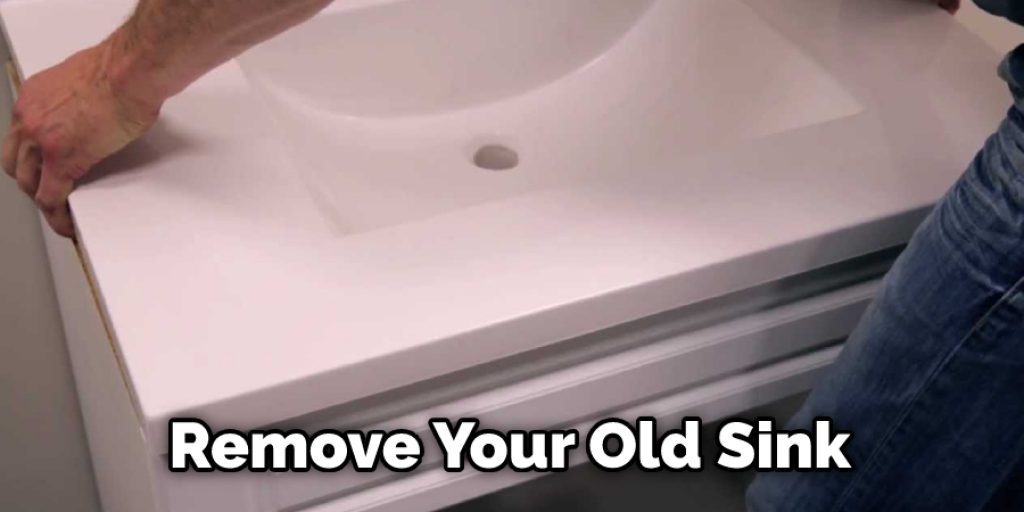
Step 4:
If your old sink was joined to any existing vanities, detaching it will require removing the surrounding tile. Use a hammer and crowbar to chisel away enough of the grout surrounding them so that you can slide out each half separately using both hands.
Step 5:
Have another person hold up one side while you detach any hoses or quick-connects used for supply lines or drains. Remove any clips holding them in place by sliding them back and the rubber tubing until they release freely from inside the fitting. You may need pliers if they seem stubborn about coming out, but take care not to damage the connections as this could cause leaks later on when you reconnect them.
Step 6:
Once the hoses are removed, lift one end of the sink. You should be able to do this by yourself if there’s nothing attached underneath either side. If you have a double-handled faucet, it may take both people to lift it out.
Step 7:
Using adjustable pliers or an adjustable wrench, loosen both nuts on the sink tailpiece beneath the P-trap at either end of your half pedestal sink model. Remove the tailpieces and clear away any debris using a damp cloth. The discharge pipe coming up from each drain line is called a “waste stack” because they go straight into your main sewer line rather than looping back into another branch leading into your wall traps. They may not always come out as one piece, so take care to clear any debris or blockages as you go along.
Step 8:
Use a screwdriver to remove the locknuts on your new pedestal sink before setting it down in place, and replace them with an identical pair that came with the unit. Make sure that the drain lines match up with those coming from underneath by inserting each into the ends of the P-trap and tightening them back up before attempting to connect them.
Step 9:
Inspect all connections for leaks by running water through both sides and observing for drips or trickles anywhere along the line. Apply plumber’s putty over any exposed threads using a putty knife before installing the aerator onto one end of your spout. Make sure that the rubber washer inside is facing outwards against the wall of your sink before replacing its threaded ring by hand or using adjustable pliers to tighten it closed.
You Can Check It Out to Fix Copper Sink Discoloration
Step 10:
Use faucet lubricant (also known as “plumber’s lube”) on any new connections you’ve made, then wipe away any excess with a damp cloth and let it dry for several minutes before turning on the water supply valves underneath both sides of your pedestal sink. Turn them both on slowly and hold down the stopper buttons for any side which has one so that you can check for leaks anywhere along your drain lines without wasting too much water. Once everything seems secure, turn off all valves before testing out each side in turn and making any adjustments using the faucets.
You can check it to Protect Granite Around Sink .

Step 11:
Once you’re satisfied that everything is working correctly, replace the sink grids and backsplash if your pedestal sink came with them. If not, reattach any decorative pieces which were removed while taking them apart.
You can Check It Out to Hide Pipes Behind Pedestal Sink
Frequently Asked Questions
Can You Remove Just the Pedestal Without Removing Sink?
There are many ways to remove the sink from the pedestal. The first thing that you can do is use a heat gun to soften the adhesive of the sink and then remove it by using a pry bar or screwdriver.
Another way is to cut off the top of the pedestal with a reciprocating saw. After cutting, you can use an electric drill to drill through each side of the pedestal in order to make room for a pry bar or screwdriver.
Lastly, if you have access to a Dremel tool, you can grind away at the base of each arm until they are flat enough for your hands and fingers to fit inside and then remove them from their sockets by unscrewing them with pliers.

Does the Pedestal Hold the Sink Up?
A pedestal sink is not meant to hold the sink up. The countertop is designed to be lower than the sink, so that water can drain into the sink and away from your floor.
Where Do Pedestal Sinks Drain?
Pedestal sinks are designed to drain into the bottom of the sink. If you need to drain water from a pedestal sink, you will need to turn off the water and empty it by reaching underneath and turning on a faucet or other mechanism that will allow water to flow out of the drain hole.
Should Pedestal Sink Be Caulked to Wall?
A pedestal sink is an uninstalled kitchen or bathroom sink that sits on top of the counter. It has a large bowl with a raised rim and cabinet below it. The sink itself has no drain assembly but relies on the surrounding countertop for drainage.
Can I Mount Pedestal Sink Without the Pedestal?
You can mount a pedestal sink without the pedestal. If you have a stainless steel sink, you will need to use the stud finder to locate the studs on the wall that you want to mount your sink on. Once found, measure out from each of these studs and make sure that they are at least 24 inches apart before mounting your sink.
After finding the correct height for your countertop, remove any cabinets or shelves in front of it so that it is just an open space where you can attach your cabinet. Now take an electric drill and screw two screws into each side of the bottom edge of your sink so that it is secured onto its base. Next, mark where the top edges of your countertop will be with a pencil, and then use a jigsaw to cut through them all the way across so that there is enough room for screwing in one single bolt into each side of the top edge of your sink’s base (this should create a hole in which you can place both bolts).
Finally, after mounting everything together, fill up any holes or gaps around screws with silicone caulk or epoxy glue before putting away all tools used in this project as well as make sure that no sharp edges remain on either side of the cabinet because they could cause injury if someone were trying to get under or over them while using them.
Conclusion
I hope this article has been beneficial for learning how to remove a half pedestal sink. Ensure the steps are proper. Thank you and have a nice day!
You can also check it out: How to Clean a Sink After Vomit


