Removing nails from concrete can be a challenge. The hammering, the noise, and the dust are enough to get anyone riled up. However, removing nails from concrete is something that must be done when you find them in your yard or driveway.
This is because they pose a safety hazard to people walking by or driving over them with their car tires. If you have children playing outside, it’s even more important not to leave nails exposed on the sidewalk! The best way to remove these pesky objects without damaging your property is by using a nail puller tool.
Keep reading for more information about how this handy device works and what features make one type better for different applications. So, this article is for you. You will learn how to remove nails from concrete without damaging them with just one simple trick!
Step to Follow on How to Remove Nails From Concrete Without Damaging
Step One: Determine if the Concrete is Damaged
Using a chisel, drill, or pickaxe, remove any chunks of concrete that have been broken off. If small pieces of concrete come up with the nails, use a hammer and cold chisel to break them away. Be careful not to damage surrounding areas while removing these fragments.
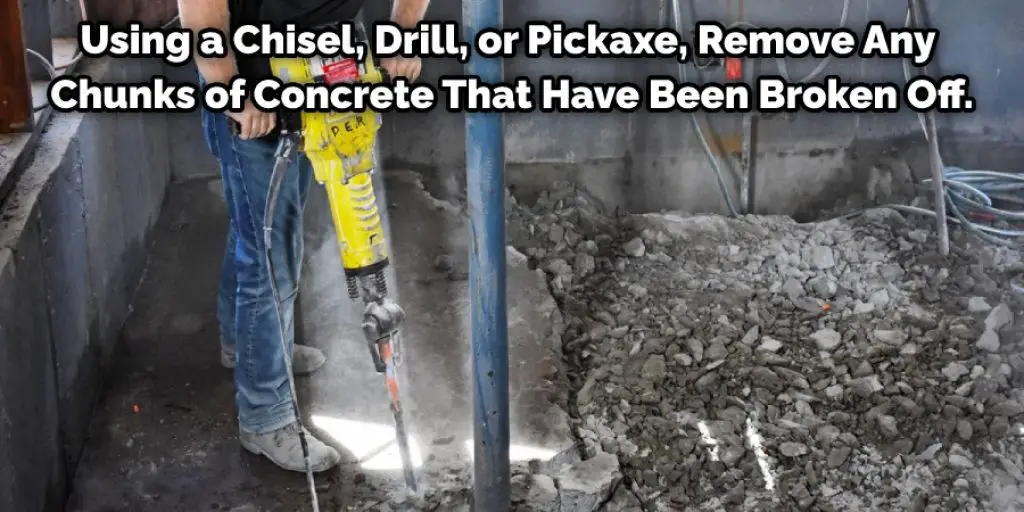
This process should be performed before heating the concrete. If multiple spots of concrete need to be removed, it is possible that the entire slab must be removed and replaced, which means you will have to hire a contractor or construction company for this job.
Step Two: Heat the Concrete
The heat level of a propane torch can be tested by holding the flame near your hand. A low setting will cause mild discomfort, while a high setting will burn your skin. The optimal heat level for removing nails from concrete is large enough to heat the entire area around the nail but not so hot that it damages the surrounding concrete.
Smaller, easier to control torches that are explicitly made for heating concrete can be bought or rented from hardware stores and home improvement centers. These torches allow the user to direct the flame in a more targeted way, allowing them to heat specific areas without affecting others.
Step Three: Pull the Nails
Remove all tools used for heating around the concrete slab. This includes propane tanks, hoses, and torches. If available, using a cat’s paw or pry bar, pull up any nails that are still embedded in the concrete. If they break off below the surface, use a hammer and nail set to pierce the concrete around the nail head.
Remove the broken nail piece using a hammer or needle-nose pliers. If the pieces are still inside of the slab, you’ll have to wait until it cools completely before chipping away at them with a cold chisel and hammer. An experienced contractor should only perform this part, as chipping away at the surrounding concrete may permanently damage it.
Step Four: Replace the Concrete
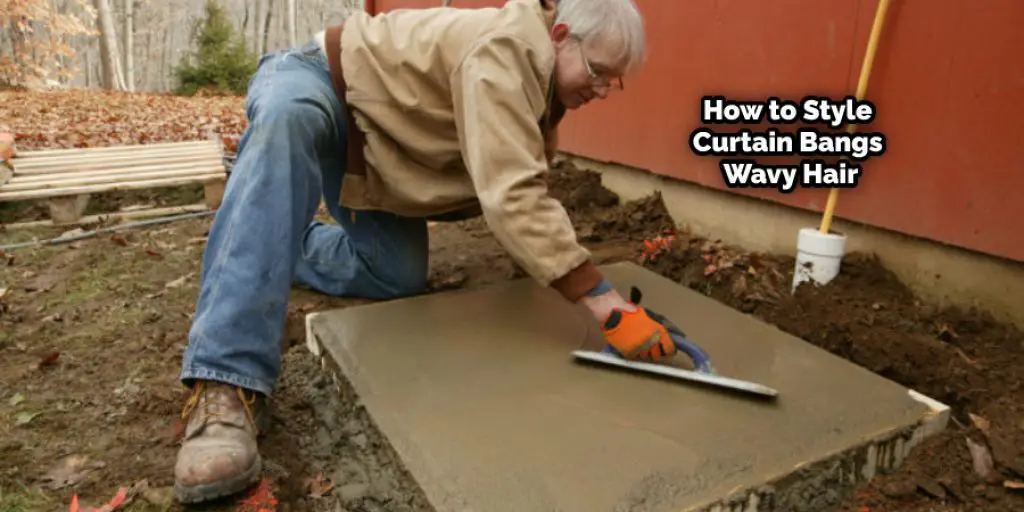
If you cannot pull out every nail, place a piece of wood or steel over them and pour new concrete into all available holes. Make sure that this area does not sit submerged underwater for long periods. Although it is possible to pour new concrete over old, it is not recommended.
Wait for the pieces to dry completely before repouring the slab. If only portions of the concrete are broken off, they can be repaired by applying a thin layer of cement that covers up any holes or gaps left in the concrete after cutting out damaged material. These steps should help you in learning how to remove nails from concrete without damaging.
Step Five: Inflate the Concrete
Concrete tends to shrink over time, which can cause additional damage. To prevent this from occurring, flood the concrete with water and allow it to sit for ten minutes. Then, when you begin pouring concrete into the area surrounding the nails, add a little bit of air until it reaches a floatable consistency.
The air will spread evenly through the concrete and give it a smoother, more even appearance after drying. Pour about half of your cement into the area around the nails before adding water to dilute it enough to pour the rest. This article is for information only and should not be seen as professional or expert advice.
Step Six: Safety Precautions
Read all warning labels on equipment before use. For example, when removing nails from concrete, there is a risk of shattering the surrounding material, so be extremely careful when using any power tool for this process. Wear heavy work gloves and eye protection at all times while working with heated items or chemicals.
If you are unsure about properly using a tool or chemical, talk to an expert before using it. Also, make sure that all tools and equipment are completely cooled down before being stored away. Finally, if you do not feel comfortable performing the task yourself, contact an experienced professional in concrete removal.
Step Seven: Prevent Additional Damage
Be sure to clean the area thoroughly before repouring new concrete. If previous damage is not removed correctly, it can still exist underneath a fresh coat of cement. To ensure that the area is safe to be used again, make sure you gently use a wire brush or metal hand scraper to remove any remaining particles from the concrete’s surface.
After you’re finished, apply a concrete protectant to the area that will seal out any impurities that could cause damage in the future. Although this method works well for removing smaller pieces of concrete, it is not possible to safely remove large sections without having them professionally cut out before being replaced.
Step Eight: Perform a Patch Test
A patch test is only necessary after trying out this method on small pieces of concrete. If you are not satisfied with the results, you need to try another way before using it again on larger surfaces of slab or brick. A patch test can be performed by pouring new concrete over the old and drying it completely before checking the results.
If you are still not satisfied with the way it looks, try using a concrete removal chemical to strip away any lingering remnants before repouring the slab. The chemicals used in this process are hazardous and should only be handled by professionals wearing the proper safety equipment.
Step Nine: Prevent Acid Staining
Although it is impossible to stop acid staining completely, there are still steps that can be taken to prevent it from occurring. If you do not want concrete exposed to the elements, you need to apply the proper sealers and inhibitors before pouring new concrete.
You can either purchase these chemicals from a home center or hardware store or hire professional contractors to do the job for you. Acid staining is caused by the wearing down of the cement’s surface and can occur with any method used to remove it.
You can Check It Out to Repair Concrete After Removing Tack Strips
Step Ten: Prevent Oil Staining
Although it is not impossible to prevent oil staining, you will need to apply new sealers and inhibitors before pouring new concrete. These chemicals are available for purchase at most home centers or hardware stores but can also be applied by professionals if necessary.
Oil stains can occur when small amounts of gasoline, diesel fuel, or other petroleum products contact the concrete’s surface. This type of damage is very common in parking lots, car parks, garages, and other areas that regularly hold motor vehicles. This will help in how to remove nails from concrete without damaging.
Step Eleven: Perform a Visual Inspection
After removing the concrete, it is important to always perform a visual inspection before allowing people to use the area again. If there is any damage or spots where concrete has worn away, you will need to patch them up before applying a new protective sealant.

Whether you need to patch small holes or replace large slabs, this process is best performed by hiring a professional contractor experienced in concrete repair and replacement. If you do not know who to contact, consider getting recommendations from friends, family members, or other people who have done the same job before.
You can check it to Remove Nail Polish From Bathtub.
Step Twelve: Maintain the Area
If the area has been resealed, it is important to keep up with regular maintenance to prevent damage. Once the new concrete dries, you should scrub away any stains or residue before applying a new coat of sealant.
Watering the area regularly will also help replace any lost minerals stripped away from the concrete’s surface. By utilizing these steps, you will be able to keep up with maintenance and prevent damage from occurring in the future, making it a very cost-effective method for removing concrete without causing any structural damage.
You can check it to Remove Aluminum Fence Post Set in Concrete.
Frequently Asked Questions
Can Nails Penetrate Concrete?
Nails are not strong enough to penetrate the concrete, even if they are very sharp. However, when nails hit a hard surface, they will leave behind a mark and make the surface less slippery.
Is There Such a Thing as a Nail Puller?
A nail puller is a device that removes nails from the fingers or toes. A common type of nail puller is a pair of tweezers with an angled head at one end and a curved, sharp edge at the other.
How Much Does a Nail Puller Cost?
Nail pullers are priced based on the size of the nails. They range from $2 to $6, with the average price being around $4. The most common types of nail pullers are made out of metal and plastic, with the latter being more affordable and having a softer grip.
Conclusion
If you are looking for an easy way to remove nails from concrete, the best tool is a drill with a masonry bit. You can then use this solution without damaging your surface or other materials that might be around it. This should save you time and money in the long run when compared to hammering out each nail individually.
If you’re interested in learning more about how to get rid of stubborn nails on concrete surfaces, contact us today! We have years of experience removing hard-to-reach items from tough places like driveways and sidewalks. This blog post has given helpful advice on how to remove nails from concrete without damaging.
Check it out also – How to Apply Thompson’s Water Seal to Concrete .


